How to Create a Text Portrait Effect in Photoshop
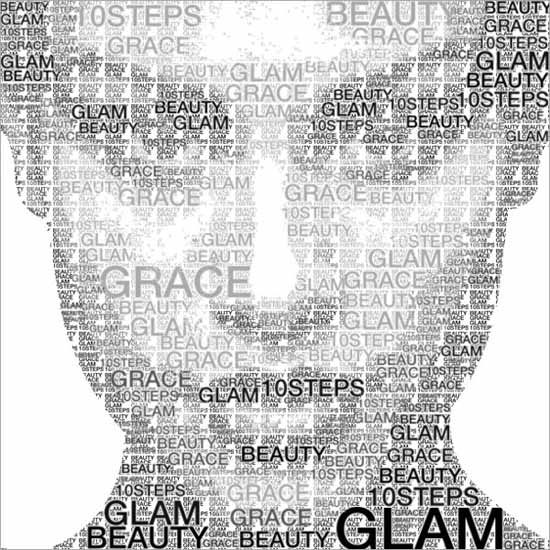
In this tutorial, we will learn how to create a text portrait effect in Photoshop. Like we added a transparent text to an image, we’ll now give the illusion that the picture shown is being created by a text.
Open the picture that you want to use. Select the ‘Rectangular Marquee tool’ and make a selection around the face. Now, select Image> Crop. Click on the new layer icon to add a new layer. Fill it with the color black by going to Edit> Fill and make adjustments on settings. Select the type tool and make a text frame that covers the whole document area. Now, choose the font and its size. It is preferable to keep the font size small. As we will be writing the text now, if your color is set to something else, click on the color swatch and select the color white. Now, add your text. With the text layer selected, click on the Layer Mask icon.

Photo Courtesy : http://10steps.sg/
Now, select the background layer, press Ctrl+A and then press Ctrl+C to copy the photo. Then, alt-click on the text layer’s mask thumbnail. Now, paste the photo by pressing Ctrl+V. Again, alt-click on the text layer’s mask thumbnail. Deselect the selection by pressing Ctrl+D. If you like the results, you can skip the following steps. But if you want the photo to be a little brighter, duplicate the text layer by pressing Ctrl+J. If you want the image to be much brighter, duplicate the text layer again. If you find the image to be a little too bright, lower the opacity of the top layer.
And the text portrait effect tutorial is complete. I hope that this tutorial has helped you to get the idea of how to create a text portrait effect in Photoshop and hopefully you
can now create that effect on your own with confidence in the future.
Done with how to create a text portrait effect in Photoshop? You can go and have a look at “How to make creative typography portraits in Photoshop.”
