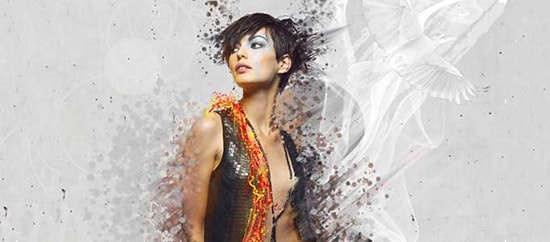
How to Make a Stylistic Poster in Photoshop
Here, you can learn about how to make a stylistic poster in Photoshop. This tutorial is a fine example of how a few simple techniques can be used to create a piece of digital artwork using multiple layers, masking, the brush tool and some basic lighting and one simple noise texture.
At first, create a new document in Photoshop with the size 1200px by 1500px at a resolution of 72 pixels/inch. Add a layer style icon from bottom part of the Layers panel and select ‘Gradient Overlay.’ Click in the color bar to open the ‘Gradient Editor’ and set the color stops as required. Next, use the Ellipse Tool (U) to represent an ellipse. Add a layer style icon from bottom part of the layers panel and select ‘Drop Shadow.’ Add ‘Inner Shadow’ and apply ‘Gradient Overlay.’ Choose the Pen Tool, set the drawing mode on Shape Layers in options bar and draw the next shape. Use the ‘Convert Point Tool’ to make the corrections on the shape. Add Stroke now. Ctrl and click on the ellipse’s layer in layers panel to get the next selection. Select the spiral’s layer and add a mask. Find a stock photo and insert the texture on the main document. Set the blending mode for this layer to ‘Overlay.’ Create a new layer and apply the Hard Round brush of white color with brush opacity of 50% to paint the element to highlight. Find a stock photo of a model and remove the background by going to Filter> Extract and insert it on a new layer in our main document. Add a layer style icon from bottom part of the Layers panel and select ‘Drop Shadow.’
Photo Courtesy : http://www.photoshoplady.com/
Create a new layer and apply the Soft Mechanical brush to paint along the line of the model’s hair. Set the blending mode for this layer to ‘Color.’ Hold down Alt key and click between layers in the Layers panel to create a clipping mask. Create a new layer and use the ‘Paint Bucket Tool’ to fill the layer with yellow color. Set the fill to 11% for this layer and change the Blending mode to ‘Hard Mix.’ Create a new layer and apply the Soft Round brush to continue painting the model’s hair. Make adjustments on color as well. Set the blending mode for this layer to ‘Vivid Light.’ Insert the mask on the layer from Add layer mask on the bottom part of the layers panel and press CTRL+I. Choose the Soft Round brush of white color and click on the girl’s head and hair. Create new fill or adjustment layer from bottom part of the layers panel and click to Curves to adjust the curve shape to make a little color corrections. Find another stock photo with grey dirt textured wall and insert it on the main document. Insert the mask on the texture layer by choosing ‘Add layer mask’ on the bottom part of the Layers panel and select the Hard Round brush of black color. Set Fill to 45% for this layer and change the blending mode to ‘Divide.’ Set ‘Fill’ to 0% for this layer. Click on add a layer style icon from bottom part of the layers panel, select ‘Inner Shadow’ and add Stroke. That sums up the whole process.
I hope this tutorial has helped you get the idea of Adobe Photoshop and how you
can make “stylist posters using Photoshop” with confidence.
