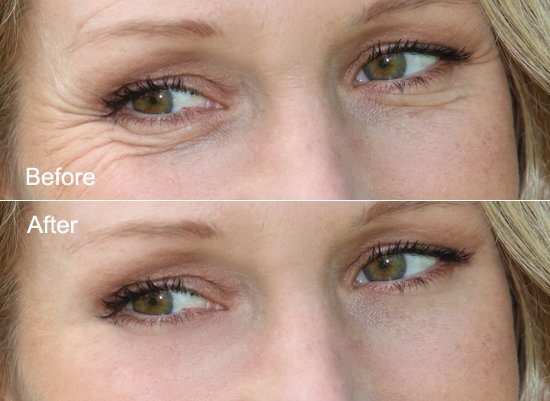
How to Remove Wrinkles in Photoshop
There are many ways of removing wrinkles in Photoshop and there are even third party plugins that do the job for you. However, the goal is not always complete removal since that can leave your subjects looking like they came out of a cartoon.

You can never be perfect and when you see a picture where everything is perfect, there is one thought that instantly pops into your head is that – “That is done with Photoshop.” A quick and easy way to remove wrinkles that lends itself to realistic results. The first and most commonly used method is to use the healing brush tool and simply get rid of the wrinkles by painting over them. However, if you remove the wrinkles completely, you will be seeing that something is missing from that picture. The Photoshop will be obvious and It is normal for an older person to have wrinkles, after all.

The recommended method for more natural looking portraits is this – At first, duplicate the background layer by hitting Ctrl + J. Make sure you are working on a layer with pixels. Now, select the ‘Clone Stamp’ tool. Then, change the brush mode for the Clone Stamp to Lighten. After that, sample an area near a wrinkle and start painting over the wrinkle. If you use the ‘Clone Stamp’ tool directly on the layer with the brush set to lighten and sample and paint over the wrinkles, you are effectively removing the shadow in the wrinkle while keeping most of the texture. It is an easy technique since it does not copy the texture like a normal clone stamp brush. It just uses the color. That way you keep some of the wrinkles in order to keep the natural look. This can be used over many other imperfections on the skin.
That sums up the whole process. In this way, you can photo edit and remove wrinkles using Photoshop. Hope that helps! You will see the difference in methods is quite evident.