
How to Remove Color Shed in Photoshop
This tutorial will show all of you on how to remove unnecessary color shed using Photoshop. This is a handy little tip that avoids messy trial-and-error color balance correction in Photoshop. You will need an image of a person to start off this tutorial.
Open the image at first in Photoshop. If the face of an image looks too illusory, sample the skin color from a highlighted part of the face. Hit Alt + Ctrl + delete to fill the image with a mask of that color. Then click the layer filter and change it to color. Now, hit Control + Shift + I to inverse the colors so that you can offset the balance of the pre-dominant color. Lower the opacity to something under 10 percent so it looks subtle.
Photo Courtesy – http://www.iheartfaces.com/
Create two layers by isolating one for highlights and one for shadows. Their color differences are subtle but the result will be cleaner. To do this, double click the underlying layer and grab the shadow slider, click Alt to split it in two and clip out the dark mid-points. Then repeat the entire process again but this time use the eyedropper on a shadowed skin tone and split the underlying layer slider down from the highlights so it only affects the shadows. You will see that the final product is less overly vibrant but much more realistic given her actual skin color. That sums up the whole process.
It is a subtle change but it makes the difference between pro and amateur digital editors. Hopefully that helps.
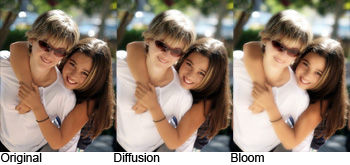
Here, you will learn on how to create bloom effect in Photohsop. It is also called hipster photo effect. I hope it will help you both the beginner and advanced level of students in a great … Continue reading How to Create Bloom Effect in Photoshop
Read More
Here, you will learn on how to create HDR effect with some photo edit in Photoshop. HDR generally means ‘High Dynamic Range.’ It will be done using only one photo. I hope it will help … Continue reading How to Create HDR Effect in Photoshop
Read More