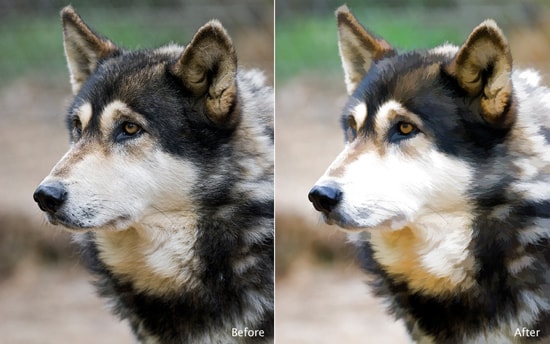
How to Give Your Photos an Artistic Effect in Photoshop
Here, you will learn on how to give your photo an artistic effect in Photoshop. You will learn how to add an artistic impression to your image. Hopefully, this will help the beginner and advanced level of students in a great deal.
Photo Courtesy – https://www.topazlabs.com/
There are many ways this feat can be achieved. With the use of filters and adjustment layers, a person can achieve this feat which is illustrated here. First of all, open an image that you would like to work in Photoshop. Duplicate the background layer. Go to Filter> Artistic> Colored Pencil and then make some necessary adjustments. Go to Filter> Artistic> Cutout and then make some adjustments necessary. Go to Filter> Blur> Gaussian Blur and then make some essential adjustments. Change the blending mode of the duplicate layer from Normal to Overlay. Next, create a new adjustment layer and choose Hue/Saturation. Then make the changes on Hue/Saturation and Lightness that are necessary. Create a new adjustment layer and choose Curves and make the changes on RGB color. That should be it and sums up the whole process.
I hope this tutorial has helped you get the idea on how to give your photo an artistic effect in Photoshop. Hopefully, you can now do the same on your own with confidence. In this way, you can photo edit and create this artistic effect. Hope that helps!
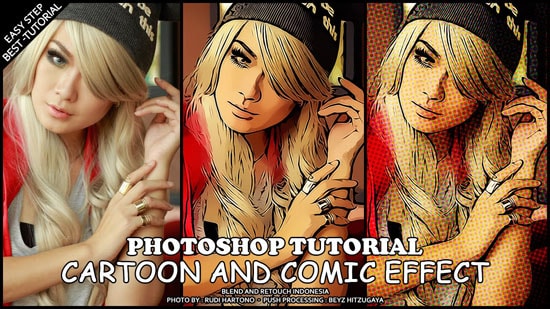
Here, you will learn on how to give an image a comic style effect using Photoshop. Hopefully, this will help many students. Open the image that you want to give a comic style effect. Adjust … Continue reading How to Give an Image a Comic Style Effect in Photoshop
Read More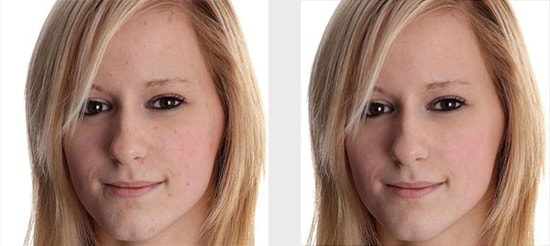
Here, you will learn on how to use healing brush tool to quickly retouching skin with some photo edit in Photoshop. I hope it will help you both the beginner and advanced level of students … Continue reading How to Use Healing Brush Tool for Skin Retouching in Photoshop
Read More