How to Create Smoke Dispersion Effects in Photoshop
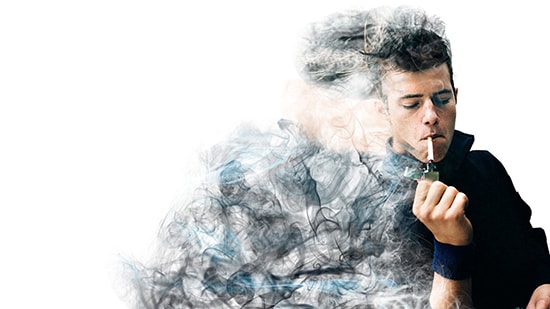
Here, you will learn on how to create smoke dispersion effects with photo edit in Photoshop. I hope it will help you both the beginner level of students in a great deal.

Photo Courtesy – http://tophdimg.com/
At first, select an image of a person that you want to work with under a new layer. Duplicate the layer by clicking Ctrl + J twice. Now, select a solid background color. Select the ‘background copy,’ grab the lasso tool and select around the person. After selection, right click on it and choose ‘fill’ and select content-aware in a normal mode with opacity of a 100%. Now, you have a solid background color. Make sure that ‘background copy 2’ is selected while you are doing these works. After selection, click on ‘refine edge,’ carefully select the hair and click OK. After selection, right click on it and click ‘layer via Copy.’ Selection should be on a new layer and without a background. Duplicate the layer once more and click OK while making sure that layer 1 is selected. Go to filter> liquify. The brush size should be very big around 500+ because it will determine the size of the effect. When done, click OK and make sure ‘layer 1’ is still selected. Add a ‘vector mask’ and you will need black and white as foreground and background color. Select the ‘paint bucket tool.’ Now, click on ‘Layer 1 copy’ and then mask. Select the paint brush tool.’ You can now erasing parts of a person but use different brushes to differentiate the patterns and make sure the background copy is un-selected. Use smaller and larger brush accordingly. When done, select ‘layer 1’ mask layer. Change the foreground color to white and start adding the effect. That sums up the whole process.
I hope that it will help you and from now on, hopefully you will create more and more transparent effect images like this and be an expert in this field in the future.


