How to Create Dispersion Effects in Photoshop
Here, you will learn on how to create dispersion photo manipulation effects in Photoshop. I hope it will help you both the beginner and advanced level of students in a great deal.

Photo Courtesy – http://www.magcartz.com/
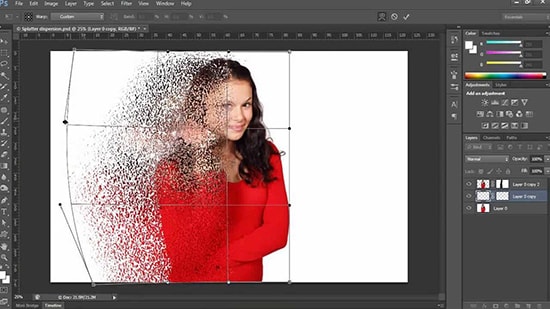
Open an image that you want to work with under a new layer. Duplicate the background layer twice. We need the background layer isolated. Hence, we need just a background and no model. Close the eye of layer 1 copy and select layer 1. Select lasso tool and delete the model. Click Shift and F5 to consent aware fill. Select our model now that is in layer 1 copy and make a couple of layers of her. Grab the ‘Magic Wand Tool’ and paint it in the selection ones. Click Ctrl + J again to create a new layer. Make the layer 1 copy invisible again because we do not need that. Others will keep the same. Create a new layer again. Select layer 2 and go to Filter> Liquify and with the use of a big brush, you can bring the model out in the direction you want to scatter to go. With the layer selected, click the layer mask. Click Ctrl + I to invert that and hide the model. Go on to layer 2 copy and create another mask. Paint it the splatter with the brushes. Go to brushes and select ‘Splatter Bushes.’ You can do that with ‘Lower Brushes’ as well. Change the bush size with the help of bracket keys. Make sure that the black as your foreground color and white as background color selected and click around. Grab another brush and change the size of the brush to do it well. In the other layer which is ‘layer 2.’ Do the opposite.
I hope that it will help you and from now on, hopefully you will create more and more dispersion photo manipulation effects like this and be an expert in this field in the future.

