How to Create a Smoky Text Effect in Photoshop
In this tutorial, you will learn how to create a smoky text effect using Photoshop. I hope it will help you both the beginner and advanced level of students in a great deal.
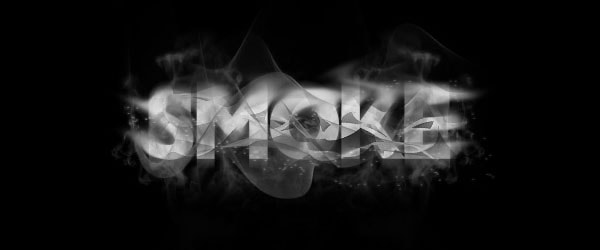
At first, create a new 800 x 800 px document and start with a subtle texture as the background. The texture should be such that the text and smoke stand out. We will now enhance the background a bit. Create a new layer named ‘Shadow’ and using a soft large black brush, paint around the edges of the document. After that, create another new layer named ‘Highlight’ and take an even larger soft white brush, paint a big dot in the center and change this layer’s blending mode to Overlay. To create smoke text effect in Photoshop write your text using the ‘League Gothic’ font and rasterize the text layer by right-clicking on the layer and selecting Rasterize Type. With the text layer still selected, go to Filter> Blur> Gaussian Blur and apply a 2 or 3px blur. Bring down the text layer’s opacity to 85%. Now, using the Rectangular Marquee Tool, select each letter and cut and paste them onto a new layer to get a separate layer for each letter. Then, move the letters around upside down a bit. When you are done, you can merge the letters again by selecting all of the type layers and pressing Ctrl+E.
Select a brush from the smoke brush set to create smoke text effect in Photoshop and make some smoke on a new layer. Select the text layer again, grab the ‘Smudge Tool’ and bring its strength down to 20% and paint over the edge of the letters to blend them with the smoke. Continue doing this with different brush sizes until the letters start blending with the smoke. You can also use the eraser with a low opacity to remove certain parts of the letter in order to make it blend more with the smoke. Finally, increase the contrast of the image to create smoke text effect in Photoshop. To do so, click on the Create New Fill or Adjustment Layer option at the bottom of the layers palette, select Levels and apply the settings that you think is perfect for your image.
That ends the task. In this way, you can photo edit and create this smoky text effect. Hope that helps!
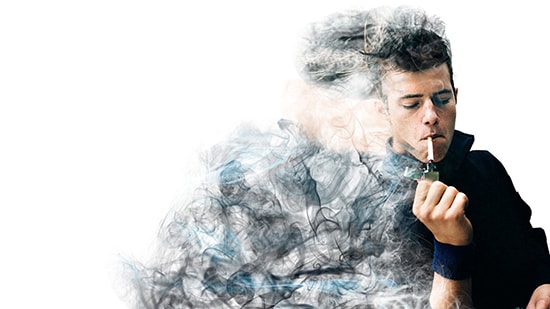
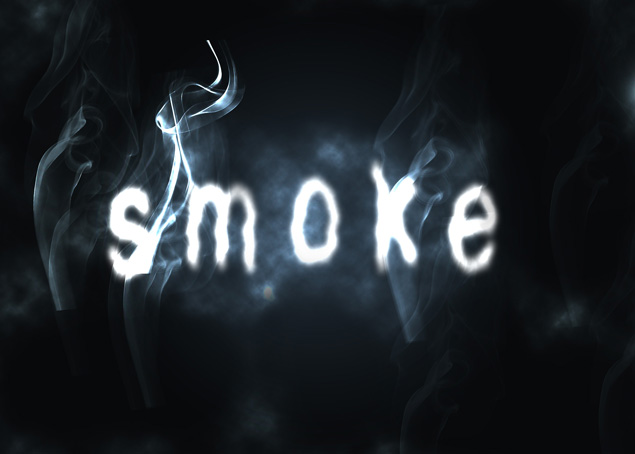
Here, you will learn on how to create smoke dispersion effects with photo edit in Photoshop. I hope it will help you both the beginner level of students in a great deal. Photo Courtesy – http://tophdimg.com/ … Continue reading How to Create Smoke Dispersion Effects in Photoshop
Read More
Today we will learn, how we can add shadows to an object. One of the first things that we want to do with the image is to take a look at how we can extract … Continue reading How to Create a Drop Shadow in Photoshop
Read More