How to Create a Web Photo Gallery in Adobe Bridges through Photoshop
Here, you will learn on how to create a photo gallery in Adobe Bridge through Photoshop. I hope it will help you the beginner and advanced levels of students in a great deal.
Photo Courtesy – http://www.apogeephoto.com/
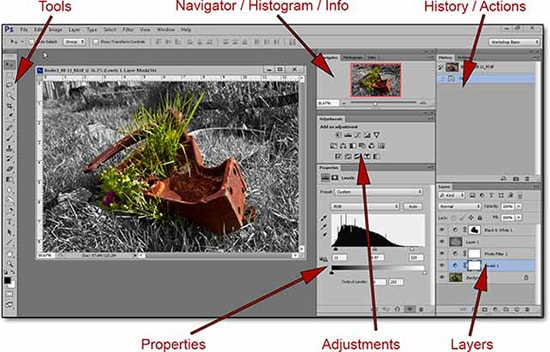
Before creating a photo gallery, one needs to check whether the images are needed any corrections or not. If needed, it should be edited in Photoshop. It should be done in Histogram panel in Photoshop. You would find it in windows panel. The panel shoes tones of the images and how the images are taken. So, at first, you need to change the channel to RGB. Refresh it which is right on the panel there. It shows you which side has more dark side than the other ones. You need to even these two parts. You need to create a new fill or adjustment layer and go to levels. You will see that level panel looks exactly the same as histogram. Turn the visibility icon on from there and drag the left slider onto the right side a bit which will improve the image a bit. Do the opposite this time as you drag the right slider to the left and it further improves the image. Now, go back to the histogram and when you refresh it, you will see that improvement have been made. Turn off the visibility bar off and then on it and you will see the image has changes a lot when you started to work on it before.
I hope that it will help you and from now on, hopefully you will follow this procedure more often in Photoshop and be an expert in this field in the future.
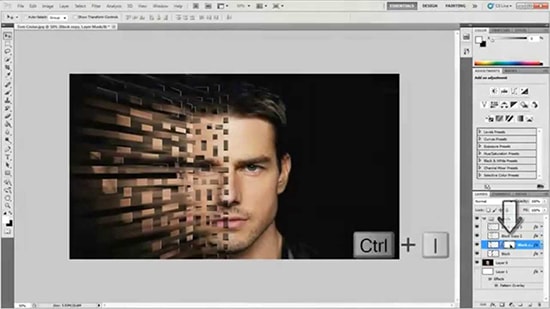
Here, you will learn on how to create a dispersion effect in Photoshop with photo edit option. I hope it will help you both the beginner level and advanced level of students in a great … Continue reading How to Create a Dispersion Effect in Photoshop
Read More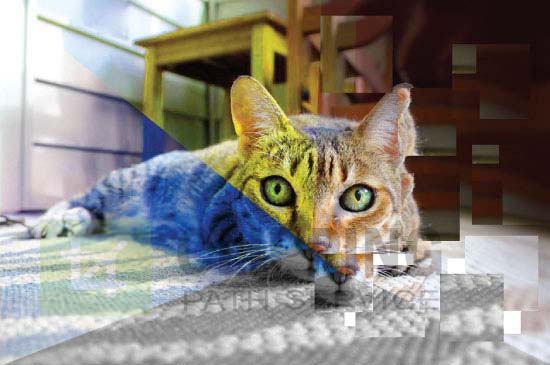
In this tutorial, we are going to Color Grade an image in Photoshop. Hopefully, this post will help both beginner and advanced level of users in a great deal. Open the image you would like to color … Continue reading How to Color Grade Images using Photoshop
Read More