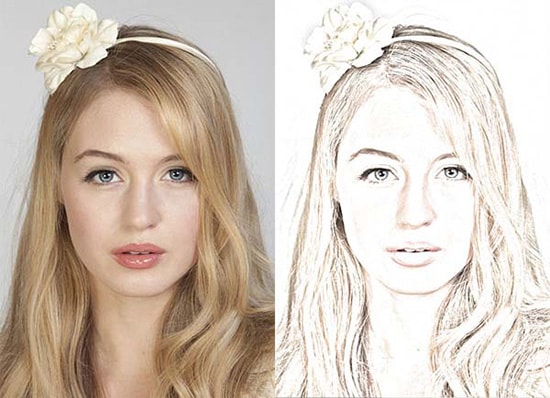
How to Create Drawing Effects in Photoshop
Here, you will learn on how to create flare effects in Photoshop. I hope it will help you both the beginner and advanced level of students in a great deal.
Photo Courtesy – http://www.instantshift.com/
At first, select an image that you want to work with under a layer. Right click on the background and duplicate the layer. Double click on the ‘background’ to unlock and click OK. Click on ‘background copy’ and change the blending mode from normal to ‘Color Dodge.’ Hold Ctrl key while pressing ‘I’ key on the keyboard. This will invert the image. Now, go to Filter> Blur> Gaussian Blur. Make the adjustments that are required for the image. Try to set it so that the image has still lots of details and specifically the outlines. Select ‘Create a new fill or adjustment layer’ and select Hue/Saturation. Make the adjustments that are required for the image there as well. You can adjust the black and whites here according to your benefit. Click on the ‘background layer’ and ‘Convert to Smart Object.’ Go up to Filter> and select ‘Oil Paint.’ Give the image a soft look. It will give the image a little more detail and like a drawing. Adjust to your demand. That sums up the whole process.
I hope that it will help you and from now on, hopefully you will create more and more drawing effects like this and be an expert in this field in the future.
As retouching is an very important way of representing an image it catches everyone eyes easily..Models of different sector get priority over other, they are found in billboard, TV, magazine even in journal. As celebrities … Continue reading About “Model Retouching”
Read More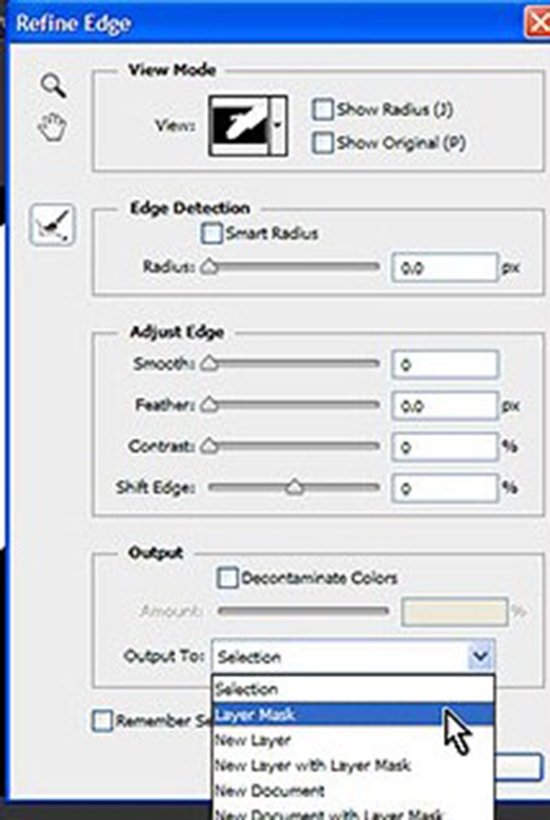
Adobe Photoshop is continually upgrading everyday to make our life easy. The CS6 version has some new options available to create layer mask. Lets discuss about this here. Adobe Photoshop CS6 has so many huge … Continue reading New Options to Create Layer Mask in Photoshop CS6
Read More