How to Create a Trendy Double Exposure Effect in Photoshop
In this tutorial, we will create a trendy double exposure effect in Adobe Photoshop with the help of Blending Modes and Clipping Masks in a few steps.
Open the image that you want to work with. It is easier if the background of your photo is more or less neutral. Make it much brighter and add contrast. Press Ctrl + L to call the pop-up Levels menu. Move the lightest slider to the left, making the photo brighter and add contrast by moving the left black slider to the right. You can use the Spot Healing Brush Tool (I) to make the area is clean and flawless. Now, we need to get rid of the background. Take the Magic Wand Tool and click anywhere on the background to select it. Then go to Select> Inverse to make the man selected. In the Refine Edge options window, you can change the View of your photo in the View Modes. Slightly increase the Radius value in the Edge Detection. You can play with other Refine Edge options too, making the edge smoother or more blurred. After wards, create a new layer below the cut-out portrait and fill it with neutral grayish color using the Paint Bucket Tool.
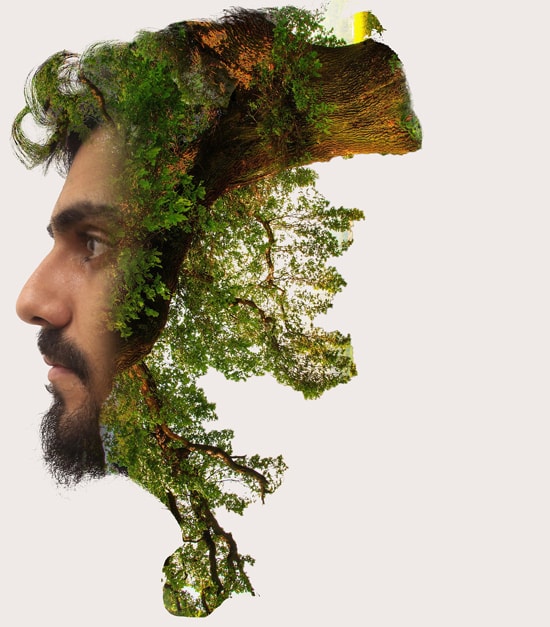
Next select the second photo which is a nature scene of a forest. Place the image of the forest above the man’s portrait. Keeping the forest layer selected, press the Control key and click on the Layer Clipping Mask of the layer below. Press the Add vector mask button in the bottom of the layers panel to hide the unnecessary parts of the forest image. In our case, let’s put the forest image upside down, so that the dark reflection of the trees is placed in the head area of the outline. Select the layer which contains the cutout portrait with clipping mask. Make a copy and drag and drop it above the forest layer. Keeping the portrait layer selected, press Shift-Control-U to convert the image to grayscale. Open the Levels options window and make the image much darker by moving the black slider to the right side. Apply the effect and go to Image> Adjustments> Hue/Saturation. Tick the Colorize checkbox in the bottom right corner of the options window to change the whole range of colors of our image. Right-click on the portrait layer mask and we can Apply Layer Mask in the dropdown menu. Change the Blending Mode of the portrait layer to Screen in the Layers panel.
Let’s edit the head of the portrait. Take the Brush Tool and select the Airbrush Soft Round from the standard Round Brushes with Size set. Select the Layer Mask of the forest layer, set the Fill color to white and paint softly over the upper part of the head area. This makes the image look as if the trees are growing directly from the man’s head. Some parts of the image look too noisy at this step—for example, the eyes area, where the trees from the forest image create a distracting effect. Let’s get rid of this and make these parts more clear and contrast.
Create a New Layer under the de-saturated portrait layer, take the Brush Tool (B) again and switch the Fill color to dark blue (#2f2c35), which you can pick directly from the hair part of the portrait with the Eyedropper Tool (I). Start painting over the eyes area, making it more distinct. For more convenience, you can Ctrl + click on the layer mask of the portrait layer which allows you to draw inside the selected area, without crossing its boundaries. Select the de-saturated portrait layer and Add Layer Mask by clicking the mask icon in the bottom part of the Layers panel. Take the Brush Tool and switch the Fill color to black. Paint over the neck area of the man, creating an illusion of his face popping out from the trees.
That sums up the whole process. In this way, you can photo edit and create this trendy effect. Hope that helps!
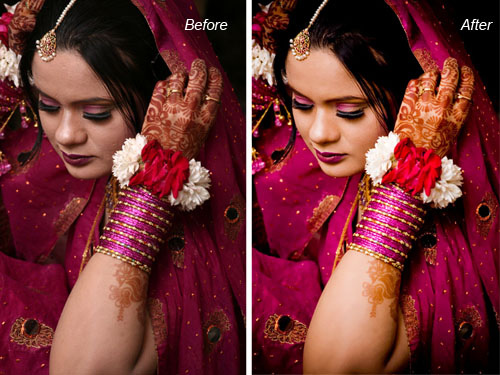
It is quite a challenge for the new photographers to retouch the wedding photos because among the hundred photographs, it is really very difficult task to pick the best one. All the photographers know that … Continue reading Wedding Photo Manipulation
Read More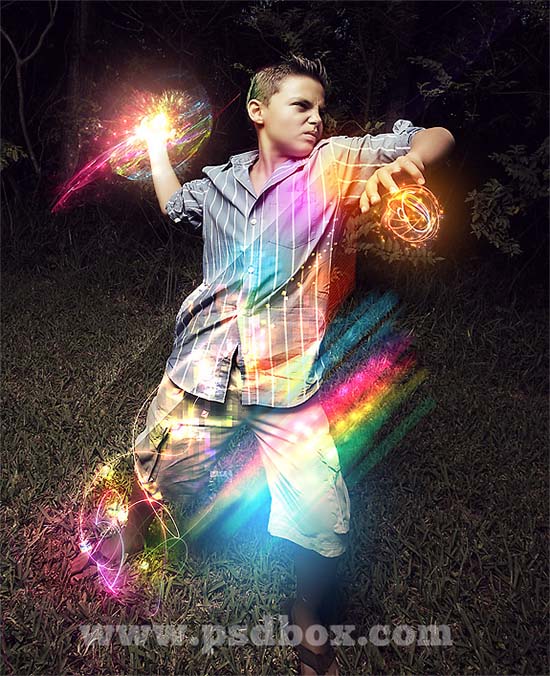
Here, you will learn on how to create light effects in Photoshop easily. Here, we will play with blending modes, adjustment layers and brushes. You will get the best result when you create a dark … Continue reading How to Create Amazing Light Effects in Photoshop
Read More