
How to Create Realistic Drop Shadow Effect in Photoshop
Here, you will get to know about how to create drop shadow effect that look realistic using Photoshop.
At first, open the image that you want to work with. Before we can add a shadow to someone, we first need to select them. Using the selection tool of your choice, you can draw a selection around the person or object in the photo. With the person or object selected, press Ctrl+J on your keyboard to quickly copy the selection to a new layer. Add some extra canvas space to make room for the shadow using Crop tool. Hold down your Ctrl key and click on the New Layer icon at the bottom of the Layers panel to add a new layer below Layer 1. Let’s create a new background for the effect using a gradient. Click on the Foreground color swatch near the bottom of the Tools panel. By default, it should be showing black. This opens Color Picker where we can choose a new Foreground color.
Next, select the Gradient Tool from the Tools panel. With the Gradient Tool active, right-click anywhere inside the document window to quickly bring up the Gradient Picker and make sure you have Foreground to Background – selected. Press Enter when you are done to close out of the Gradient Picker. Then, click near the bottom of the document, hold down your Shift key and drag straight up until you are just above the horizontal center of the image. Holding the Shift key as you drag constrains your movements, making it easier to drag vertically. Release your mouse button and Photoshop draws the gradient, which becomes the new background for the image. Next, add a New Layer above the Gradient. Hold down your Ctrl key and click directly on the top layer’s preview thumbnail in the Layers panel. Do not select the layer, just click on its thumbnail. This instantly loads a selection around the contents of the layer. Fill the Selection with Black after that. Next, Distort the Shadow into Position. The edges of the shadow look a little too crisp and sharp, so let’s apply a slight blur to it. For a shadow to look realistic, the edges need to become gradually softer the further away it extends from the subject. To create this effect, you need to use Quick Mask Mode to gradually select the Shadow. Apply the Gaussian Blur Filter Again, add a Layer Mask and set the Foreground Color. Lastly, Draw a Gradient across the Shadow on the Layer Mask and lower the opacity of the shadow so it doesn’t appear quite so dark near the subject.
That sums up the whole process. In this way, you can photo edit and create this realistic effect. Hope that helps!
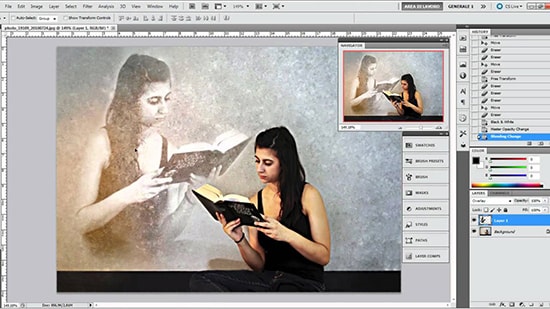
Here, you will learn on how to create transparency effects in Photoshop. You must use mask in this method. I hope it will help you both the beginner level of students in a great deal. … Continue reading How to Create Transparency Effects in Photoshop
Read More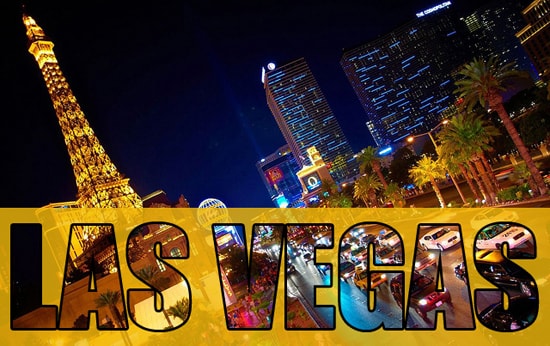
In this tutorial, you will learn on how to add transparent text to an image surrounded by a semi-transparent background so that the text can be readable. You will need an image to go forward … Continue reading How to Add Transparent Text to an Image in Photoshop
Read More