How to You Adjust the Skin Tone in Photoshop
The Adjust Color for Skin Tone command adjusts the overall color in a photo to bring out more natural skin tones. It will be helpful for those people who are new in Photoshop and also those who do not know how to adjust the skin tone of a person through Photoshop. I hope it will certainly help the beginner levels of students.
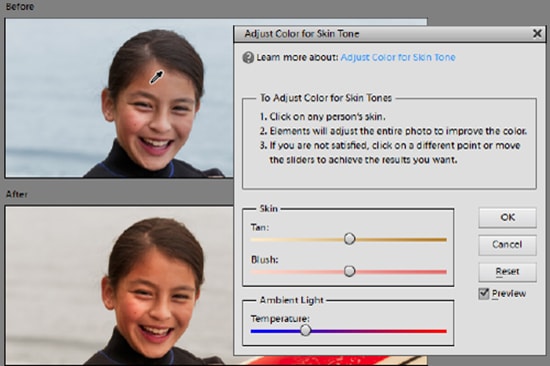
Photo Courtesy – https://helpx.adobe.com/
A variety of factors in Photoshop through photography can cause poor-looking skin tones in the subjects of yours. Elements provide the ‘Adjust for Skin Tone’ command that attempts to restore human skin tones to a more natural look. You can adjust an entire layer or a selection. It is actually a good idea to select just the areas of skin that you want to adjust by using the selection tool so that it does not make you necessarily change the other elements of your image. Once you make your selection, choose ‘Enhance Adjust Color for Skin Tone’ from the menu bar. Click into an area of a skin that you want to change. Click around until you achieve your desired results. You can also use the ‘Skin and Ambient Sliders’ to make further adjustments. ‘Tan’ in the skin layer adds and removes brown while ‘blush’ adds and removes and finally ‘Temperature’ changes the overall color to the right and to the left. After you are done with that, click OK. That will do that for you.
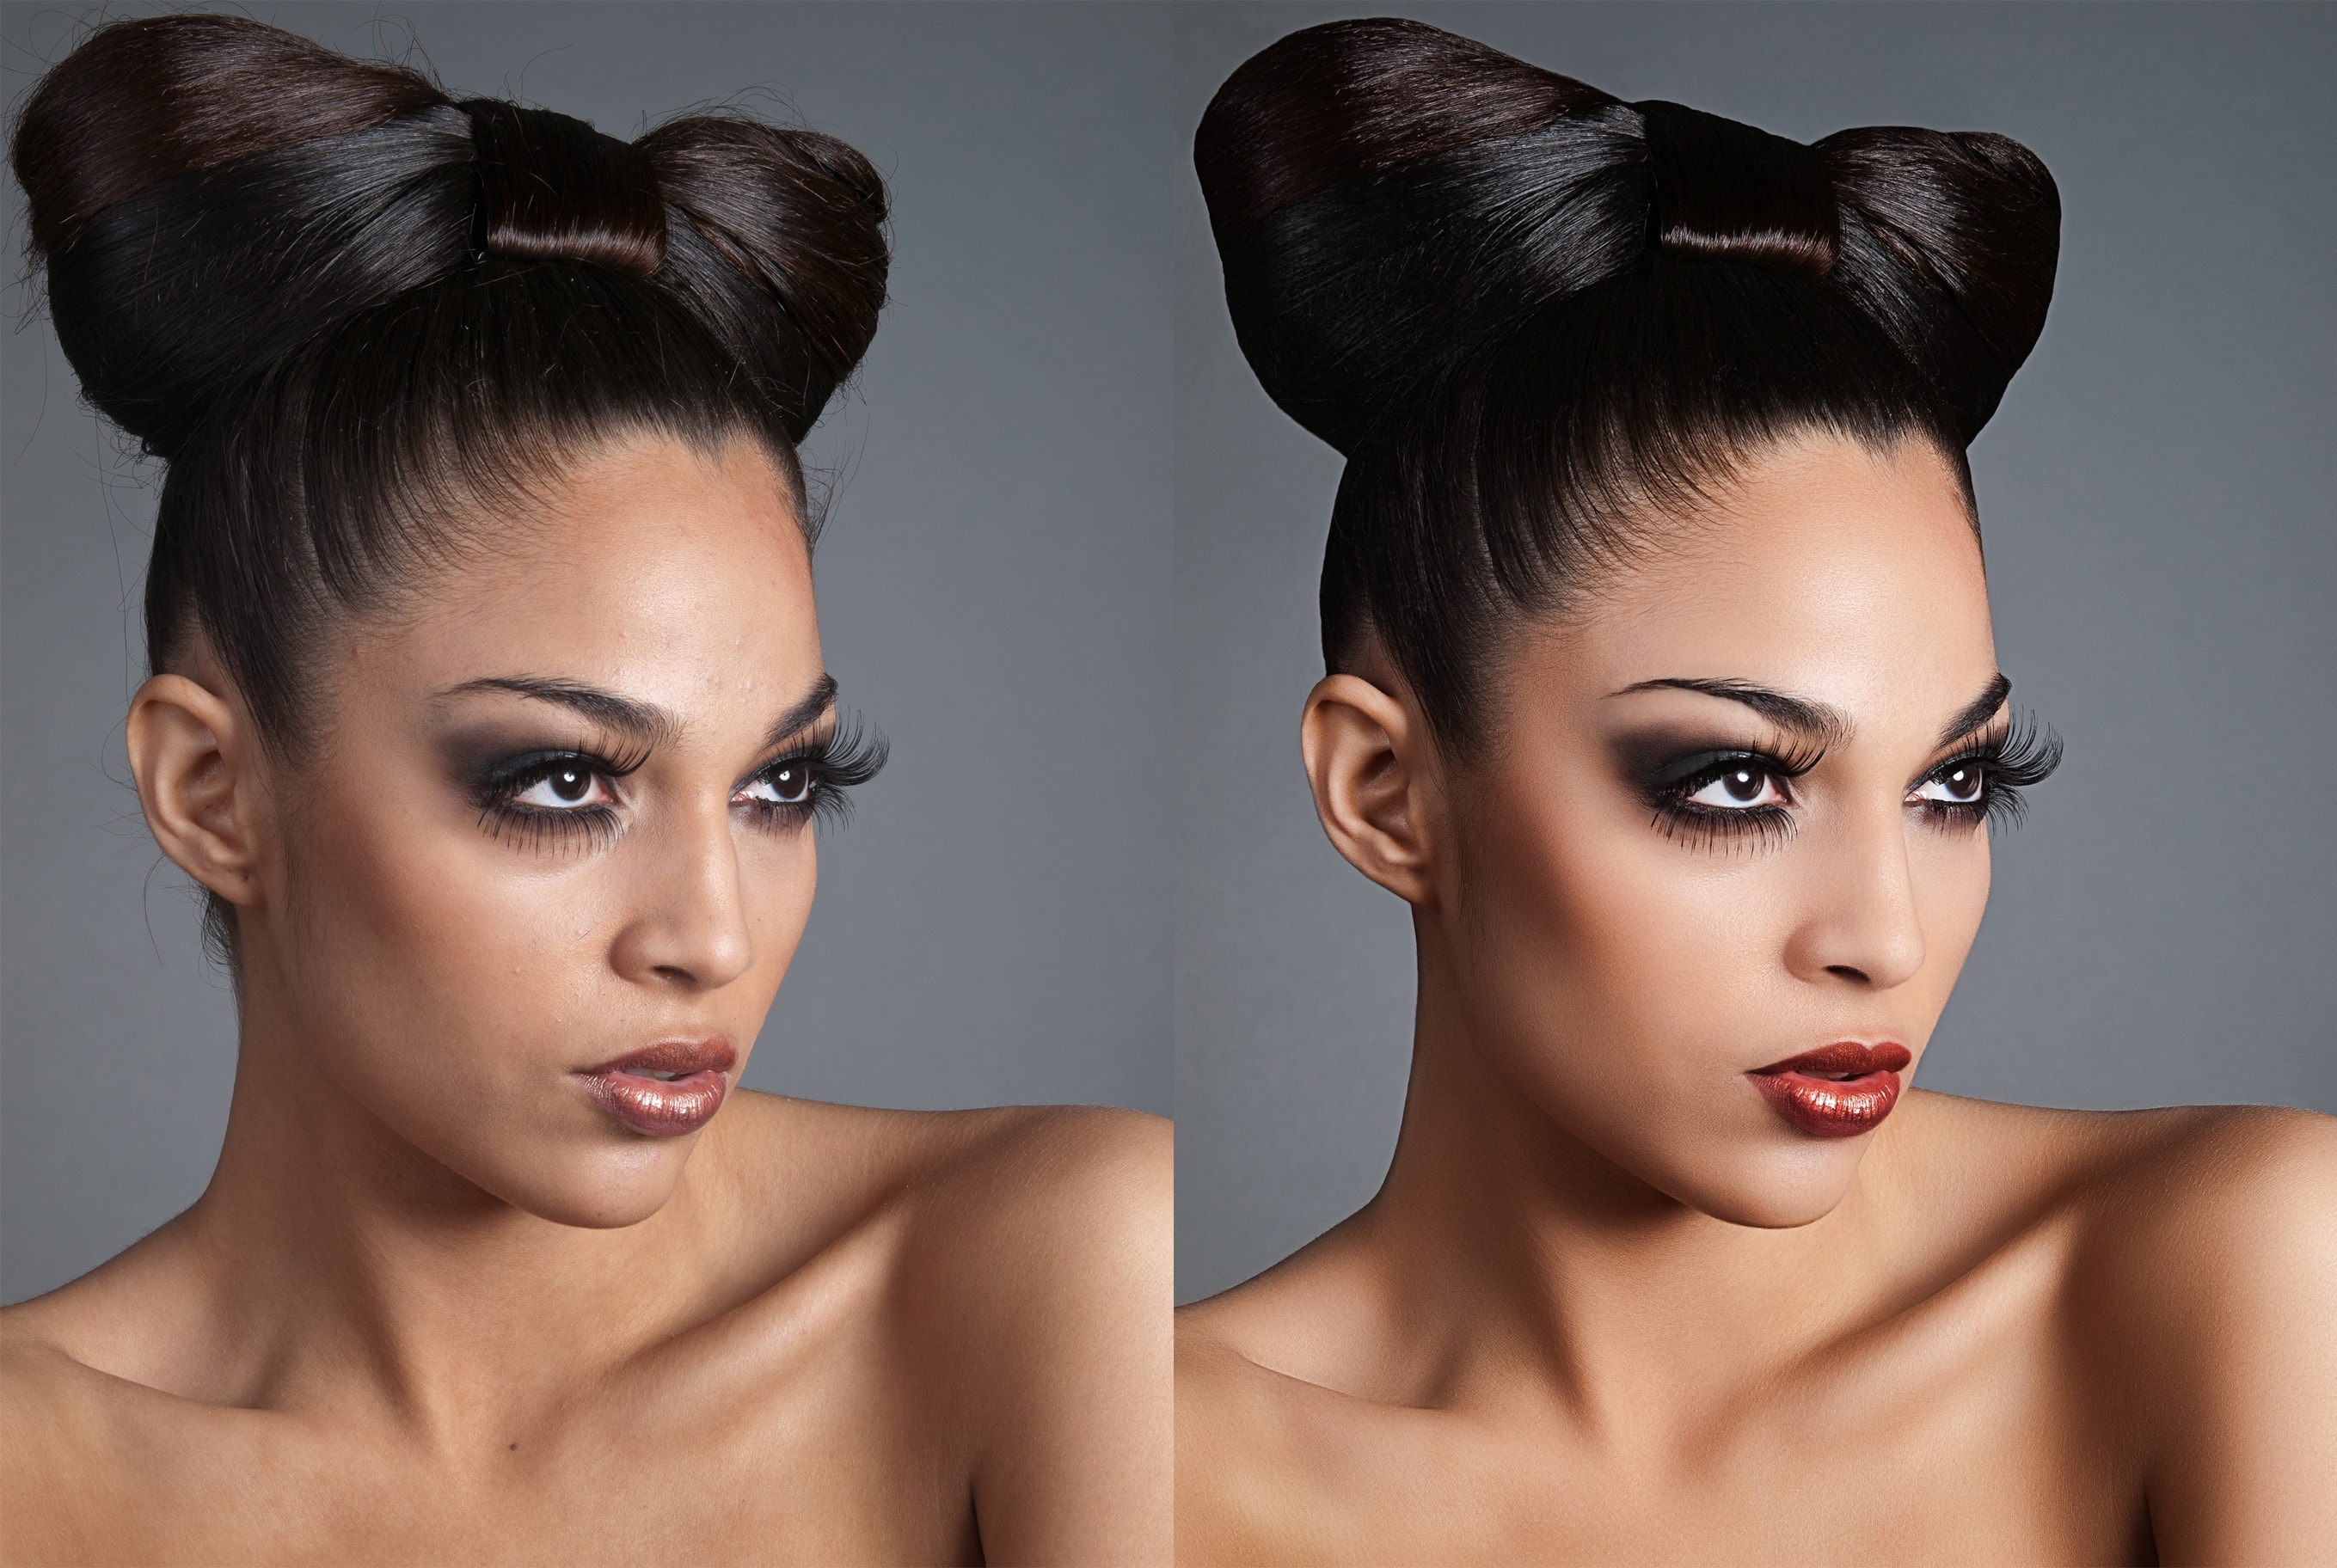
Beauty retouching is one of the major areas where Adobe Photoshop is used in a wide manner. One of the most important reasons for using it widely is because it is an area where people … Continue reading Beauty Retouching at a Glance
Read More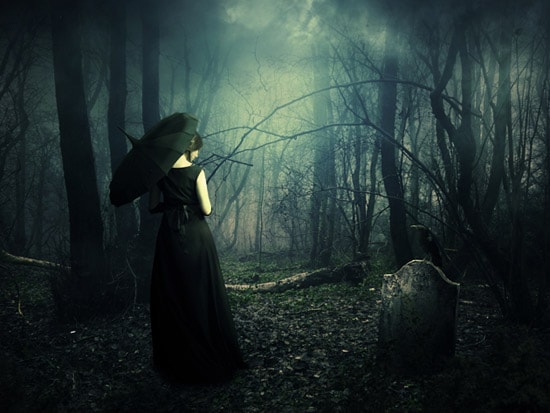
Here, you will learn on how you can convert a forest into a dark, foggy, ominous scene. You will learn how to work with shadows, lighting, adjustment layers, layer masks, dodge and burning and much … Continue reading How to Create a Dark Photo Manipulation in Photoshop
Read More