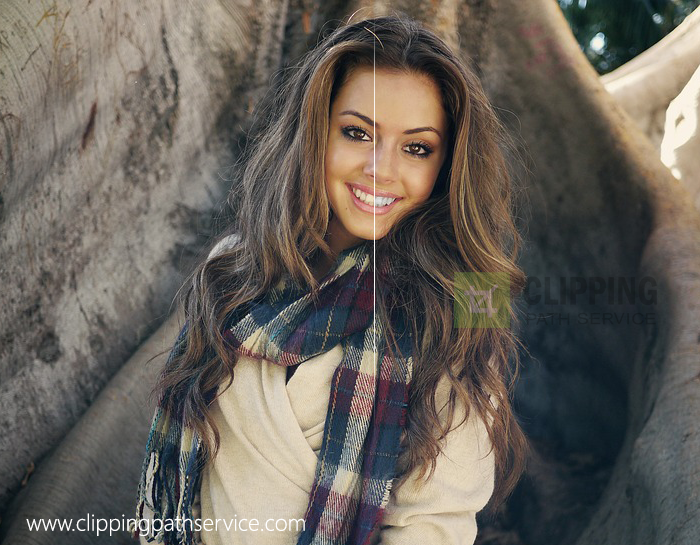
Whitening teeth in Photoshop and Smile Please!
A smile on your face speaks a volume for you. The white shinning teeth gives you wings to fly, it shows you are open to the challenges the world throws at you. You are confident to embrace the world in a beautiful way. How about bringing the same confident in your photo by using the touch of Photoshop on your image? There are many ways to whiten your image in Photoshop. In this article we will see two ways to do it. In both ways quick selection tool works well for the selection of the teeth.
Let’s start with first way.

1. Zoom in and make a selection of the teeth using the Quick Mask mode or the Quick Selection tool.
2. Click Select at the top from navigational menu.
3. Select Modify.
4. Select Feather.
The Feather Selection dialog box pens up.
5. Choose 2 in the Feather Radius field. This will slightly soften the edge of the selection.
6. Select OK.

7. Select the Zoom tool and zoom out to see the entire image.
8. Press Command +H (Ctrl+H) to hide the selection marquee.
If the dialog box appears, don’t forget to select Hide Extras.
You will notice the selection marquee is no longer visible, but the teeth are still selected.
9. Select the Hue/Saturation button to create an Adjustment Layer.

A. The Properties panel appears and a Hue/ Saturation layer is created in the Layers panel.
10. Select the drop-down menu and select Yellows.
11. Select and drag the Saturation slider slowly to the left to remove the yellow in the teeth in the image.

12. Select the drop-down menu and select Master.
13. Press and drag the Lightness slider slowly to the right to brighten the teeth.
14. Press Command+D (Ctrl+D) to deselect the teeth.
15. Press Command+Shift+E (Ctrl+Shift+E) to merge all the visible layers into one layer.
Let’s now begin with the second way.
What you want to do is select the teeth. It is a best practice to always start with a duplicate background layer. Duplicate the layer by pressing Command + J for Mac and Ctrl + J for Windows. Select the magic wand tool to select the teeth only. Hold Shift button to add the entire selection of the teeth visible on the image. You might be wondering what if all the teeth aren’t selected properly. Simply press Q to change everything to Quick mask.
Now select thee brush tool and see that the foreground is white. Put the value of the brush hardness to maximum. Zoom in on the image by hold down the space bar to temporarily changes the pointer to hand tool. With hand tool you can move around the image to focus on the area where it needs to be adjusted. Once you release the spacebar the hand tool return to its previously selected tool. In this case it is the brush tool.
Now, select the area of the teeth that were not selected perfectly by using the wand tool. It’s all right if the selection is still not perfect just do your best as you can. Once you are done with the selection press Q again to return to the selection. Go to the navigational menu select Image – Adjustment Hue/ Saturation. As we are trying to get white teeth instead of Yellow change the Masters to Yellow. Now lower the value of Saturation. As you lower the value of the saturation the whitening of the teeth increases. Don’t get too overwhelmed. The changes must be subtle adjustment. Give the teeth a natural white color so don’t lower the value of slider of saturation all the way to zero. Change the lightness a little bit. Move the slider to the right. Press ok.
Last thing to do with the image is to change the brightness. Go to the layer on the navigational menu then new Adjustment layer and curves. Very subtly move the line up by a small amount. As we are working in the layer where any change on the curve will have effect only on the teeth. Slight upward move will change the image the change it needed.
Tell us which way you like best.
Related Articles :
How To Whiten Teeth In Photoshop
In this tutorial, you will get to know about how to re-size an image in Photoshop. It is a very basic and easy thing to do in Photoshop. I hope that it will be very … Continue reading How to Re-size an Image in Photoshop
Read More
The usage of photo retouching through Photoshop is huge. It cannot be measured. With this Photoshop tool, one can do so many things. Here, in this article, you will see some angry look retouching images. … Continue reading Retouch of a Angry Face
Read More