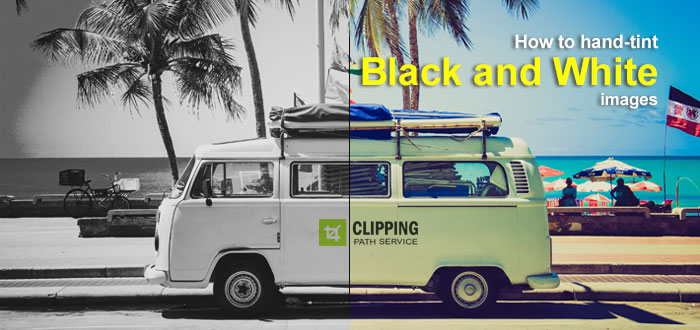
How to hand-tint black and white images
Once there was time when it was unthinkable to colorize black and white or grayscale image.
The trade secret was only known to very few limited people. The process was time consuming as it was done by patience and skilled hands. However, hand- tinted was the only mean of colorization of a photo in 1950’s. For this reason it was preferred by the middle class because the art hold much charm attached to it. Now the trade secret of hand tinting can be easily achieved using Photoshop technique. You can choose any color you want to colorize your photo.
First, open the image in Photoshop. You might need to restore the photo for better conversion. For example, there might be some need for contrast, removal of scratch, normal cleaning of the image till the image is workable in the format of black and white. Next, duplicate the current layer by choosing Background layer in the layer window and select the duplicate layer. You can rename the new layer with the name you will be using for this layer such as Color.
Select the brush tool and the color from the color pallet. Choose a color that you might think resembles the leather jacket. I will choose leather color to colorize the jacket. Before we proceed change the blending mode from Normal to Soft edge. Use the brush to color all over this jacket. Now while painting at this mode, you will see all details down below. Paint all over the jacket. So the technique is pretty straight forward. New layer on a Soft edge blending mode, use brush and finally color it.
Step by Step Procedure
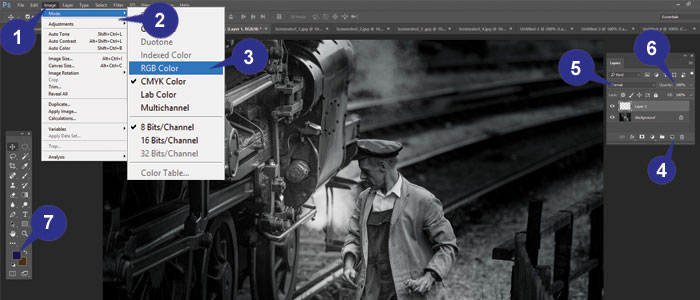
1. Select the Photo.
2. Select Mode.
3. Select RGB Color.
The color mode of the image changes, but the image on the screen remains the same.
4. Choose the New Layer button in the Layers panel.
5. Select Opacity and set the layer opacity to 30% so you can see the image as you paint on it.
Please Note: You can change the opacity setting as you work on the tinting.
6. Select the blend mode drop-down menu and select Soft Light. You can also Select Color.
7. Click the foreground color in the toolbar.
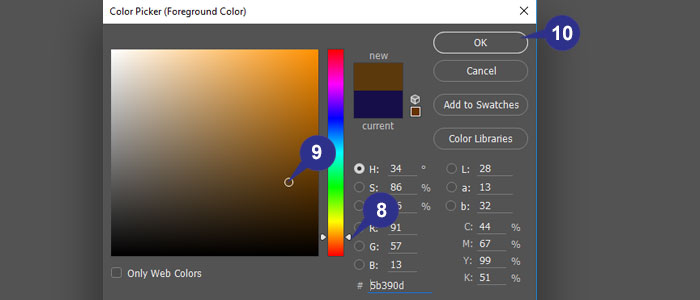
The Color Picker appears.
8. Choose and drag the Color slider to select a hue that matches the leather.
9. Select in the Color Preview box to select a color.
10. Choose OK to close the dialog box.
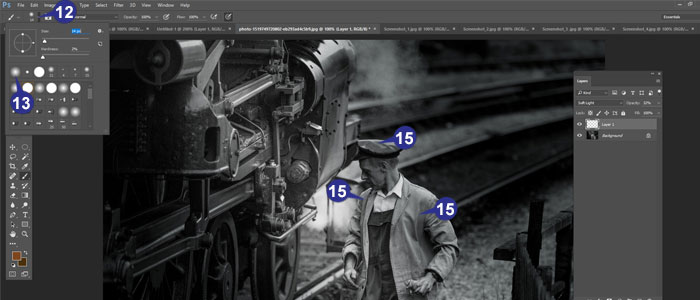
11. Press B to select the Brush tool.
12. Click the Brush Preset drop-down menu to open the Brush picker.
13. Click the soft-edged brush.
14. Press the left or right bracket keys to adjust the brush size.
15. Paint over an area to apply the color.
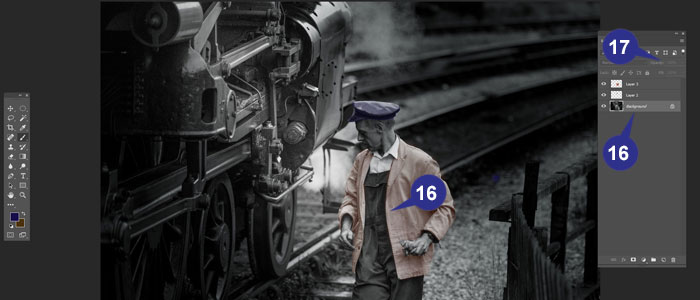
You will see the photo becoming tinted as you paint over the photo with the brush.
16. Repeat steps 4 to 15 until the entire image is painted, adding new layers for each color.
The black-and-white photo now appears tinted with color.
17. Click and drag the opacity of individual layers to adjust the look.
So this is the basic technique. Simply keep changing the color with suitable colors throughout the photo. If needed you can do some background research to see which color matches with the selected piece in the photo.
Related Articles:
A Look Back at the Forgotten Art of Hand-Tinted Photography
Hand-Colouring Black and White Images with Photoshop CS
Hand colored Black and White Photographs using Colored Pencils

Here, you will learn on how to create rain effects in Photoshop. Firstly, go to file> new and open a new file with your desired settings. Create a group Background and go to layer> new … Continue reading How to Create Rain Effects in Photoshop
Read More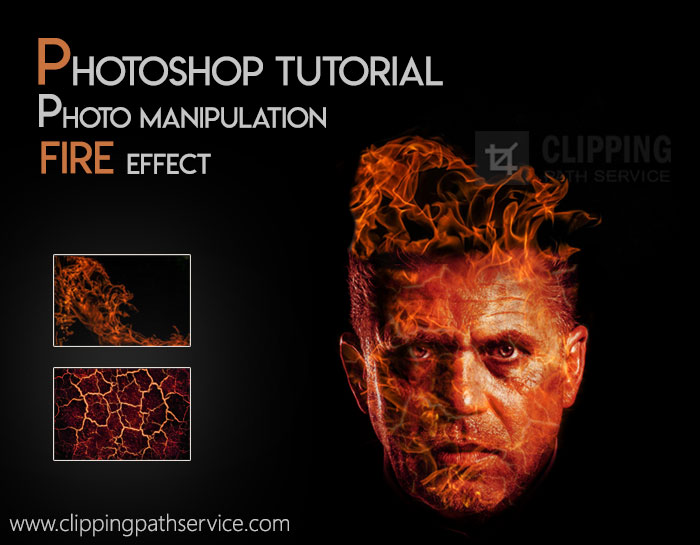
In this tutorial we’re going to learn how to create a fire effect in Adobe Photoshop. You can see below an example of what we’re going to be creating. We will be taking a subject … Continue reading Photoshop Tutorial | Photo Manipulation Fire Effect
Read More