How to Re-size an Image in Photoshop
In this tutorial, you will get to know about how to re-size an image in Photoshop. It is a very basic and easy thing to do in Photoshop. I hope that it will be very helpful for all and for the beginners especially.
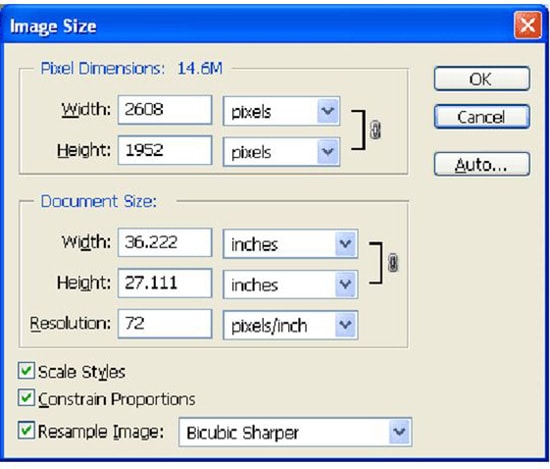
Photo Courtesy – http://photo.stackexchange.com/
Re-sizing an image is useful if you want to send the image over through e-mail or you want to file size small which will ultimately save a certain portion of space in your PC or perhaps you want to upload it into various websites like yahoo photo album. Now, in order to re-size an image, you just need to go to the image toolbar and choose image size. You will see the actual or default size of that particular image there. If you want to cut that short, you can do that as well as if you want to enlarge the image, you can also do that. This is what re-sizing does actually. It is shown in pixels but however, you can also show it through centimeters. When you re-size any image, you will see that, when you re-size the width of an image, it will automatically re-size the height of it as well because of the selection of constrain proportion. If it is unchecked, the height will stay as the same. I hope, it will help you and especially the new Photoshop users or the beginner levels of students.
In this tutorial, you will learn how to create masks through Photoshop CS5. I hope it will help the everyone and beginner level students of Photoshop specially. Photo Courtesy – http://www.popscreen.com/ In order to do this, you need … Continue reading How to Create Masks in Photoshop CS5
Read More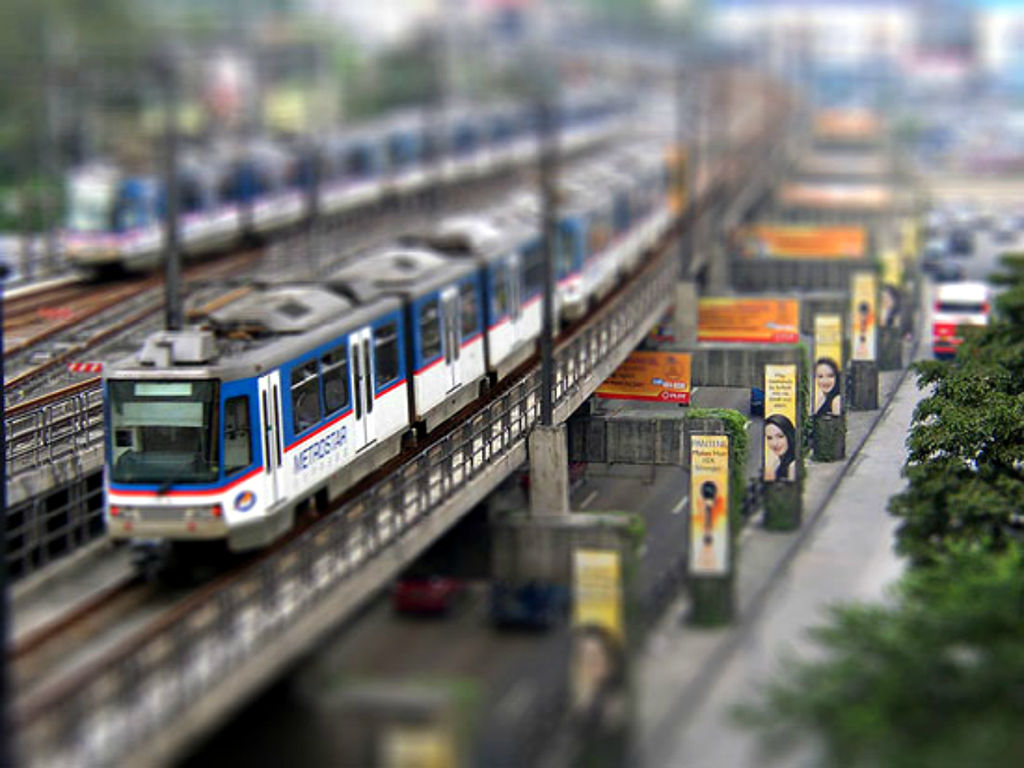
Here, you will learn on how to to achieve a miniature effect in Photoshop. I hope it will help you both the beginner and advanced level of students in a great deal. Not all the photos … Continue reading How to Achieve Miniature Effect in Photoshop
Read More