How to Turn a Photo into a Sketch in Photoshop
Here, you will learn on how to turn a photo into a sketch using Photoshop. Hopefully, it will help both beginner and advanced level of users in a great deal.
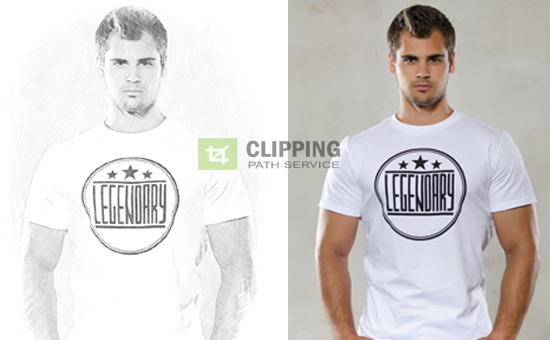
Photo Courtesy – Original by Pexelz and edited by ClippingPathService
First open the image you would like to use. Change the name of the image layer to Main. Now create a new Fill Layer. Go to Layer> Select New Fill Layer> click Solid Color. Name the Layer Paper then click OK. Select a light gray color from the Color Picker and click OK. Now add a Texture Layer. Go to Layer> Select New Fill Layer> Pattern. Name the New Layer Texture and click OK. From the Pattern fill options, select the Gray Granite and then click OK. The new Texture layer should be above the Paper layer. Make sure the Texture layer is selected and change the Opacity to 50%. Afterwards, change the Blend Mode to Multiply. The texture layer will blend into the paper layer. Now, make a copy of the Main image layer. Name this Layer Outline and click OK. Move the Outline Layer to the top of all the Layers. Then click Filter> Gallery Filter. Select the Glowing Edges option. Then Click OK. Now, we need to reverse the image. Make sure the Outline layer is selected. Click on Image> Adjustments> Invert to do that. Now the image will have some details on a white background. Now we need to remove the color from the image. Click Image> Select Adjustments> Then Click De-saturate. With the outline layer still selected, change the opacity to 50% and set the Blending Mode to Multiply. The outline layer will now blend into the texture layer.
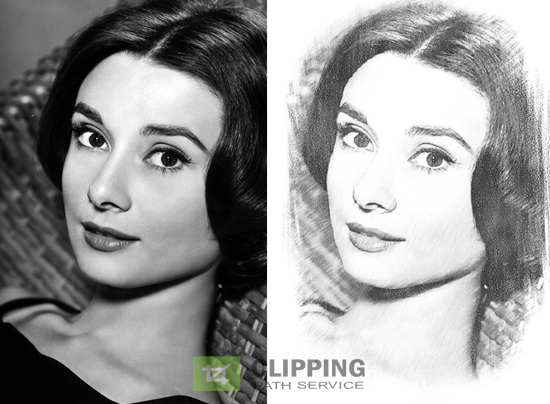
Photo Courtesy – Original by Pexelz and edited by ClippingPathService
We need to duplicate the Main image layer again. Name this Layer Sketch and click OK. Move the sketch layer to the top of all layers. We now need to change the image to black and white by clicking on Image> Adjustments> Black and White. From the Preset options, select High Contrast Blue Filter. Now we need to add a Layer Mask. If the layer mask is white, Press Ctrl+I to invert it to black. Now, select the brush tool. Change the brush size to 300 px and select the Flat Curve Bush. Make sure the Foreground color is set to white. If the Foreground color is not set to white, press D to reset it to white. Now make sure the sketch layer is active and the layer mask is selected. Now start sketching the image. Click and hold the left mouse button and drag the brush across the image with broad strokes. Now, move the brush in different directions. Before, moving the brush in a different direction releasing mouse button, Press and hold the mouse button again and move the brush in a new direction. If you make a mistake, press X to change the brush to black and paint over the brush strokes out. Press X to switch back to the white brush. Do not bush over one section to much because you will lose the sketch effect. After you are finished applying the brush strokes the final step is to reduce the opacity by 20% of the Outline Layer. That sums up the whole process.

Adobe has been working hard to give us a better 3D tool in Photoshop. In this tutorial, you will learn how to make simple 3D text effect. We will be using ‘Repousse Tool’ to create this effect. Photo Courtesy … Continue reading How to Make Simple 3D Text Effect in Photoshop
Read More
Here, you will learn on how to create a 3D effect in Photoshop. You will need three images with different poses by the model. I hope it will help you both the beginner and advanced … Continue reading How to Create a 3d Effect in Photoshop
Read More