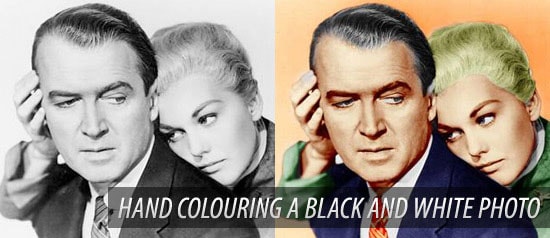
How to Convert Black and White Photo to a Color Photo in Photoshop
Here, you will learn on how to convert black and white photo to a color photo with some photo edit in Photoshop. I hope it will help you both beginner and advanced level of students in a great deal.
Photo Courtesy – http://www.photoshopsupport.com/
At first, open a black and white photo as a background layer. Select ‘Pen tool’ and select the screen area with it. Press Ctrl + Enter for object selection and set the ‘Feather Radius to 1.5 pixels. Click Ctrl + J to create a new layer. Select that layer which is Layer 1 and close the eye of background layer. Now, press Ctrl + B. Adjust both red and yellow color under that category. Now, with the use of a pen tool, select the lips portion and select the ‘Feather Radius’ to 1.5 pixels again. Select background layer and create duplicate copy by clicking Ctrl + J. Put the layer 2 above layer 1. Press Ctrl + B 2 times and increase the red color. Similarly do the eyes and eyebrow part but this time set the ‘Feather Radius’ to 2 pixels. Select background layer and create a new layer again. Move layer 4 at the very top. Press Ctrl + M to bring up the curve and make the eyebrow black. That sums up the whole process.
I hope that it will help you and from now on, hopefully you will follow this procedure more often in Photoshop and be an expert in this field in the future.
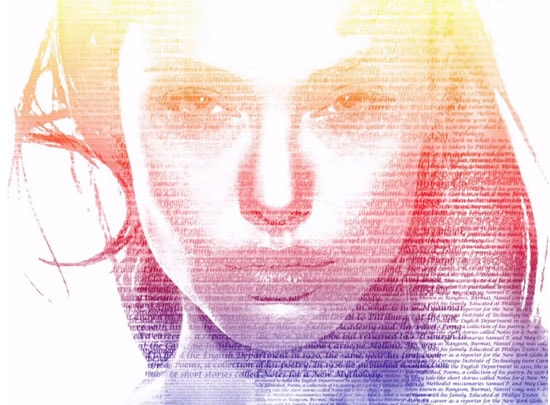
This tutorial is about how to make a creative typography portrait using just one photo and applying a typography brush to it. This is easy but needs practice to get the best effect. At first, … Continue reading How to Make Creative Typography Portraits in Photoshop
Read MoreHere, you will learn on how to remove oily faces with photo edit in Photoshop. I hope it will help the beginner level of students in a great deal. Photo Courtesy – http://www.photoshopatoms.com/ Open an image … Continue reading How to Remove Oily Faces in Photoshop
Read More