
How to Turn a Photo into a Collage of Polaroids using Photoshop
Here, you will learn how to photo edit and turn a photo into a collage of Polaroids using Photoshop. Firstly, duplicate our Background layer. Rename it “Layer 1” and places it above the background layer in the Layers palette.
Next, add a new blank layer between the background layer and the copy of it that we just created just below “Layer 1”. Hold down the Ctrl key and then click on the New Layer icon at the bottom of the Layers palette. Photoshop adds a new blank layer named “Layer 2” between “Layer 1” and the original background layer. Let’s reset the foreground and background colors if needed by pressing D on your keyboard. This sets black as your Foreground color and white as your Background color. Now with black as Foreground color and the new blank layer selected in the Layers palette, let’s fill the new layer with black using Alt + Backspace on windows.
With “Layer 2” selected, click on the New Layer icon once again at the bottom of the Layers palette. Photoshop will add a new blank layer between the black-filled layer and the copy of the original image above it. Select the ‘Rectangular Marquee Tool’ by pressing M on your keyboard. Then, with the Rectangular Marquee Tool selected, drag out a selection inside your image which will become the inside of the first Polaroid. We need to fill the selection with black at this point. To create our clipping mask, click on “Layer 1” to select it in the Layers palette. Then go up to the layer menu at the top of the screen and select Create Clipping Mask.
We need to add another new layer above “Layer 2” next. To do that, click on “Layer 2” to select it and then click once again on the New Layer icon at the bottom of the Layers palette. Drag Out another Rectangular Selection as the Border of the Polaroid. Next, fill the selection with White and add a Drop Shadow layer style. Rotate the Polaroid now. After that, group all three layers which make up the Polaroid which are the top three layers in the Layers palette. We will use this Layer Group to create our second Polaroid, and we will do that by duplicating the group. Just as we did with the original, move and rotate the second Polaroid with the Free Transform command. You can add more photos, move and rotate if needed. That sums up the whole process.
You can use this effect with lots of different types of images, whether it’s a photo of one person or several people.
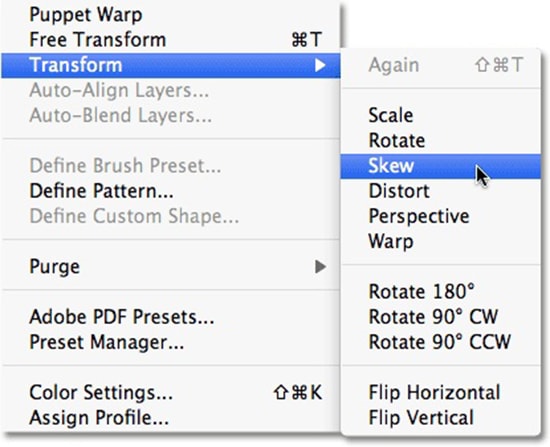
Photoshop offers free transform and transformation options like Scale, Skew, Distort from Edit menu. Using these options, you will affect selected area, actually pixels inside selected area. But you can also manipulate selection only, using exact same … Continue reading How to Use Transformation Options for Selection in Photoshop
Read More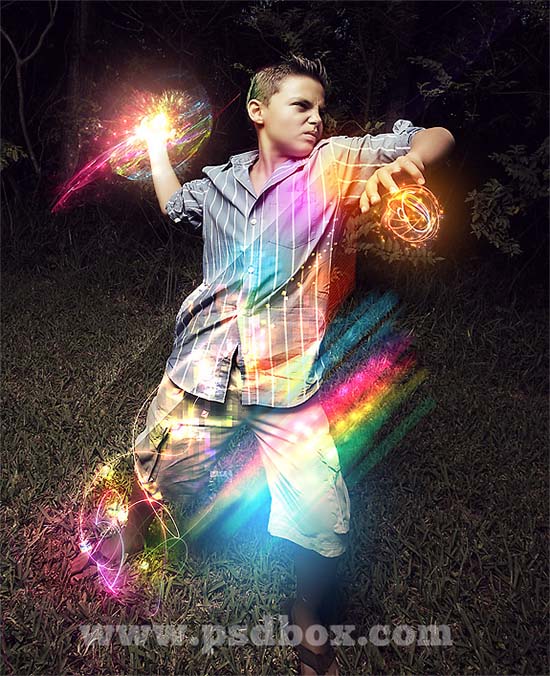
Here, you will learn on how to create light effects in Photoshop easily. Here, we will play with blending modes, adjustment layers and brushes. You will get the best result when you create a dark … Continue reading How to Create Amazing Light Effects in Photoshop
Read More