Moving people or objects within an image in Photoshop
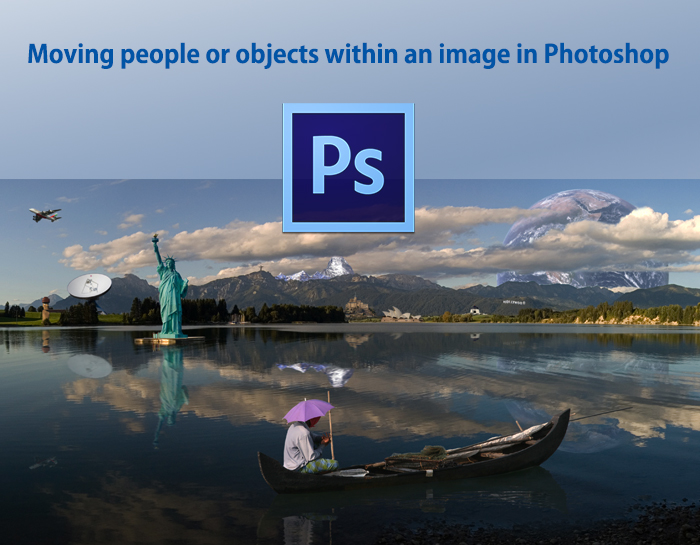
In this article we’ll use the following image and move the people around. This is going to be done through the content aware move tool, you can get it from your toolbox. It’s usually hidden underneath the spot healing brush.
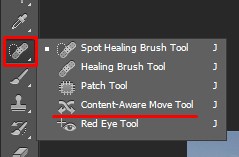
When you select it, you’ll see the cursor and if you click and drag, it will act similarly to the lasso tool, this means you’ll need a pretty steady hand if you’re to use it like this, here’s how it works.

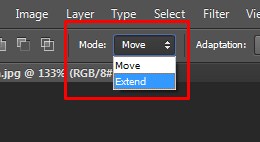
In the options bar, you have two main modes, you can either Move an element, or you can Extend it, which means you will create another copy.
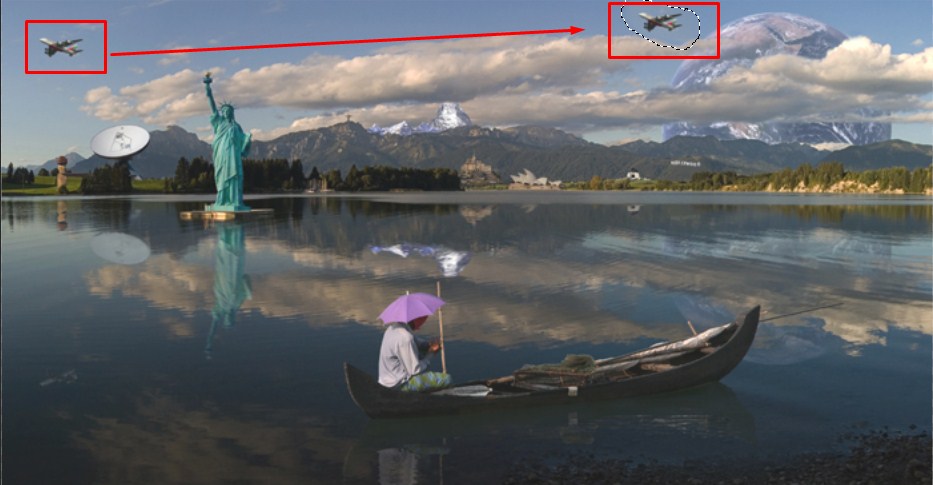
Let me copy airplane, you will roughly create a selection for it, now you will drag it to another part of my canvas.
Now depending on your settings, you might get a different result, and that’s because these two controllers are very important for this tool.
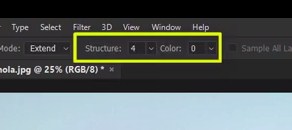
The color slider adjusts how much you’re willing to let Photoshop change the colors from your initial selection. If you increase the value of the slider then you will see a change. Again if you change the value to zero then you will see another change. This means Photoshop will create a copy without changing the colors at all. This will of course result in a duplicate that’s not blended into its surroundings, but if you increase it up to 10, this looks much better. Of course, you might still get some issues here and there but those can be corrected with various tools.
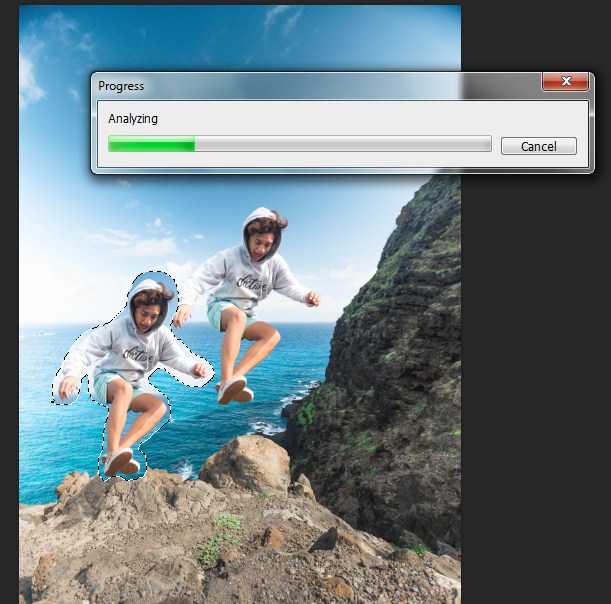
For Structure Setting we will use another image. Let’s switch tabs and I’ll show you how you can work with it. For the Structure setting, I’ll use this jumper that’s hovering in midair. To show you what’s what, I’ll drop it to its lowest value. Change the mode to Move and now I’ll roughly grab my Jumper, I’m not worried about precision, because Photoshop will do a pretty good job in identifying what you want to moved.
Original by Pexels/ CC BY and edited by Clippingpathservice
Here’s the thing, this setting controls how much the programmed is allowed to modify your selection in order to match it to its new spot. In this case, a value of 1 will give me a weird outcome. Please note that it sometimes takes Photoshop a while to process the changes so you have to be patient. If you have noticed the change came with not so perfect change.
Let me undo with Ctrl + Z and increase the Structure value up to 10. You will also enable Transform on Drop which will enable you to resize your subject once it’s moved. Now you can grab the corner handle of the image and you will resize it while holding down Shift.
Once you hit OK, you can see how this is looking much better with a higher Structure value. In essence, when you’re dealing with a well contoured subject, whether it’s a person, a car, a ball or anything else that’s solid, a higher value in this structure field will work better.
Let us switch tabs and see what happens with our next image.
Original by Pexels/ CC BY and edited by Clippingpathservice
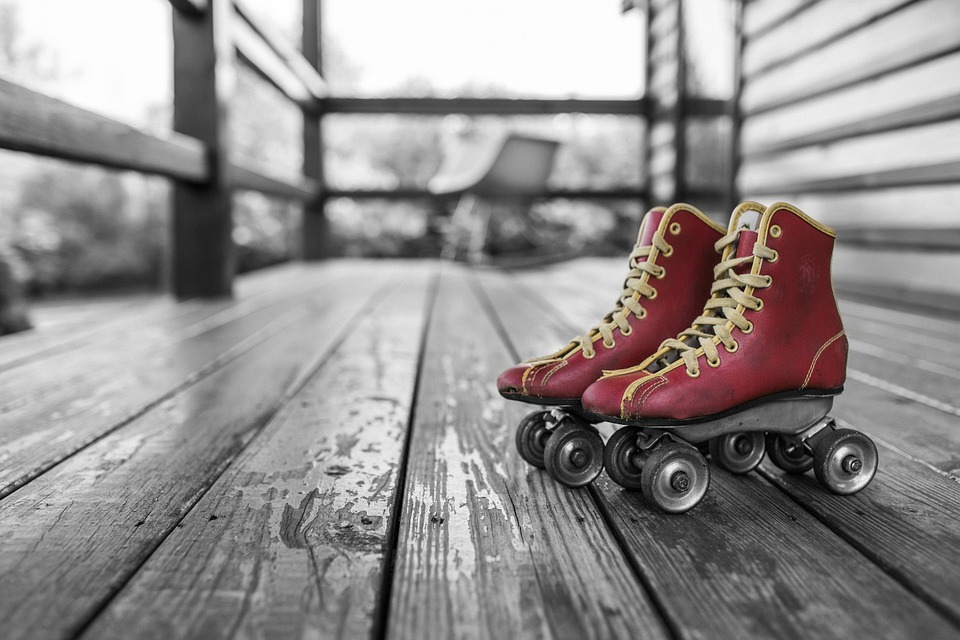
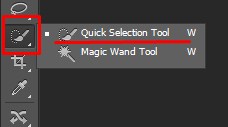
Grab the Quick Selection Tool and let’s paint over the roller-skates. This is going to go fast because we have a pretty clear contrasting background.
Now switch to the content aware move tool and notice your selection is still active.That’s because we can use this feature on any type of selection, that means you don’t have to rely on your lasso tool skills to create a good outline. Plus this also helps the content aware move tool do a better job on well defined objects.
Here, you have it set to extend, use the maximum structure value and for the color set it at zero. Click and drag, now hold shift to move it in a perfectly straight line. Because you have transform on drop active, once you position it on the left side, you will right click it and choose flip horizontally, press the check mark and you are good to go.
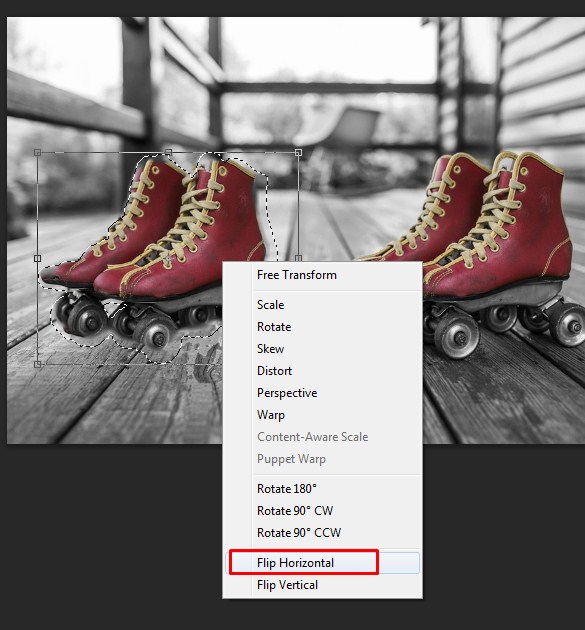
Now if you experiment with these sliders, you’ll see how they work and why this combination produced the best results.
Overall, that’s how the content aware move tool works. It’s great when you want to create a copy of an element from the canvas, but it also works well for re-positioning things, try it out and see how you can benefit from it. My advice is that you first use a selection tool rather than relying on its lasso like capabilities.
Related Articles:
How To Move An Object In A Photo Using Content Aware Move In Photoshop
A retouch aiming for a perfect final image without necessarily respecting complete resemblance with the original subject is called glamour retouching. Glamour retouching is another sub-part of photo retouching. We can do glamour retouching best by glamour photography. Glamour photography … Continue reading Glamour Retouching
Read More
At first, open a layer and then double-click in the blank space on that first layer. This will bring up a box with the different layer styles. Then, you would start by adding a normal layer drop shadow, … Continue reading Basic Techniques on Creating a Drop Shadow in Photoshop
Read More