Photoshop Tips: Tweaking Your Documents Right
Working with tabbed documents
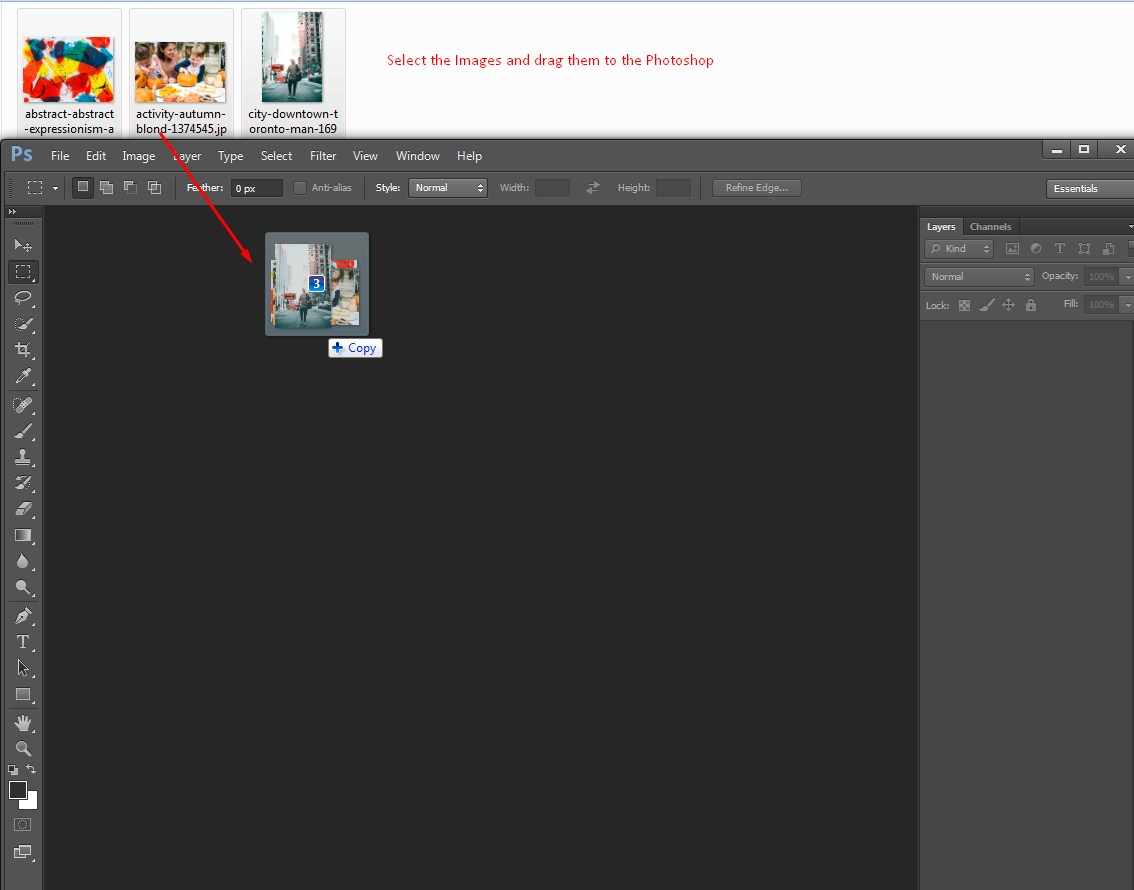
Let’s open three individual images in Photoshop. As you will see the three image will open in three different tabs. You can do it by dragging the selected three images from a selected folder and releasing them on to the Photoshop. Now you can navigate between the three documents by just clicking on the tab at the top of the window.
If you want to rearrange the order in which they appear you can click on the tab and then just drag it to the right to move it. If you want to remove one of your images from the tabs area at the top and floated you can just click and drag down into the image area and let go.
You can do this with multiple documents you want to. In fact you can even tab to floating documents by just clicking and dragging one on top of the other. Now you will have these two tab documents. If you want to put them all back together you simply click on the title bar area and drag it up to the tabs area in Photoshop.
Now you can close your tap document by clicking on the X icon. You can use the keyboard shortcut ctrl + w or Command/ cmd + w for Mac.
Arranging documents
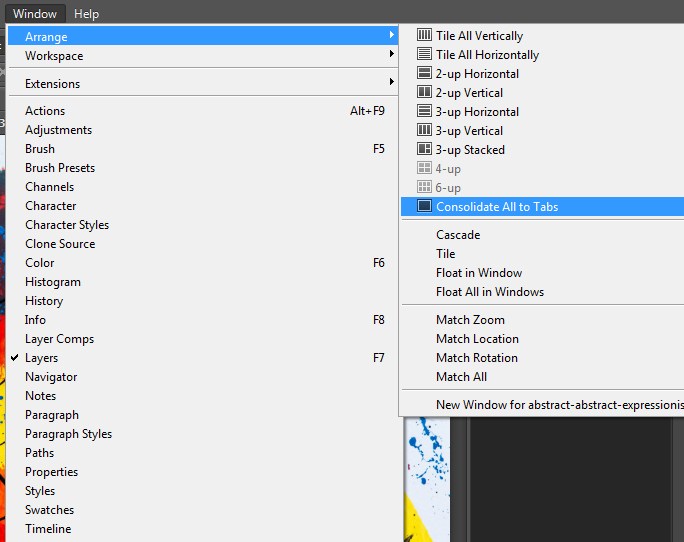
To see more than one image at a time in Photoshop can come handy when you work on different projects. You can click on the different tabs here see but you can only see one image at a time when I’m looking at them in this view. I select window arrange and I can tile all vertically or horizontally or I can specify exactly how I want them laid out using these other options.
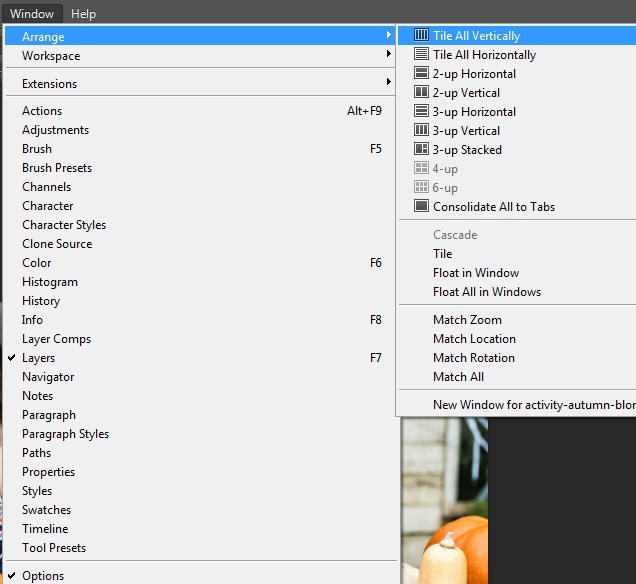
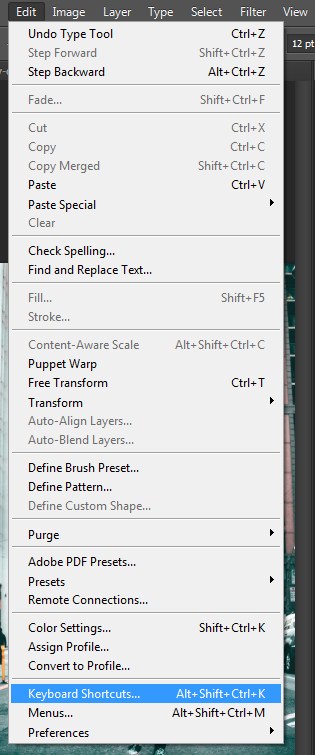
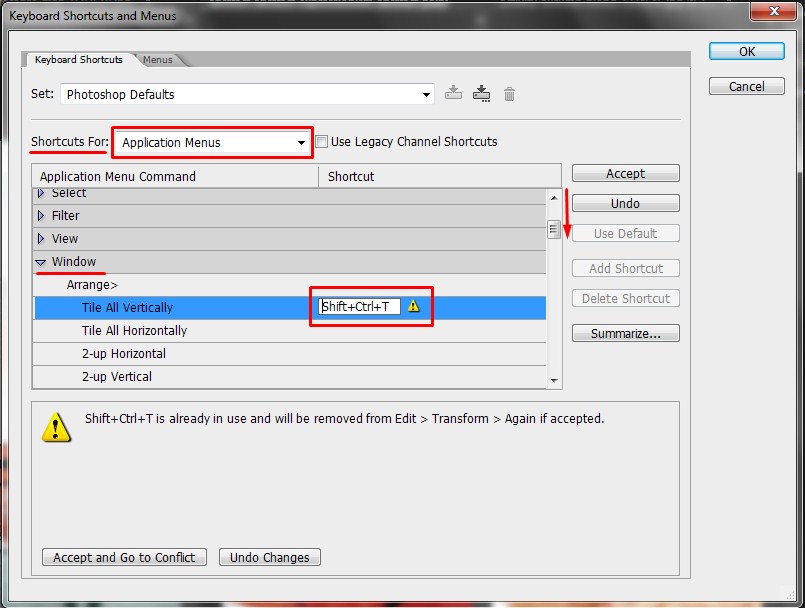
Because I only have three images open you will not get the options for four or six up. Let’s go ahead and select the 3- up vertical. Now you can see all three of your images at one time. If you select one of the image by clicking on the tab you can then returned to just seen that one image by selecting Window> Arrange> Consolidate All to Tabs. At a later stage of using Photoshop you will find that you are doing more often. So what you do is go to the Edit menu and come down to the Keyboard Shortcuts.
Under the Shortcuts For: Select Application Menus. Scroll down a little bit and find the window menu. Scroll down a little bit more and then enter a keyboard shortcuts to tile all of your images vertically. We usually do it by using Command + Shift + T for Mac or Ctrl + Shift + T for Window. A cautious sign will appear below: If you do not use Edit > Transform> Again very often and then you simply Accept it.
Scroll down further and enter another keyboard shortcut to Consolidate All to Tabs. For this instance we can choose Command + Shift + R for Mac or Ctrl + Shift + R for Window. Just for the sake of easy to remember, R symbolize to returning to a single image.
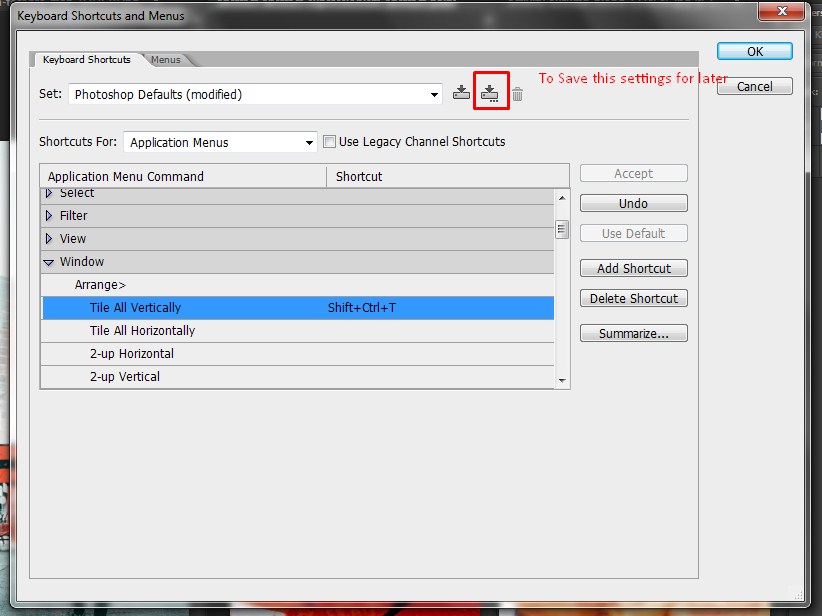
You accept it. To save this settings you can click the marked icon but for now we’ll just click OK.
Now if we go to the Window menu > Arrange and look at the menus here then we can see our keyboard shortcuts have been added to Tile images and consolidate the tabs.
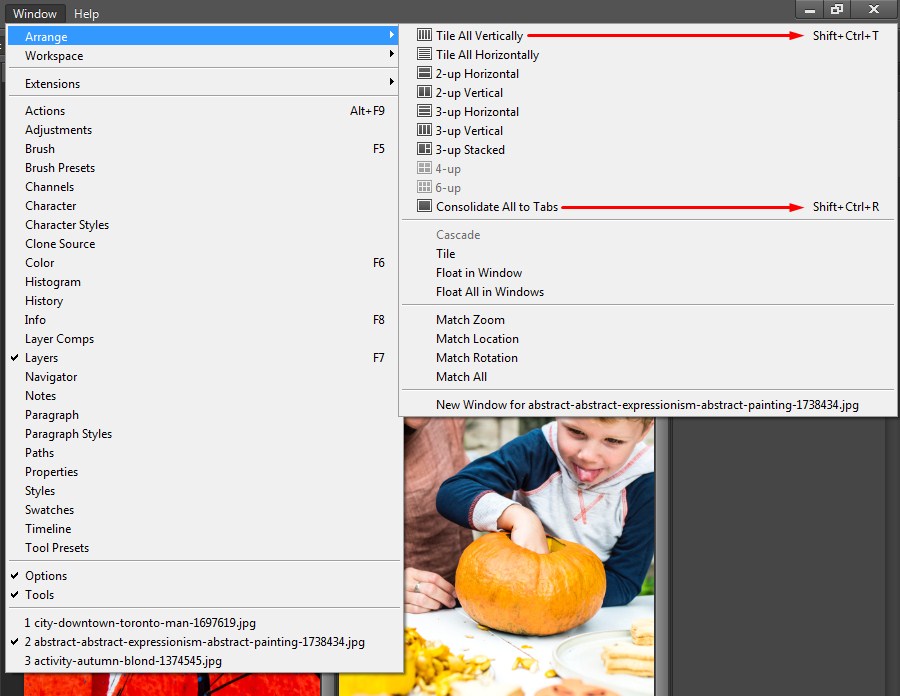
So now you just is Command or Ctrl + Shift + T key and then Command or Ctrl + Shift + R to go back to the single image view.
Stopping Photoshop from tabbing documents
It is interesting to note that when you opens the document then it opens up in the tab panels. But if you wanted to float your images you could simply click and drag anywhere in the canvass of the Photoshop and let go in order to have a floating document. If you want to float all of your documents you could choose Window then Arrange and then Float all of them in Windows.

But if you select this and then you open a new document that new document is going to be tabbed and if you are not careful and you move in around one image and you happen to hover on top of another image and let go, it would tab those as well.
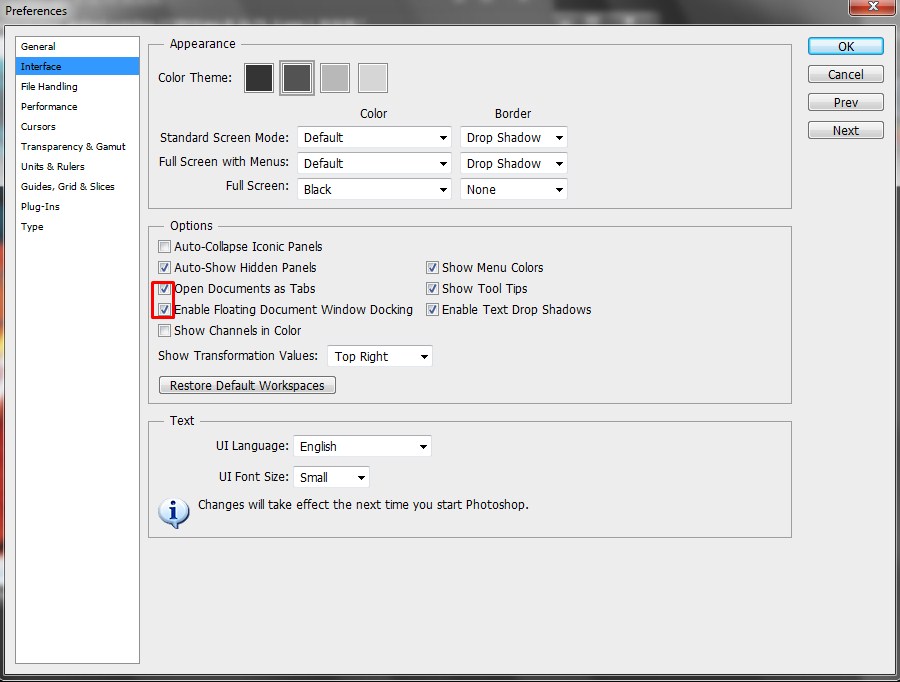
So if you want to have your images always floating and never be in tabs then you can go to the Edit > Preferences > Interface preferences.

Select to uncheck the option so you can Open Documents as Tabs. Now if you open a new window it will open as a floating window rather than tabbed. If you never want to accidentally put to floating Windows together and tab them then you would also want to uncheck the option to Enable Floating Document Window Docking.
Personally I like my images to be tabbed so I will leave both of those on and then click OK. Now if you ever want to put the three floating windows back into the tabs then select Window and then Arrange > Consolidate the Tabs. Such a relief !
Now you can quickly move through the image as either clicking on the tabs or you can use the keyboard shortcut Ctrl + Tab to quickly move through your open documents.
Hope now you can toggle between your documents with more ease. Happy learning.
Related Articles:
HOW TO CREATE A NEW DOCUMENT IN PHOTOSHOP ELEMENTS 9
How To Create A New Document In Photoshop CS6 | TrickyPhotoshop
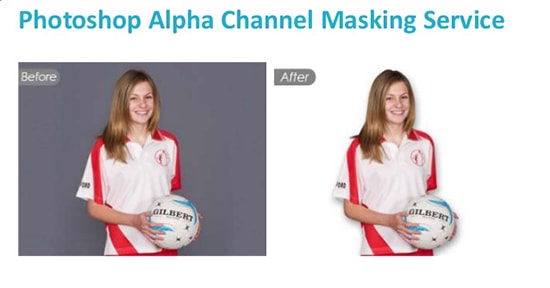
Here, you will learn on how to photo edit by creating Alpha Channel Masks effect in Photoshop. Therefore, we are going to work in the Alpha Channel. We are going to make use of Alpha Channel for masking. Courtesy – … Continue reading How to Create Alpha Channel Masks in Photoshop
Read MoreIf you are new to the Photoshop, it is obvious that you will feel a little uncomfortable and uneasy while using the tools of the Photoshop. The main reason behind it is also very obvious. … Continue reading Usage of ‘Move Tool’ in Photoshop
Read More