How to Straighten a Crooked image in Photoshop
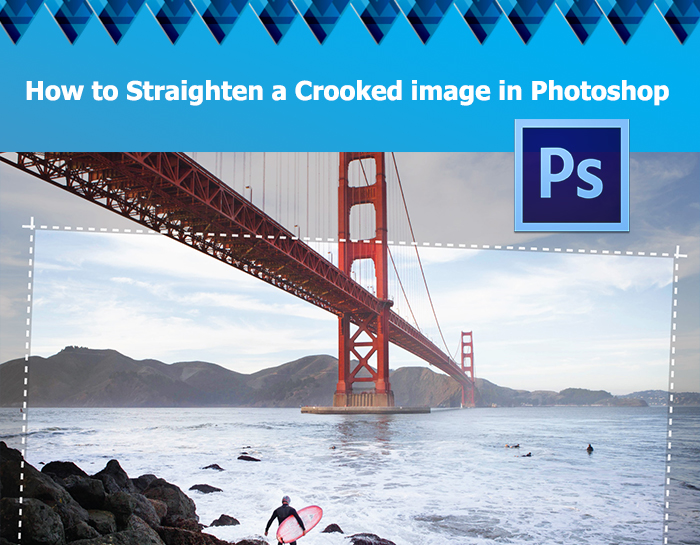
This is a quick Photoshop tip tutorial on how to straighten crooked images. This is something that comes up fairly regularly in photography or regular Photoshop editing. I am glad to know this trick and I learned it pretty early on. If you’re a Photoshop expert this is going to seem very rudimentary and simple to you. For people who don’t know how to do this or who are just starting out with Photoshop, this is a good tip to learn because it comes up fairly regularly alright.
So as you can see we have taken a picture of a frame , however it is slanted and we want it straight. To begin with there are several different ways that you can straighten image in Photoshop. The first way involves the Crop Tool. You click on the Crop Tool icon or you can press C to activate the Crop tool.
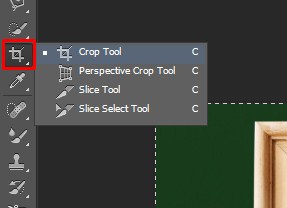
As soon as you selected in the options bar we have a Straighten Option at the top.
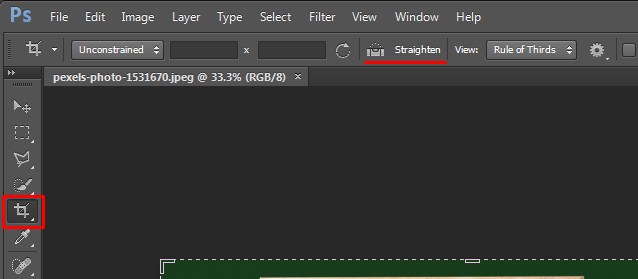
Click on Straighten option and then click and drag across the image. Select the angle that you want Photoshop to straighten the image for you, when you let go Photoshop will automatically straighten the image. Tap the enter or the return key to set the change. Basically drag out where you want it straight and the Photoshop will straighten the image for you.
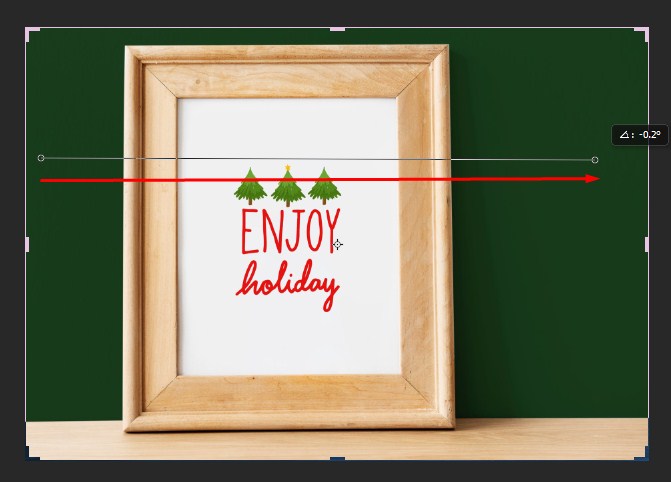
You can apply that straightening and cropping it at one time. One of the things that you might notice, because I did not have Delete Cropped Pixels selected, Photoshop is keeping track of the information outside of the canvas area that you see. In fact Photoshop has turned the background into a layer.
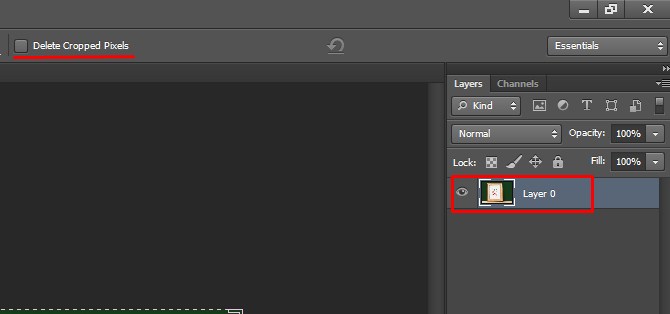
Let’s go ahead and undo that by using command or control + Z.
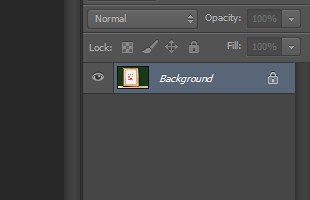
Now let’s have a look on the second way to crop an image.
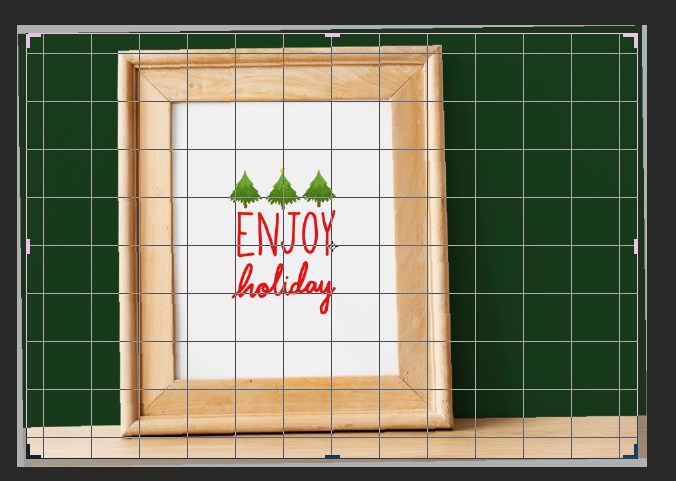
This is simply by having the Crop Tool selected and positioning your image outside of the Crop Marquis. now when you click and drag you automatically get a nice grid overview so that you can align your image. When you let go and tap return or enter again Photoshop will crop and straighten your image.
CS6 Extended
Here’s one last super tip if you happen to have Photoshop CS6 extended. Let’s just undo what we just did a minute ago. Choose the ruler tool which is right under the eyedropper tool. Just hover over the eyedropper tool and then hold down your mouse button and choose the ruler tool.
What you want to do is once you have the ruler tool chosen you want to choose a straight line in the scene or in the photograph or image that you are working with. Now, we brought a line along the stem and we click straighten layout here give it a couple seconds and it does the exact same thing as a crop tool. You can do this with heaps of your images so thank you
But note that you get a little different result here because you are not using the crop tool Photoshop will automatically add canvas size to build out the canvas to accommodate the rotated view of the image.
You might think it’s much easier to simply do this with the crop tool because the crop tool will crop and straighten at the same time but because Photoshop is used by so many different people it can be very convenient when you’re actually trying to measure things and use a measurement scale to straighten using the ruler tool in Photoshop CS6 extended.
Hope you enjoyed this quick tip. Again it’s something that comes up fairly regularly and it’s just a real easy way to align skewed images. Hope you will use this easy technique to enhance your Photoshop skill.
Related Articles:
How to crop and straighten photos
How To Straighten Crooked Photos In Photoshop
How to Straighten a Crooked Image in Photoshop


