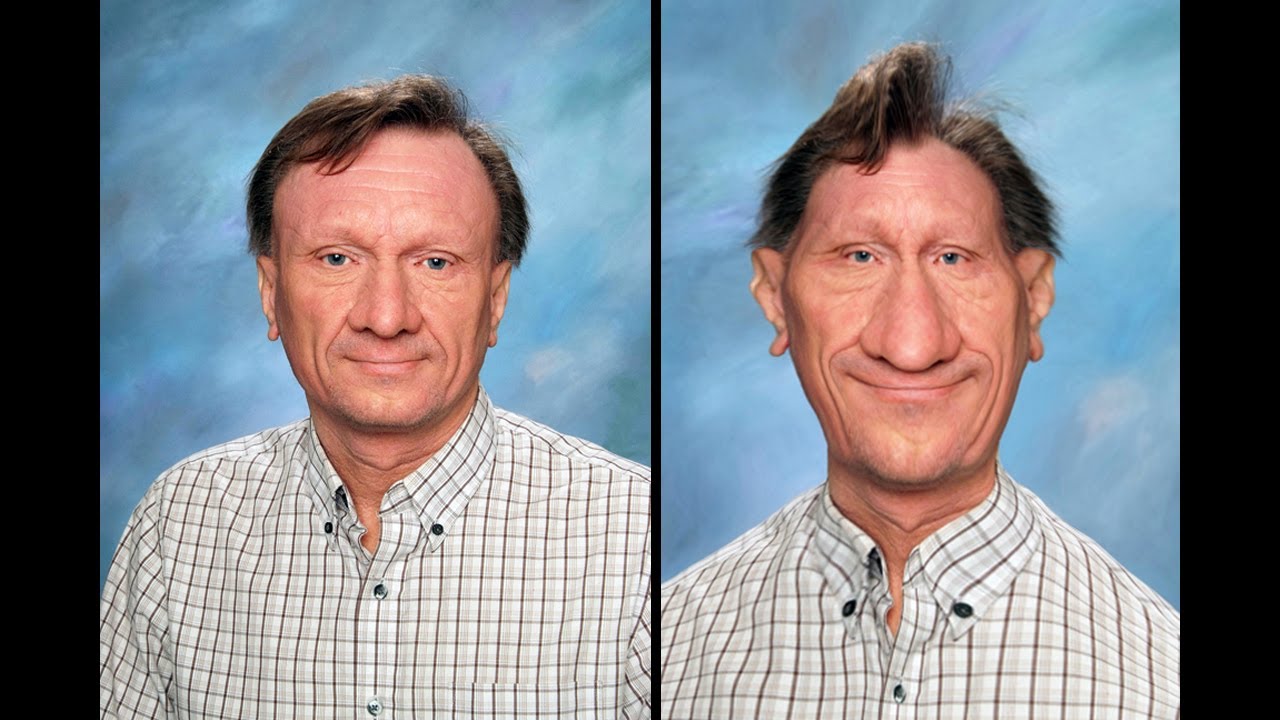
How to Make Caricature from an Image using Photoshop
This tutorial is about how to make a caricature with photo edit from an image using Adobe Photoshop CS6. I hope it will help you both the beginner and advanced level of students in a great deal. It is very exciting. I believe everyone will like it.
Hit Ctrl + Space to select the face of the person. After selecting right click and make selection. Then click Ctrl + Shift + I to inverse it. Click on ‘Add layer mask.’ Hit Ctrl + J. The layer thumbnail should be at the top and close the eye of the 2nd layer. After removing some hair using eraser tool, click on Ctrl + O again. Open a new document by going to File> New. Add a layer 0 by double clicking on the background. Click on Layer 0 and select blending options. Select ‘Gradient Overlay’ and select the style to ‘Radial.’ Lower the opacity a little bit. Now, copy the image that includes the face of a person and paste it to Layer 0. Select Ctrl + T and place it perfectly. Create layer 1 copy and close the eye of layer 1. Go to Filter>Camera Raw Filter. Make some adjustments where it requires include highlights, shadows, exposure, saturation.

Make another copy in the name of layer 1 copy 2. Close the eye of layer 1 and layer 1 copy. Select ‘lasso tool’ and select the lips. Add a new layer now. Hit Ctrl + T and enlarge it. Select the brush tool and remove the unnecessary portion that is there in the face. Select layer 1 copy 2 and select lasso tool. Select the nose with the lasso tool. Add another layer and put that layer on top. Hit Ctrl + T, enlarge it and place it as you like using warp. Click layer 1 copy 2 and select the eyes using lasso tool. Do one eye at a time. Add another layer and put that layer on top. Hit Ctrl + T, enlarge it and place it as you like it. Use the brush tool and erase the unnecessary portion that is there in the face. Hit Ctrl + Shift + Alt + E and add a new layer again.
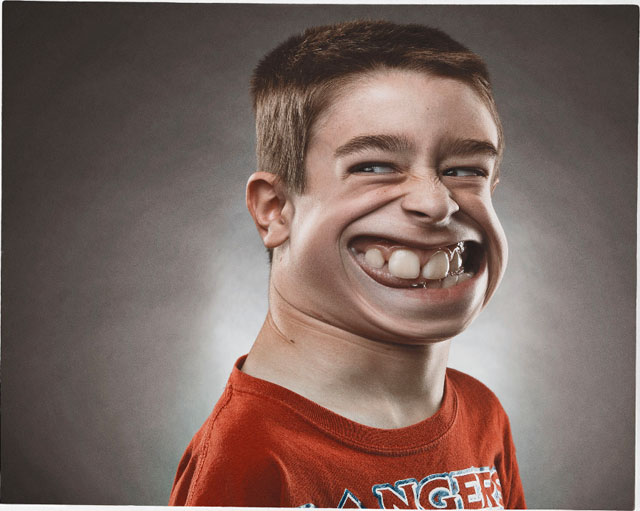
Go to Filter> Liquify. Select ‘Pucker Tool.’ After that, select ‘Forward Warp Tool’ to work on the face. Close the eye of layer 6 and add another new layer. Select blur tool and make the hair looks not real rather is should look like a cartoon. Open the adjustment layer and select hue/saturation and make some adjustments. Hit Ctrl + Shift + Alt + E to merge all layer. Select the foreground layer and change the blending mode to overlay. Now, select dodge tool and work on the face so that it looks like cartoon all the way. Go to Filter>Camera Raw Filter and make some adjustments. Open the adjustment layer and select selective color. Make some adjustment there as well. It will finish all the process.
I hope that it will help you and from now on, hopefully you will follow this procedure more often in Photoshop and be an expert in this field in the future.

We all know that retouching is very easy and at the same time very hard as well as very difficult to do. It requires some kind of potential to do that if not you have … Continue reading About “Shoes Photo Retouching”
Read More
Here you will learn on how to achieve a cinematic effect on your image in Photoshop. It can be done using color curve layers with some shortcuts using color adjustment layers and color lookup adjustment … Continue reading How to Create a Cinematic Effect Using Photoshop
Read More