How to Create Shadows in the Wall in Photoshop
Here, you will learn on how to create shadows in the wall in Photoshop with photo edit. I hope it will help you both the beginner level of students in a great deal.
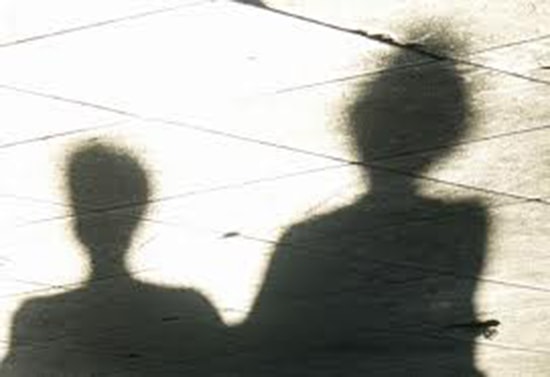
Photo Courtesy – https://ujarani.com/
To do this, you have to remove the background using quick selection tool. Select the quick selection tool and set it to add to location. In order to remove unwanted selection, set the tool to subtract to selection. Right click and choose ‘layer via cut.’ Right click on the layer of the background and choose delete layer. Click two times on the layer to open the layer style menu and then go on color overlay and choose the black color. Repeat exact same procedure to the rest of the pictures you have and export them to png format. Then choose a background and import it in the software. Hold the shift key while resizing to keep the aspect ratio. Decrease the opacity of the layer to adjust the shadow intensity. Now, go to Filter> Blur> Box Blur from the above toolbar and change the radius value to adjust the blur intensity. Repeat exact same procedure to the rest of the pictures you have. That sums up the whole process.
I hope that it will help you and from now on, hopefully you will follow this procedure more often in Photoshop and be an expert in this field in the future.
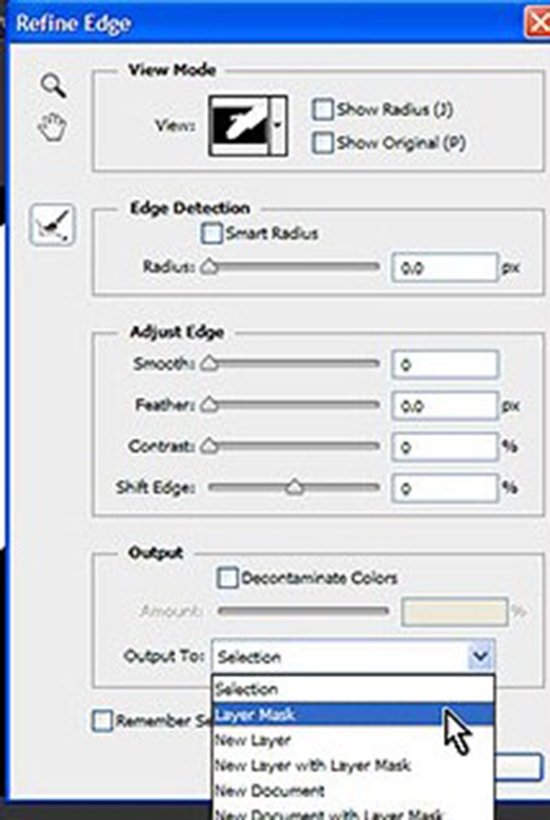
Adobe Photoshop is continually upgrading everyday to make our life easy. The CS6 version has some new options available to create layer mask. Lets discuss about this here. Adobe Photoshop CS6 has so many huge … Continue reading New Options to Create Layer Mask in Photoshop CS6
Read More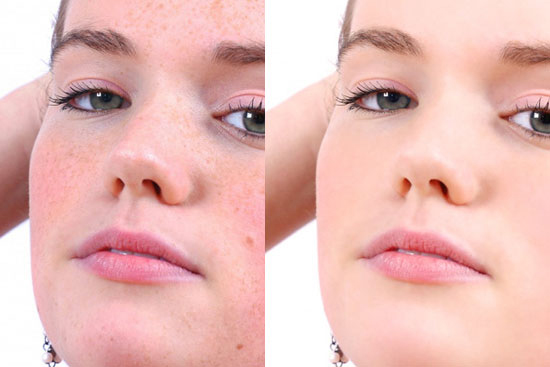
Here, you will learn on how to remove blemishes with some photo edit in Photoshop. I hope it will help you both the beginner and advanced level of students in a great deal. Photo Courtesy … Continue reading How to Remove Blemishes in Photoshop
Read More