How to Clipping Masks Effectively in Photoshop
Clipping masks can be extremely useful in the Illustrator workflow. Unfortunately, the way clipping masks get translated to print can be unexpected due to the fact that the vector programs used in production environments might not see the clipping masks. This guide shows how to use clipping masks and how to safely prepare them for print environments.
Photo Courtesy – Creating Clipping Mask
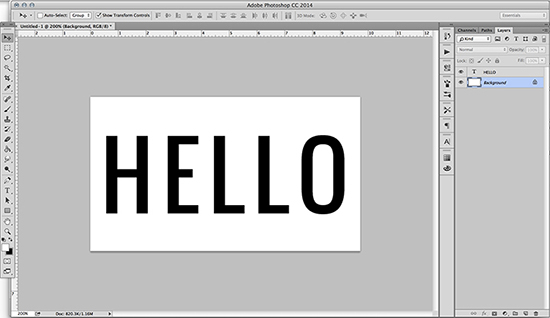
This example begins with a simple word, ‘Hello.’ The goal will be to clip off the top edge of the word. A regular clipping needs to be drawn over the section of the word that needs to be visible in the final result. With both the clipping path and the word ‘Hello’ selected, the drop down menu presents the option ‘Make clipping mask’ can be used. On the contrary, you can press Ctrl+7 for shortcuts. The final result, of course, clips off the top of the word, leaving a completely transparent space. The transparency is important to make a note of, as it might affect the final result.
Moreover, note in the layers panel that the clipping path is identified with an underline. Upon imagining the possibilities, one can begin to see the power of clipping paths in the creative workflow. The real issue with clipping masks is that vector programs used in production environments might not see the clipping masks. In other words in the example above, the word ‘Hello’ might get printed with a big black square over it. The solution is simple – the visible shapes need to be “flattened” into literal vector shapes. The beauty of a final design outlined in literal vector paths is first class.
In this way, you can photo edit and clipping masks effectively using Photoshop. Hope that helps!

Typically when you use the crop tool or use image size or canvas size you’re working with the entire image. But what if you want to work on multiple images in the same canvas area … Continue reading Use of Free Transform Tool in Photoshop
Read More
In this tutorial, you will learn how to resize an image using Adobe Photoshop. Resizing an image in Adobe Photoshop is a fairly simple task. Hopefully, it will help the beginner level of students in … Continue reading How to Resize an image in Photoshop
Read More