How to Remove Background From Hair Images using Photoshop
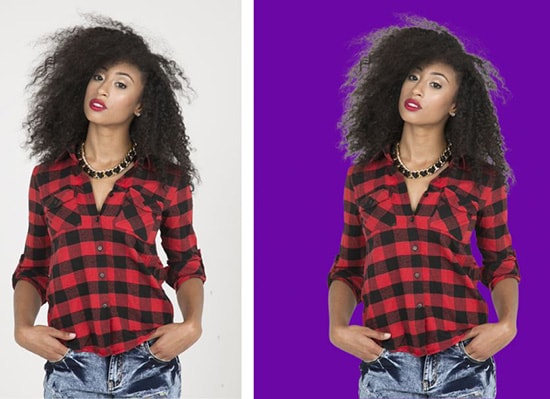
Here, you will learn on how to remove background from hair images using Photoshop. Hopefully, this will help you in a great deal. Trying to remove all this hair can be a nightmare. Using the background eraser tool makes life a little bit easier.

Photo Courtesy – Background Removal from Hair Images
Firstly, remove some of the background. Go to Windows> Layers. Unlock it by double clicking on the layer until it opens. Next, you will be using the eraser tool to delete some of the background. You will go all the way around the image on both sides as close as you can to the hair. Next, add a new layer and go back to the bottom and choose icon adjustments. Left click on that and choose solid color. Now, get rid of all background color and make it whatever color you want. Then, go back to the background eraser tool to the left hand side of the page. Select the brush size according to your image and then use a soft edge. Set the tolerance level at 50%. Continue all the way around. Do not get too far into the hair. Now if you choose to change the color, double click on layer thumbnail of color fill 1 layer and a box will pop up. Go to the left hand side again and select the burn tool. Go back to the top layer and select mid-tones and exposure 100%. Then you use the tool to go over all the edges of the hair, darkening them up, getting rid of some of the background. Now you can use any number of dark background colors.
That sum up the whole process. In this way, you can photo edit and remove background from hair images using Photoshop. Hope that helps! This simple process can also be used to add different backgrounds to your image as well.
