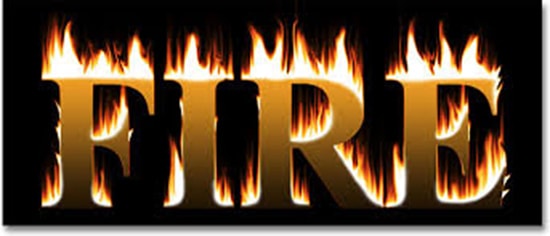
How to Create Texts on Fire in Photoshop
Here, you will learn on how to create texts on fire in Photoshop. I hope it will help you both beginner and advanced level of students in a great deal.

Photo Courtesy – http://www.photoshopessentials.com/
At first, open a document and manually give the width and height of the document to 800 and 700 pixels respectively. Select text tool along with the other sub-tools that are necessary to write a text. After writing down the text make sure that it is at the center of the document. Now, go to Layer> Rasterize> Type from the above toolbar. Duplicate the text layer by dragging to the ‘Create a new layer icon.’ Now, select the original text layer. Go to Image> Rotate Campus> 90 degree CW. Now, go to Filter> Stylize> Wind. Re-apply the wind effect three times by clicking Ctrl + F on keyboard. Now, go to Image> Image Rotation and select 90 degree CCW. Now, go to Filter> Blur> Gaussian Blur from the above toolbar and increase the pixels. This time, it is needed to duplicate the background layer. Select the text layer with the copy of the background layer. Right click on them and select ‘Merge Layers.’ Go to Filter> Liquify and adjust the tools that is there for taking. Select ‘Forward Warp Tool’ and try to give burning effect. After that, go to Image> Adjustments> Hue/Saturation and adjust hue, saturation and lightness to bring the fiery text effects. Duplicate the ‘Burning’ layer and adjust hue, saturation and lightness. On that layer, set the blending mode from normal to Overlay. That will do it.
It will sum up the whole process. In this way, you can photo edit and create this amazing effect. Hope that helps! I also hope that it will help you and from now on, hopefully you will follow this procedure more often in Photoshop and be an expert in this field in the future.

