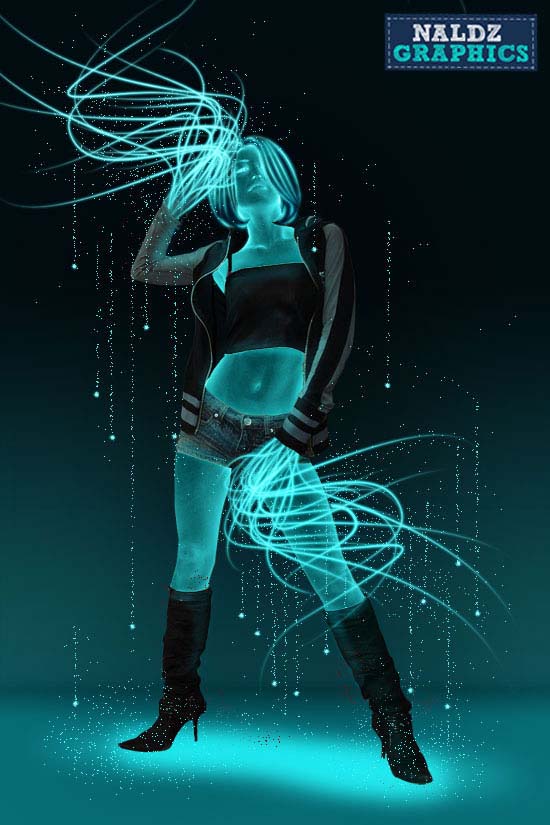
How to Create Basic Neon Lines in Photoshop
Here, you will learn on how to create basic neon lines in Photoshop. I hope it will help you beginner level of students in a great deal.
Photo Courtesy – http://naldzgraphics.net/
At first, open an image which will be the background layer. Create a new layer afterwards. Select a brush size which would be perfect for neon lines. Now, select the pen tool and begin drawing. When completed, right click on the selection and select stroke path. Make sure the brush is selected and simulate pressure is checked. Right click on layer and select ‘Blending Options.’ Click on “Outer Glow” and set the blend mode to ‘Screen,’ opacity to 75% and set the color by clicking on color picker. Lastly set the contour to ‘Half Round Contour.’ Now, select the ‘Eraser tool’ and erase the unnecessary lines. Select the pen tool, right click on selection and then delete path. That will do it. It will sum up the whole process.
I hope that it will help you and from now on, hopefully you will follow this procedure more often in Photoshop and be an expert in this field in the future.

Photographing light sources without over exposing them or underexposing other objects in the image can be tricky. This tutorial will show you how to give your images a realistic glow. At first, you will start by using … Continue reading How to Create a Realistic Glow in Photoshop
Read More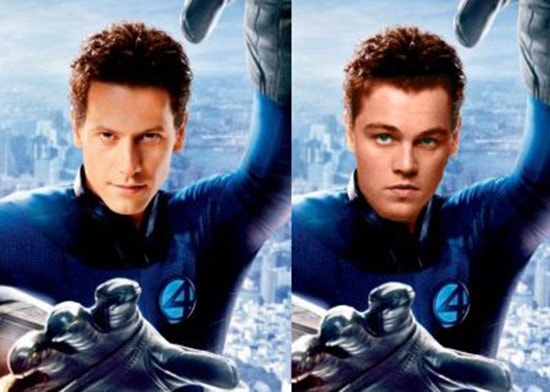
Here, you will learn on how to replace face in Photoshop. I hope it will help you both the beginner and advanced level of students in a great deal. Photo Courtesy – https://www.fiverr.com/ You will need … Continue reading How to Replace Face in Photoshop
Read More