Resize multiple images quickly in Photoshop
Hello Everyone! Today in this article we’ll learn about how you can resize lots of images fast in Photoshop. In my case, I have twelve images that are way too big for my needs. Most of these are huge but I want them limited to a maximum of 2000 pixels, weight or height-wise.
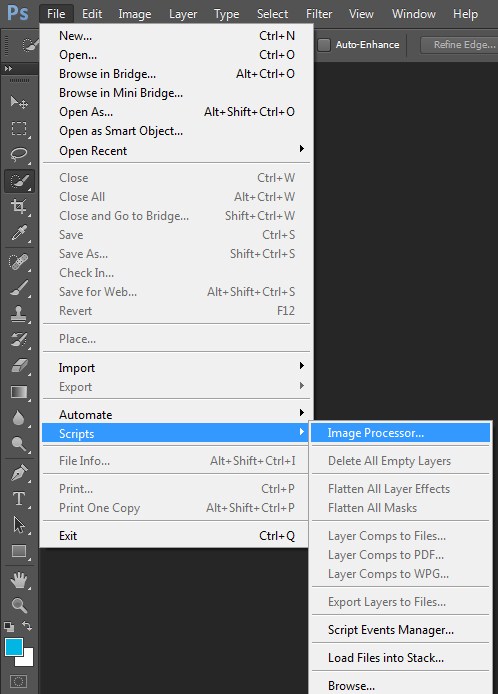
In my case, some of the images are shot in portrait mode, while the others are wide, meaning they’re in landscape mode. Whatever value is bigger, needs to be toned down. So here’s what we’ll do: With Photoshop opened but without any active projects, you will go to File, Script. From this list you will choose Image Processor.
This is a fairly old piece of technology, but it still does a pretty good job. Here’s what’s important: First, we’ll select our folder that contains our files. Just browse for it and select it. In case you have some additional folders inside it, you may want to check this option as well, Include All sub-folders.
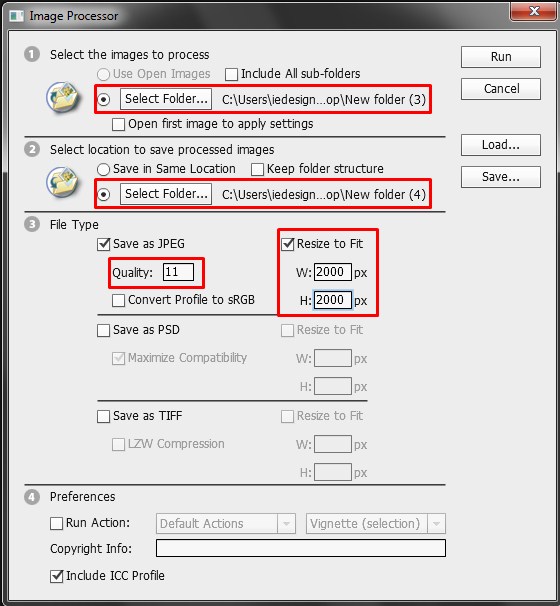
Step two is essential, I always suggest you save your work in another place on your drive. If you leave it at its default setting, you’ll overwrite your source images, which is not ideal.
At number three, we can choose our file quality and type, which is limited to JPEG, hence why I said this is pretty outdated stuff. Because of that we can’t export the most PNGs.
The quality goes from zero to 12. Most likely you’ll want to stay within the 9 and 12 range to get decent results. On the Resize to fit column is where the resize magic happens. Check this feature and you’ll be asked to enter some dimensions. Note: this reflects the maximum width and height values, it does not mess up your aspect ratio. So, if you put in 2000 by 2000, we won’t get square images, instead those set their maximum values. Since we just want to resize them, so we will hit Run.
Photoshop is going to open each image and it will perform that resize. The faster your processor, the sooner the programme will finish this task. Okay, we’re done. Let’s check out our new image sizes in the new folder selected. you will see that the image size are now changed.
That’s how you can resize images fast through the built-in image processor. This is a pretty good result, even though it’s limited to JPEGs, it only takes under 2 minutes.
Related Articles:
Photoshop tutorial: How to resize multiple images in Photoshop
Here, you will learn on how to give an image a comic style effect using Photoshop. Hopefully, this will help many students. Open the image that you want to give a comic style effect. Adjust … Continue reading How to Give an Image a Comic Style Effect in Photoshop
Read MoreIn this tutorial, you will get to know about the tool that is used for many purposes and one of the most important tools in Photoshop coined as the ‘eraser tool.’ When you click on … Continue reading Usage of ‘Eraser Tool’ in Photoshop
Read More