How to Create Double Exposure Effects in Photoshop
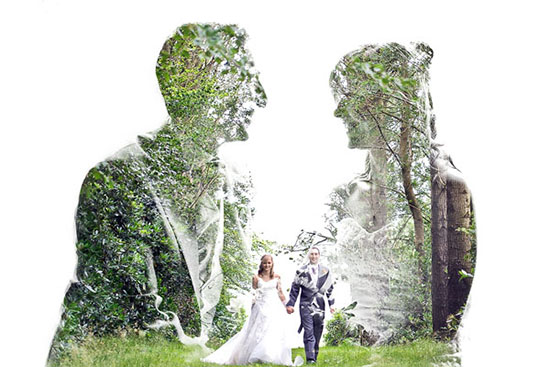
Image: dslrblog.com
Here, you will learn on how to photo edit and create double exposure effects in Photoshop. I hope it will help you both the beginner and advanced level of students in a great deal.
For this, you will need two images. One is that of a person and another one is that of an object. Open the image of a person that you want to work on. Select eraser tool and make the background of that image as white. Open the image that of an object. Supposedly it is picture of a tree with sky is seen at the up. Now go to Image> Adjustments> Replace Color from the above toolbar. Erase the sky which is blue because you will need to have a white background. Copy the image of tree layer and paste it into the layer of the image of a person. Now, set the blending mode from normal to lighten. Adjust the transformation which will look exactly what you want. Reduce the lightness a bit which will show the background more than it used to show. That sums up the whole process.
I hope that it will help you and from now on, hopefully you will create more and more glowing effect images like this and be an expert in this field in the future.
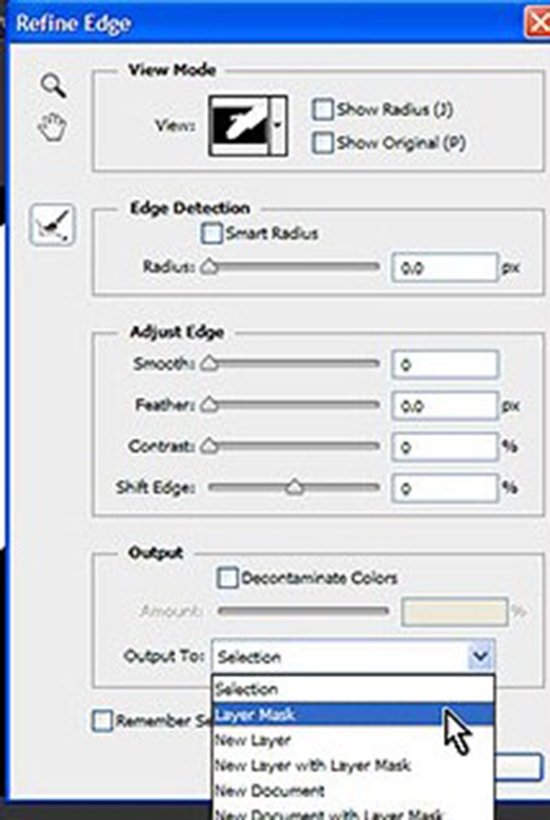
Adobe Photoshop is continually upgrading everyday to make our life easy. The CS6 version has some new options available to create layer mask. Lets discuss about this here. Adobe Photoshop CS6 has so many huge … Continue reading New Options to Create Layer Mask in Photoshop CS6
Read More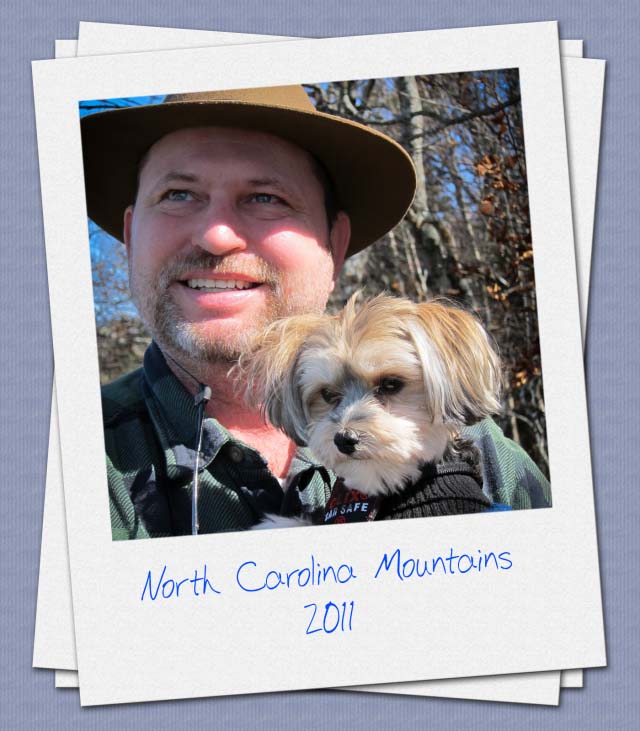
This tutorial will show you how to recreate the ‘Polaroid effect’ in Photoshop. It is a pretty straightforward process. At first, find a stock image of a Polaroid photo. Load up the stock image of the Polaroid and … Continue reading How to Create a Polaroid Style Photo in Photoshop
Read More