How to Create Basket-Weave Effects in Photoshop
Here, you will learn on how to create basket-weave effects in Photoshop. I hope it will help you both the beginner level of students in a great deal.
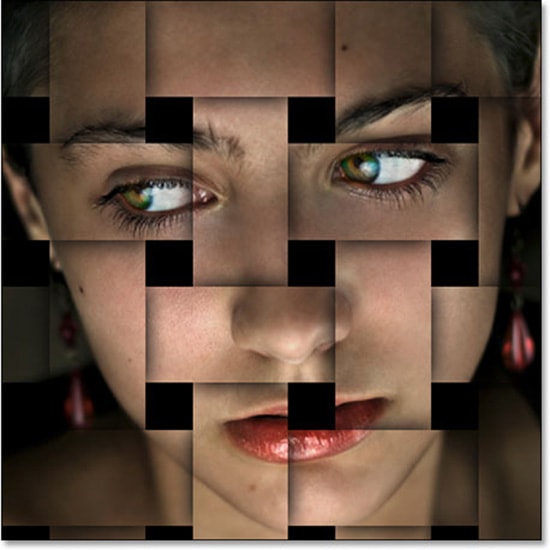
This effect works best for closely cropped portraits. At first, select an image that you want to work with. Select the crop tool and choose the width and height of that image to 870 pixels. Type 150 pixels for resolution and select ‘Delete Cropped Pixels.’ Go to the right corner of the image and then hold Shift + Alt key and drag it in a way where most of the box is inside the head and face of that person and press enter from the keyboard. The background and foreground color should be black and white respectively. Make a double copy of background layer. Select background layer and click Alt + Delete to fill it with black. Select layer 1 copy and go to Edit> Preferences> Guides, Grid and Slices from the above toolbar. In the grid sections, choose a light color for the grid. Make the ‘Gridline Every’ 217 pixels and divided into 6 subdivisions. Go to view and make sure ‘Snap’ is checked. Make the grid checked. With the ‘Rectangular Marquee Tool’ selected, make three column of boxes checked downwards. Skip one box and continue to do so until the last box. Click the layer mask icon to make a mask. Now, make three rows of boxes checked to the right. Skip one row and continue to do so until the last box. Now, select layer 1 and make a layer mask. Click Ctrl + H to hide the grid. Hit Ctrl + Click to the horizontal rows to make a selection of it. Select the vertical layer mask of layer 1 copy and hold Ctrl + Shift + Alt to make a selection that overlaps the vertical columns with the horizontal rows. Go to select and save selection. Press Q to select quick mask. Select ‘Paint Bucket Tool’ and left click inside the second empty box over the top to fill it in. Skip one box and fill it next one. Continue to do so until the last one remains. Now, go to the first empty box of the second row and fill it in. Skip one and fill it the next one. Continue to do so until the last one remains. Press Q to revert it back to selection and click Ctrl + J to cut the shape of the layer.
Photo Courtesy – http://www.photoshopessentials.com/
Click the thumbnail of the top layer and make it active. Open the channels panel. Press Ctrl + Click on Alpha 1 to make a selection of its shape. Click back on the layers panel and press Q to make it to a quick mask. This time click on the top left box and fill it in until the last one remains skipping one box of course. Then do the same on the second empty box of the second row. Press Q to make it into a selection and click Ctrl + J to cut the shape of the selection from the active layer. Now add shadows to its shapes. Go to Layer> Create Clipping Mask from the above toolbar to do that. Click the shapes as well by clicking Ctrl + Alt + G. Click the ‘fx’ icon on the bottom and choose outer glow. Click the color box and pick black color. Change the blend mode to ‘Multiply’ and bring down opacity to 50 percent and set the size to 40 pixels. To copy the outer glow shadow to the other shapes, go to the fx icon of right side of layer 2. Hold Alt key and drag it up to the top layer. Add texture now. Take a composite snapshot of the image. To do that, make the top layer active and press Ctrl + Shift + Alt + E. Go to Filter> Filter gallery. Open the texture folder and click ‘Texturizer.’ Choose texture as ‘Burlap,’ scaling 100 percent, relief is 1 and light is from the top. That sums up the whole process.
I hope that it will help you and from now on, hopefully you will create more and more transparent effect images like this and be an expert in this field in the future.

Here, you will learn on how to make glass effect in Photoshop. I hope it will help you both the beginner and advanced level of students in a great deal. Photo Courtesy – http://www.designyourway.net/ At first, … Continue reading How to Make Glass Effect in Photoshop
Read MoreExposure is the amount of light striking the surface of film or digital imaging sensor. It refers to the amount of light recorded on the film or sensor. Applying different exposure modes can transform your … Continue reading Exposure
Read More