Advanced Masking in Photoshop
In this tutorial, you will learn something about advanced Photoshop masking. It will be a little complex and suitable for advanced learners of Photoshop users.
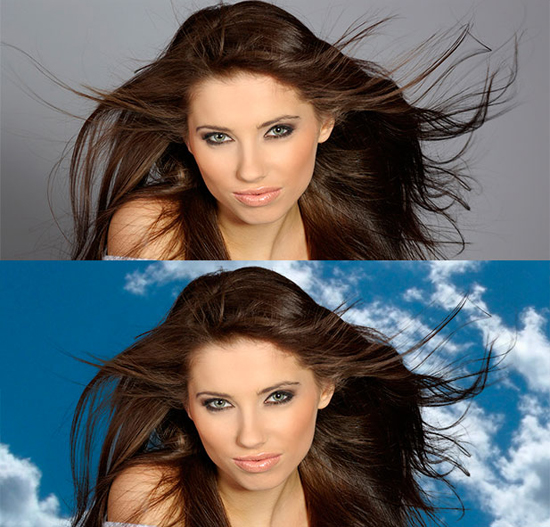
Open an image that is suitable for hair masking. Select a quick selection tool first. Make a new channel and work on there. However, do not forget to keep the transition in the image un-selected. Now, go back to the main layer. Make the selection of little rough but not refined. Create a mask next. In the other layer mask, you should have a background of this image. If you do not have it, make it one. Now, lets try and blend this into the background. You can get the refined edge around hands first not on the hair. Select mask edge. First, get the edge to look right for the hard edges. Adjust some of the adjust edge controls. Increase the feather as well as the contrast and decrease the shift edge.
After cleaning up the hard edges, you can see that you have made the refine edge a little bit sharper. Go back to the main layer again. Now, concentrate on the hair part. In the mask edge, adjust he radius which is under edge detection. Paint on the hair now. Paint it so that it covers the areas of transition and define it. Do not go too far into the defined mask and wait for it to process. The edges based upon the areas of the transition you have made. Now, open it with your background image. you need to re-adjust the area of transition which you do not want to have in your image. Select the decontaminate color and adjust it along with the shift edge from the adjust edge controls. After clicking OK, you are done with this. Hopefully, you will get benefited from the post.
This time, you will see how to make any person look evil in Photoshop. I expect and really hope that it will work well and help the beginner level students of Photoshop. Photo Courtesy – http://creativenerds.co.uk/ … Continue reading How to ‘Make any Person Look Evil’ in Photoshop
Read More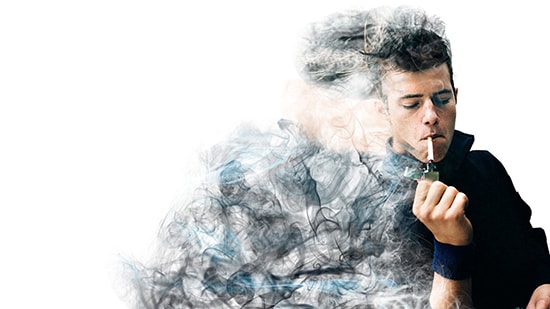
Here, you will learn on how to create smoke dispersion effects with photo edit in Photoshop. I hope it will help you both the beginner level of students in a great deal. Photo Courtesy – http://tophdimg.com/ … Continue reading How to Create Smoke Dispersion Effects in Photoshop
Read More