How to Create an Artistic Photo Manipulation in Photoshop
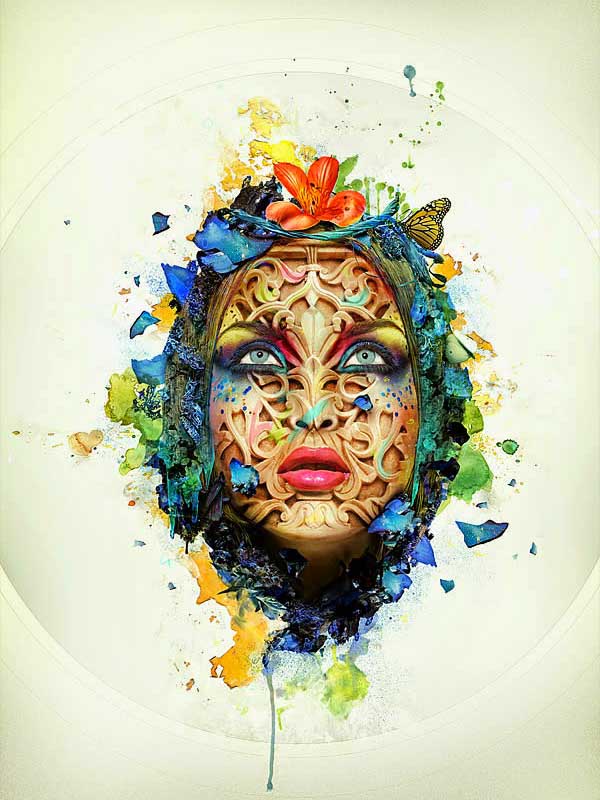
In this tutorial, you will learn on how to create an artistic photo manipulation in Photoshop. It will cover techniques like layer blending, layer masks, filter effects and the use of an adjustments layer. This process is also called leafy face photo manipulation. Hopefully, this will help both beginner and advanced level of students in a great deal.
First of all, create a new document with a size of 800 px * 1000 px with white background. Load the background texture image into Photoshop and select a portion of it. Copy and paste the selection over the document and re-size it to fit the canvas. Apply ‘Watercolor’ filter to this texture layer. In order to create some depths, use a big soft eraser to remove the unwanted portions. Now, open the image of a person after cutting down the head and neck using Photoshop to the canvas. Place it into the center after re-sizing it. Use a rough eraser and remove all the edges adjusting eraser size as necessary. Make some adjustments on the layer mask, levels and curves on the black and white adjustment layer according to your image. Start adding the leaves in. Open the left stock 1 image into Photoshop and use the ‘Lasso Tool’ to select a portion of it. Copy and paste the selection of the image and re-size it. Change the layer blending mode to ‘Screen’ for the new leaf layer. Repeat the process and add some more leaves to the areas.
Next, open the leaf stock 2 into Photoshop. Copy and paste the selection over to our document and apply the ‘Paint Daubs’ filter. Choose the layer blending mode of this leaf layer to ‘Multiply.’ Repeat this process and add 2 leaves on both sides of the face. Go back to leaf stock 2 image and select another different piece. Again, copy and paste the selection to our document and reduce its size and apply the black and white adjustment to this layer. Change the blending mode to ‘Screen’ for this leaf layer. Now, duplicate the new leaf layer that has been created before and keep the blending mode to ‘Screen.’ Use the free transform tool to rotate and re-size the layers to from a line. Add a few more transparent leaf layers to the top. You can change the layers blending mode to ‘Overlay’ for those leaf layers and you will see that a completely different effect altogether. Make some adjustments on the colors of the image by adding a new vibrance adjustment layer on top.
It sums up the whole process. In this way, you can photo edit and create this artistic effect. Hope that helps!

Here, you will learn on how to create texts on fire in Photoshop. I hope it will help you both beginner and advanced level of students in a great deal. Photo Courtesy – http://www.photoshopessentials.com/ At first, … Continue reading How to Create Texts on Fire in Photoshop
Read More
When a Photographer takes a photo it’s normally comes in raw format. The initial photo is big in size. To share it easily on the web or via email it is a good idea to … Continue reading Image Size-Resize your image on Photoshop
Read More