You find the photograph in a drawer. It is the only picture of your grandfather in his twenties.
A crease runs across his chest. The colors have faded to brown. One corner is gone, and the left side of his face has turned into a pale smudge.
You search "photo restoration" and every result shows a perfect before and after. Nobody tells you whether your photo can look like that.
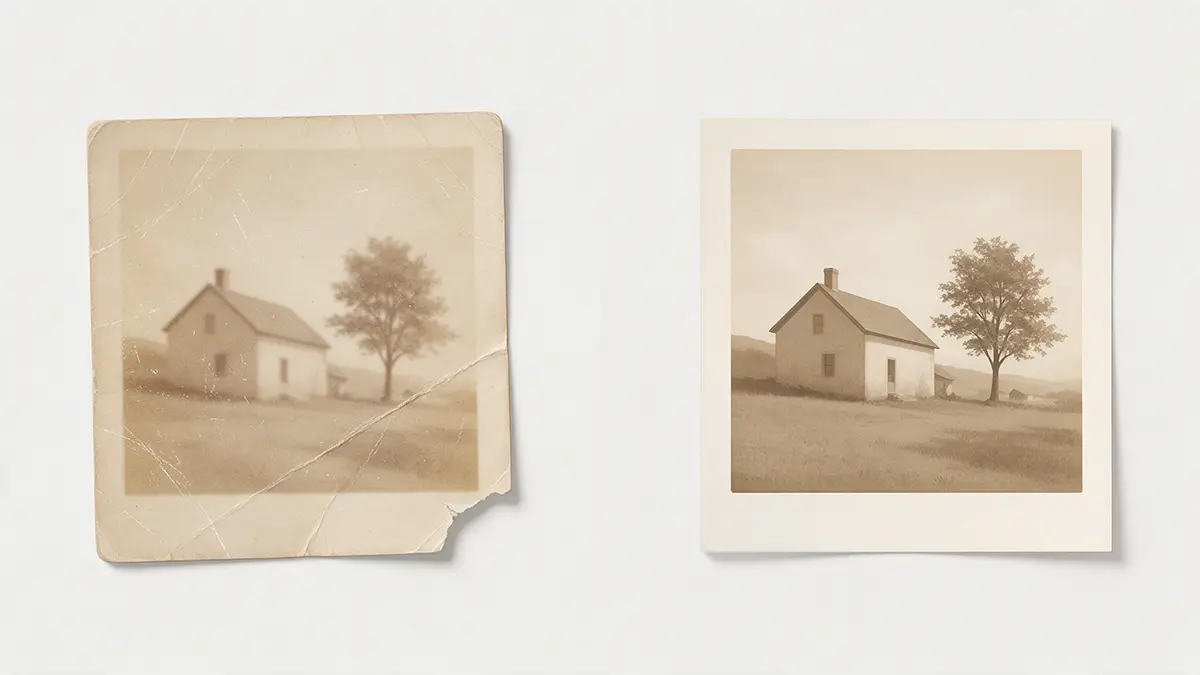
Illustration: a damaged print before restoration (left) and after (right), with the rebuilt corner outlined.
Now picture a different starting point. Before anyone opens Photoshop, you know which parts of the photo can be recovered, which parts can only be reconstructed, and which parts are gone for good. You decide what you want with the facts in front of you.
This guide gives you that map. You will learn what digital restoration can fix, where it turns into reconstruction, how to scan a fragile photo safely, and how to judge a restoration service before you spend money. You will also see a real project from ClippingPathService.com: a severely damaged family photograph, with a clear account of what was recovered and what was reconstructed.
The Question Behind Every Restoration Job
Most people ask, "Can you restore this photo?"
The better question is:
How much of the original image still exists in this file?
Restoration works on information that is still there. Dust, scratches, stains and fading hide information. A good editor can uncover it.
When information is missing, nothing can be uncovered. An editor can only draw new content in its place, using the surviving image as evidence. That is reconstruction, and it is a different job with a different result.
Restoration recovers. Reconstruction rebuilds.
Both can be useful. Problems start when nobody tells you which one you are getting.
Three Words That Get Mixed Up
Services use these terms loosely. Here is what each one means in practice.
| Term | What it means | Example |
|---|---|---|
| Restoration | Repairing damage while keeping the original information | Removing dust and stains from a face that is still visible |
| Enhancement | Improving contrast, sharpness and tone | Lifting a flat, faded portrait so features read clearly |
| Reconstruction | Drawing new content where the original is missing, using the surviving image as evidence | Filling in a torn corner by continuing the pattern around it |
| Interpretation | Adding detail with no source in the photo | Guessing the features of a face that has been wiped out |
The first two protect the photograph. The last two change it.
For a family portrait, a careful reconstruction may be exactly what you want. For an archive or a historical record, the same edit could be a problem. Neither choice is wrong. You just need to make it on purpose.
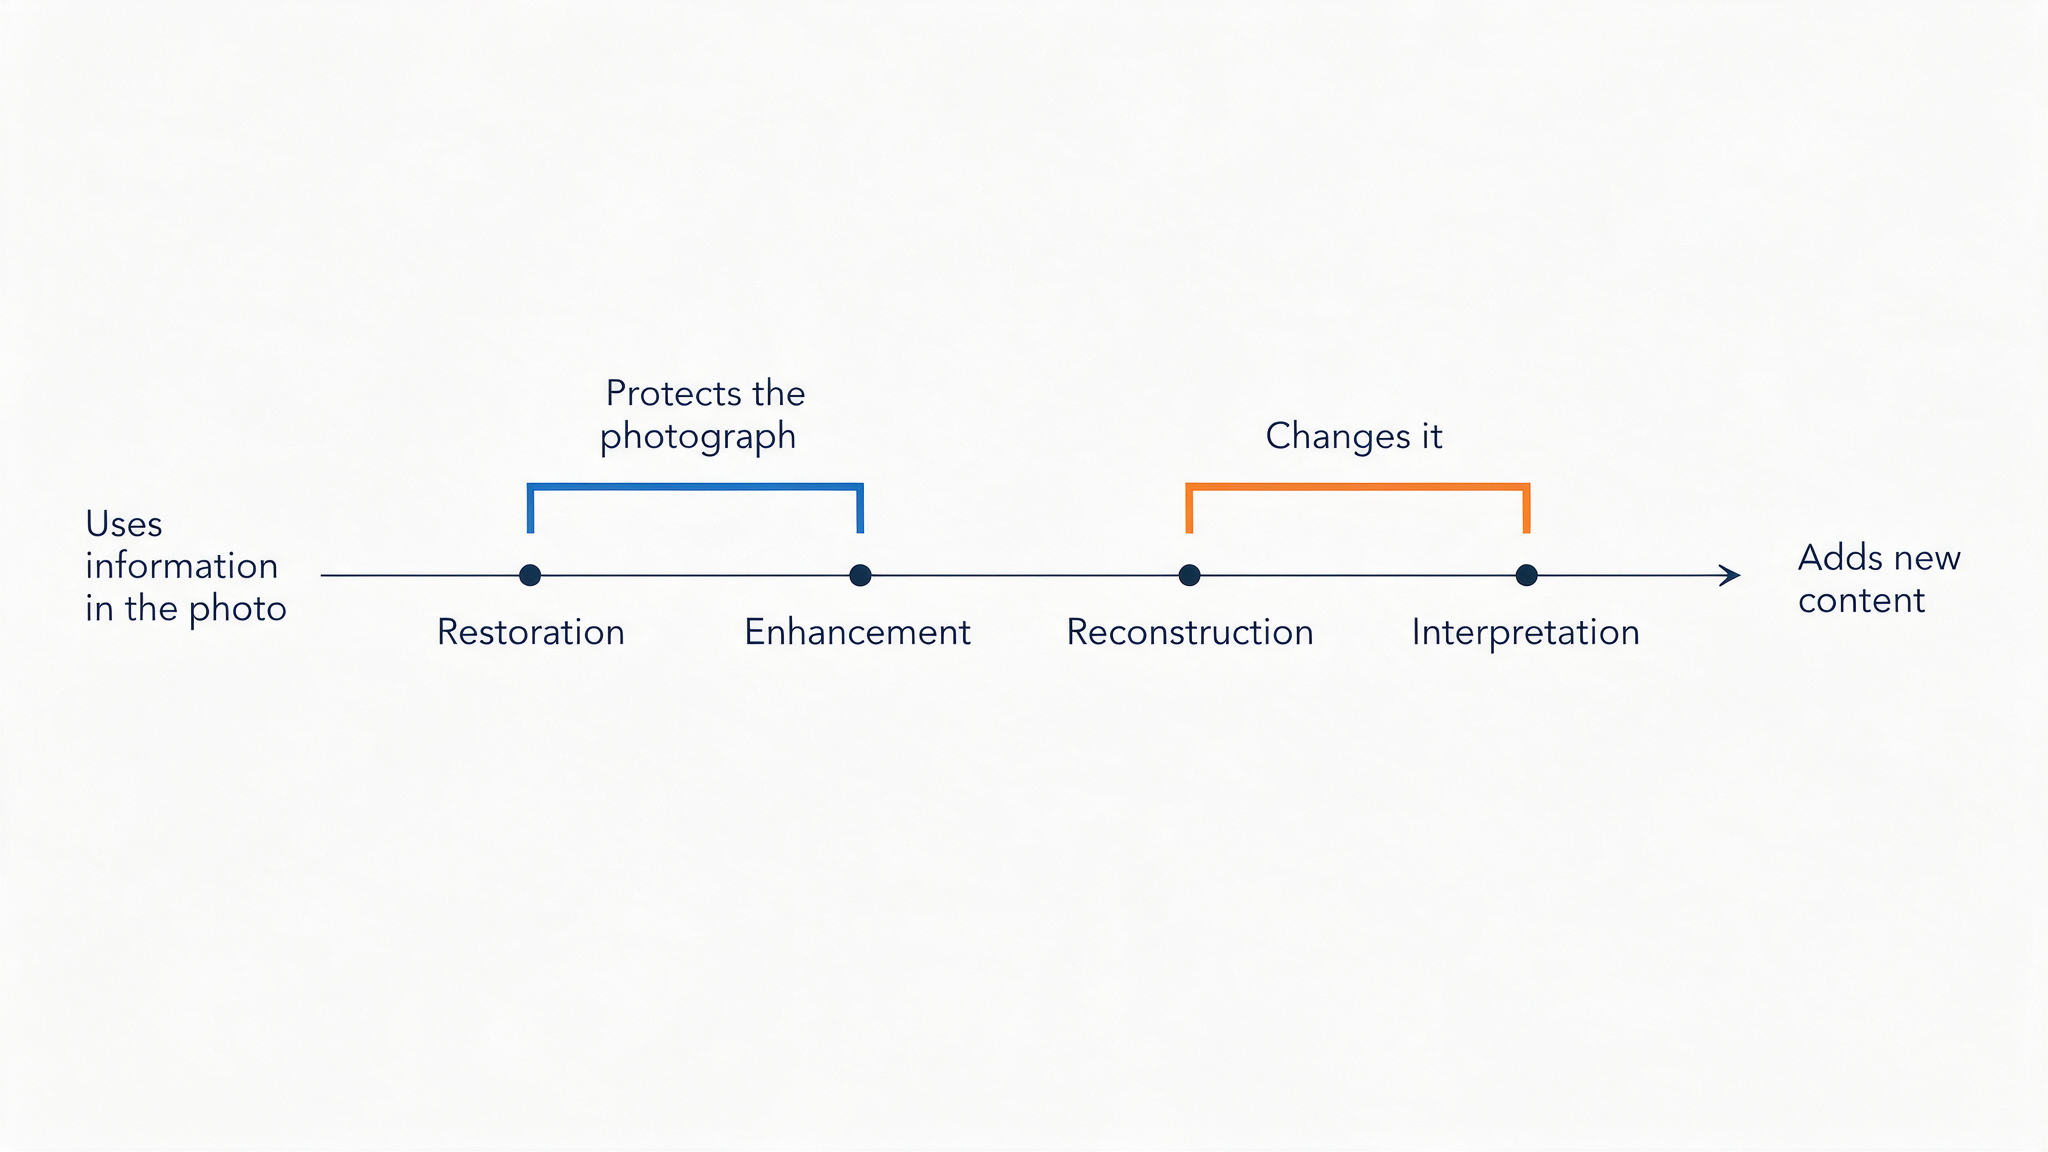
The first two protect the photograph. The last two change it.
What Can Usually Be Recovered
These problems sit on top of the photo. The image underneath is still intact, so recovery chances are high.
Dust, scratches and stains. Recovery: high for dust and surface marks, and good for fine scratches. The editor cleans the spots and repairs fine lines, matched to the grain and texture around them. You gain a clean photo that still looks like a photograph, not a smooth digital painting.
Fading and low contrast. Recovery: high, as long as some tonal range remains. Rebuilding brightness, contrast and tonal balance brings shadows and highlights back, so faces, clothes and backgrounds read again.
Color shifts. Recovery: good, with limits. Old color prints turn yellow, red or magenta as dyes break down. Correcting the cast gives natural skin, sky and fabric. If the dye has fully gone from a channel, the original color may be a best estimate, not a fact. Family members or other reference photos can help confirm it.
Creases and light tears. Recovery: good to high. The image on each side of the damage is still there, so the editor rejoins it along the line and blends the repair into the texture. The damage no longer pulls your eye.
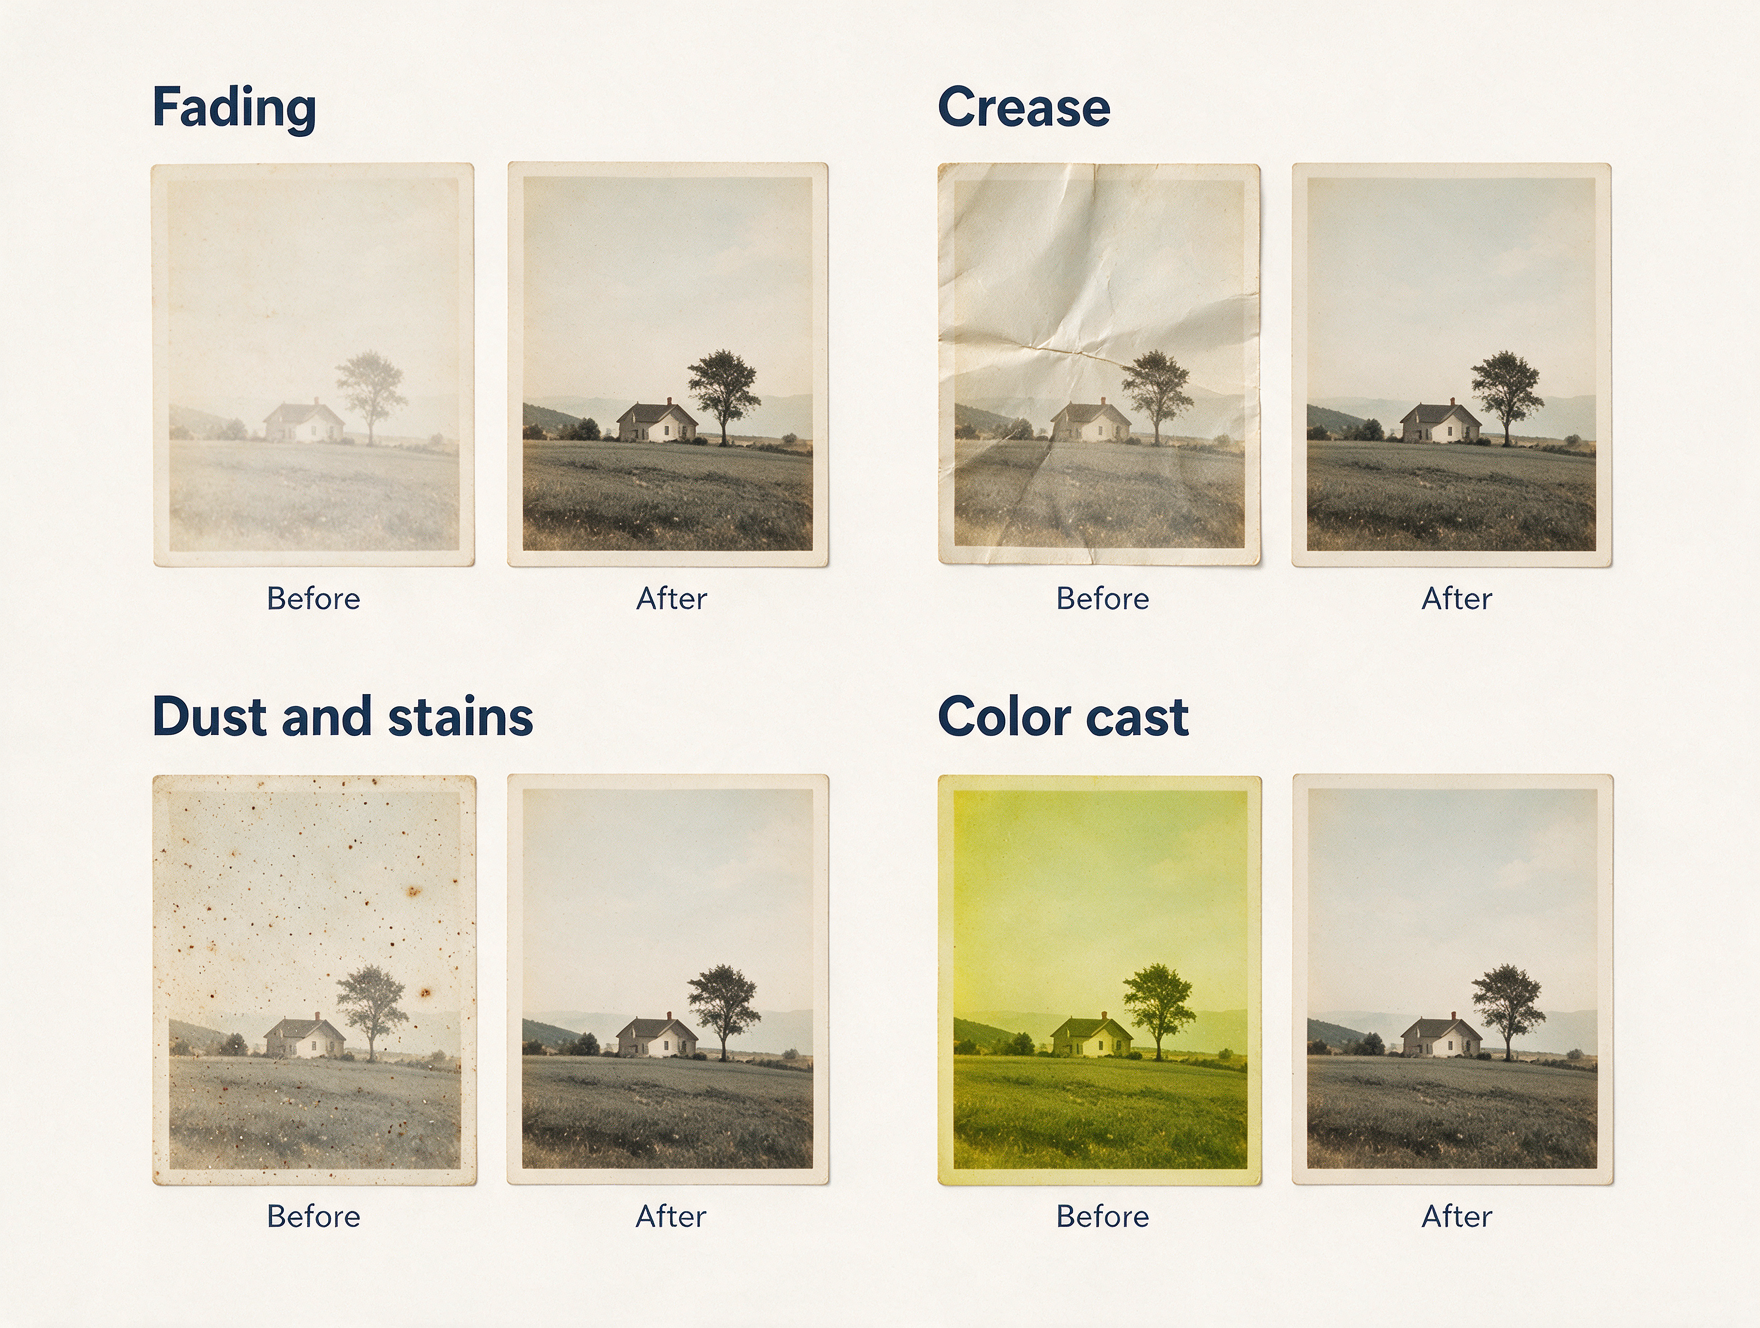
Illustrative examples of damage that sits on top of the image and can usually be recovered.
What Can Be Partly Recovered
Here the answer depends on how much remains.
Larger tears and missing corners. If the missing area is a plain background such as a wall, sky or studio backdrop, rebuilding it is straightforward and easy to check. If the missing area contains part of a person or an object, the editor is now drawing, not repairing.
Scratches that cross faces, hair or clothing. A scratch on an empty background can be repaired from the pixels beside it. The same scratch across a face has to be repaired with the shape, direction and texture of the features in mind. The case study below is a good example.
Heavy fading. A photo that has faded to a faint ghost can sometimes be pulled back, but noise and grain rise with every adjustment. You may get a usable image, though not a crisp one.
Low-resolution scans and small prints. Sharpening and upscaling can make a small image easier to view and print. Upscaling increases pixel dimensions, but it cannot reliably reconstruct authentic details that were never captured. In a small face, features that were never recorded can be estimated by software, but the result is a guess that cannot be checked against the original.
The rule for this middle zone: ask the editor to show you which parts of the result came from the photo and which parts were rebuilt.
What Usually Cannot Be Recovered
These losses are not damage on top of the image. The information itself is gone.
- Faces that are missing or wiped out. If the eyes, nose or mouth are no longer in the file, they cannot be uncovered. They can be drawn from a guess. A guess is not your grandfather.
- Heavily blurred or out-of-focus detail. Blur from the original shot cannot be reversed into real detail.
- Text and fine patterns that never resolved. A sign, a badge or a pattern that was never legible will not become legible.
- Large areas destroyed by water, mold or burning. Where the emulsion has gone, so has the image.
- True original color in fully faded prints. The color can be estimated. It cannot be known.
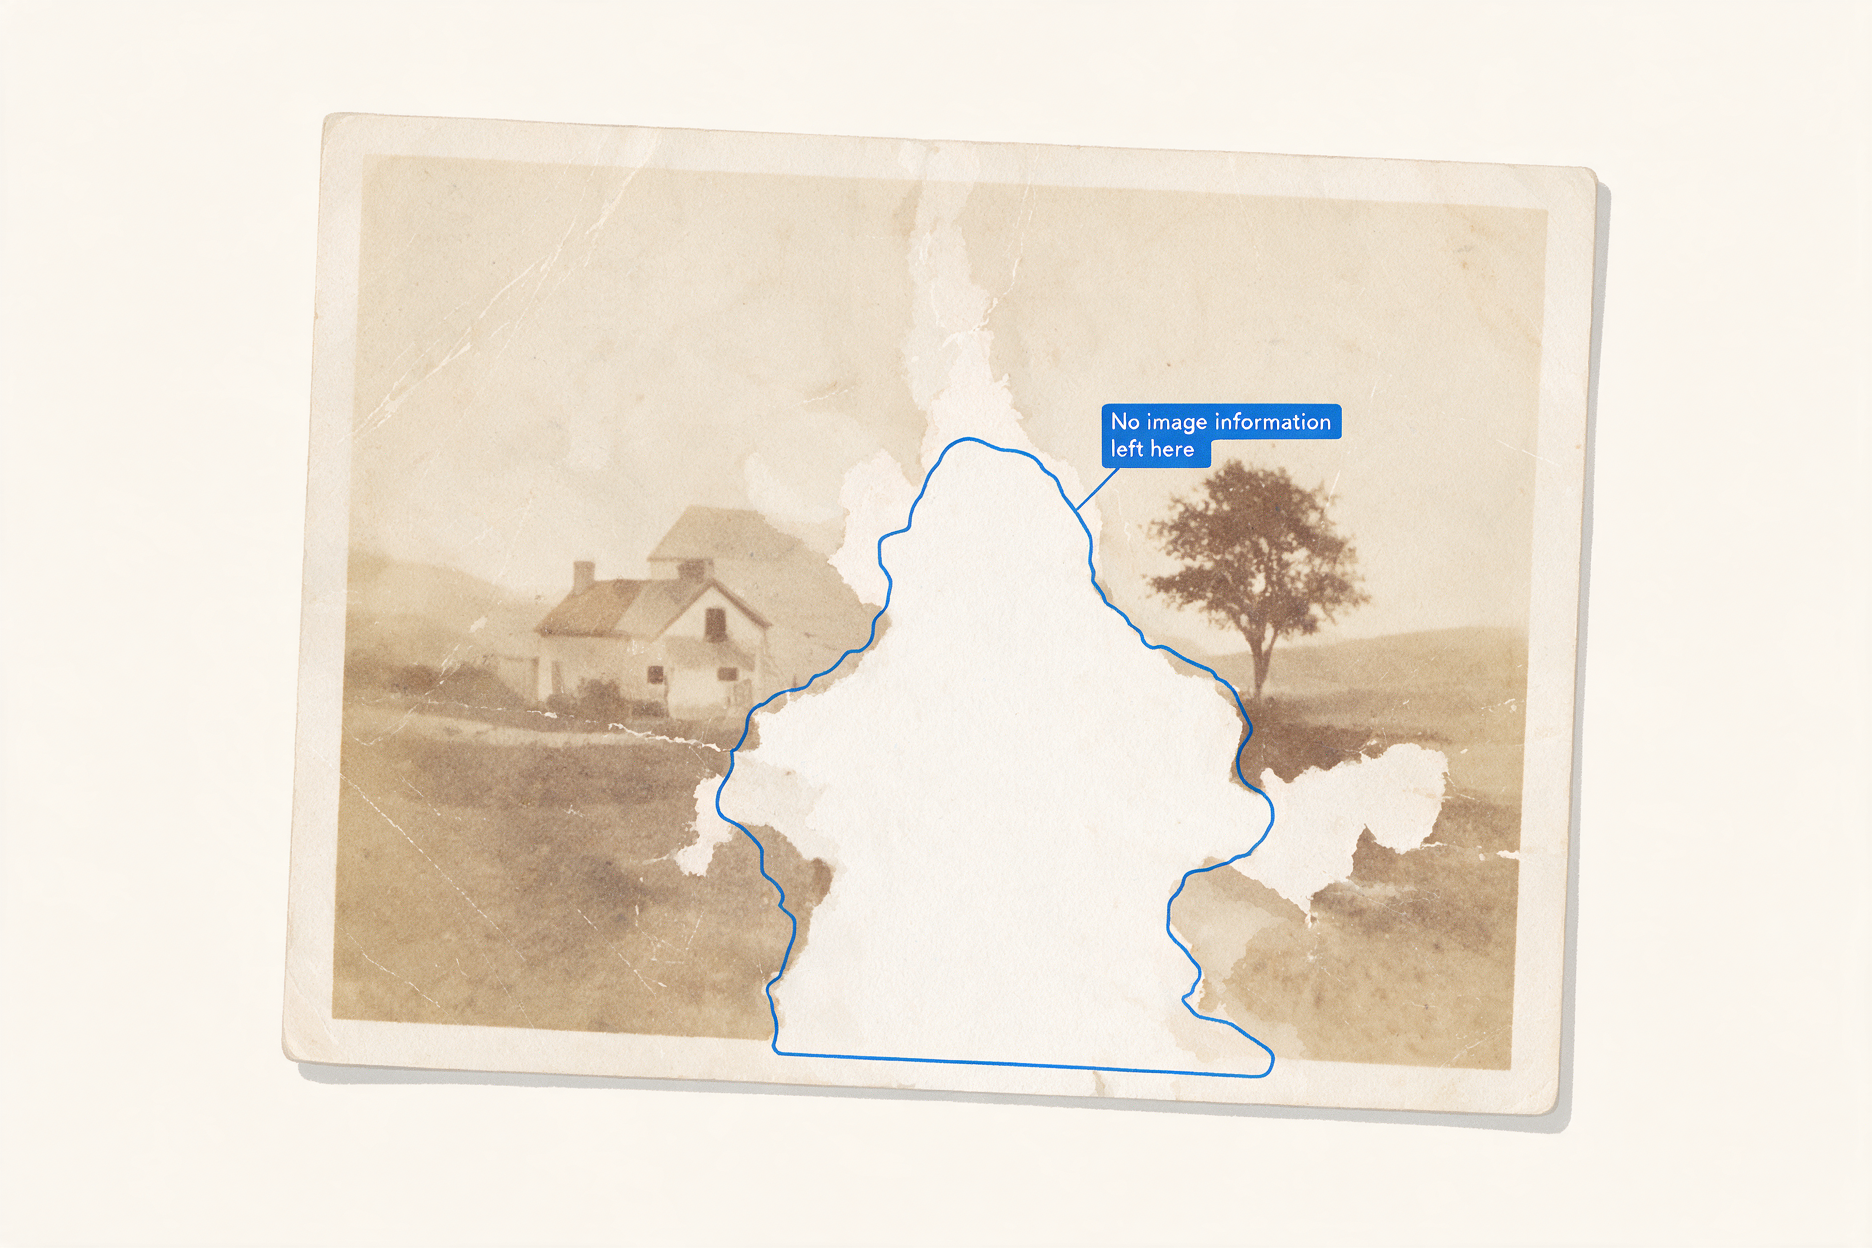
Illustrative example. Where the image is gone, only a guess can fill it.
AI Restoration and Upscaling: What They Can and Cannot Do
AI tools can be useful for light damage, and results vary a lot by photo. They do not reliably repair every scratch or every faded area, and they can leave artifacts, smeared texture or unnatural skin.
The bigger issue is what happens when a tool fills in missing areas. AI reconstruction can generate details that look realistic but cannot be checked against the original photograph. A restored face can look sharp and still not look like the person. Relatives may say, "That doesn't look like him." That is generated detail, not recovered detail.
Upscaling works the same way. It increases the pixel dimensions of an image, which helps with printing. It cannot reliably recover original information that was never captured or has been lost. Any new detail in an enlarged image is estimated.
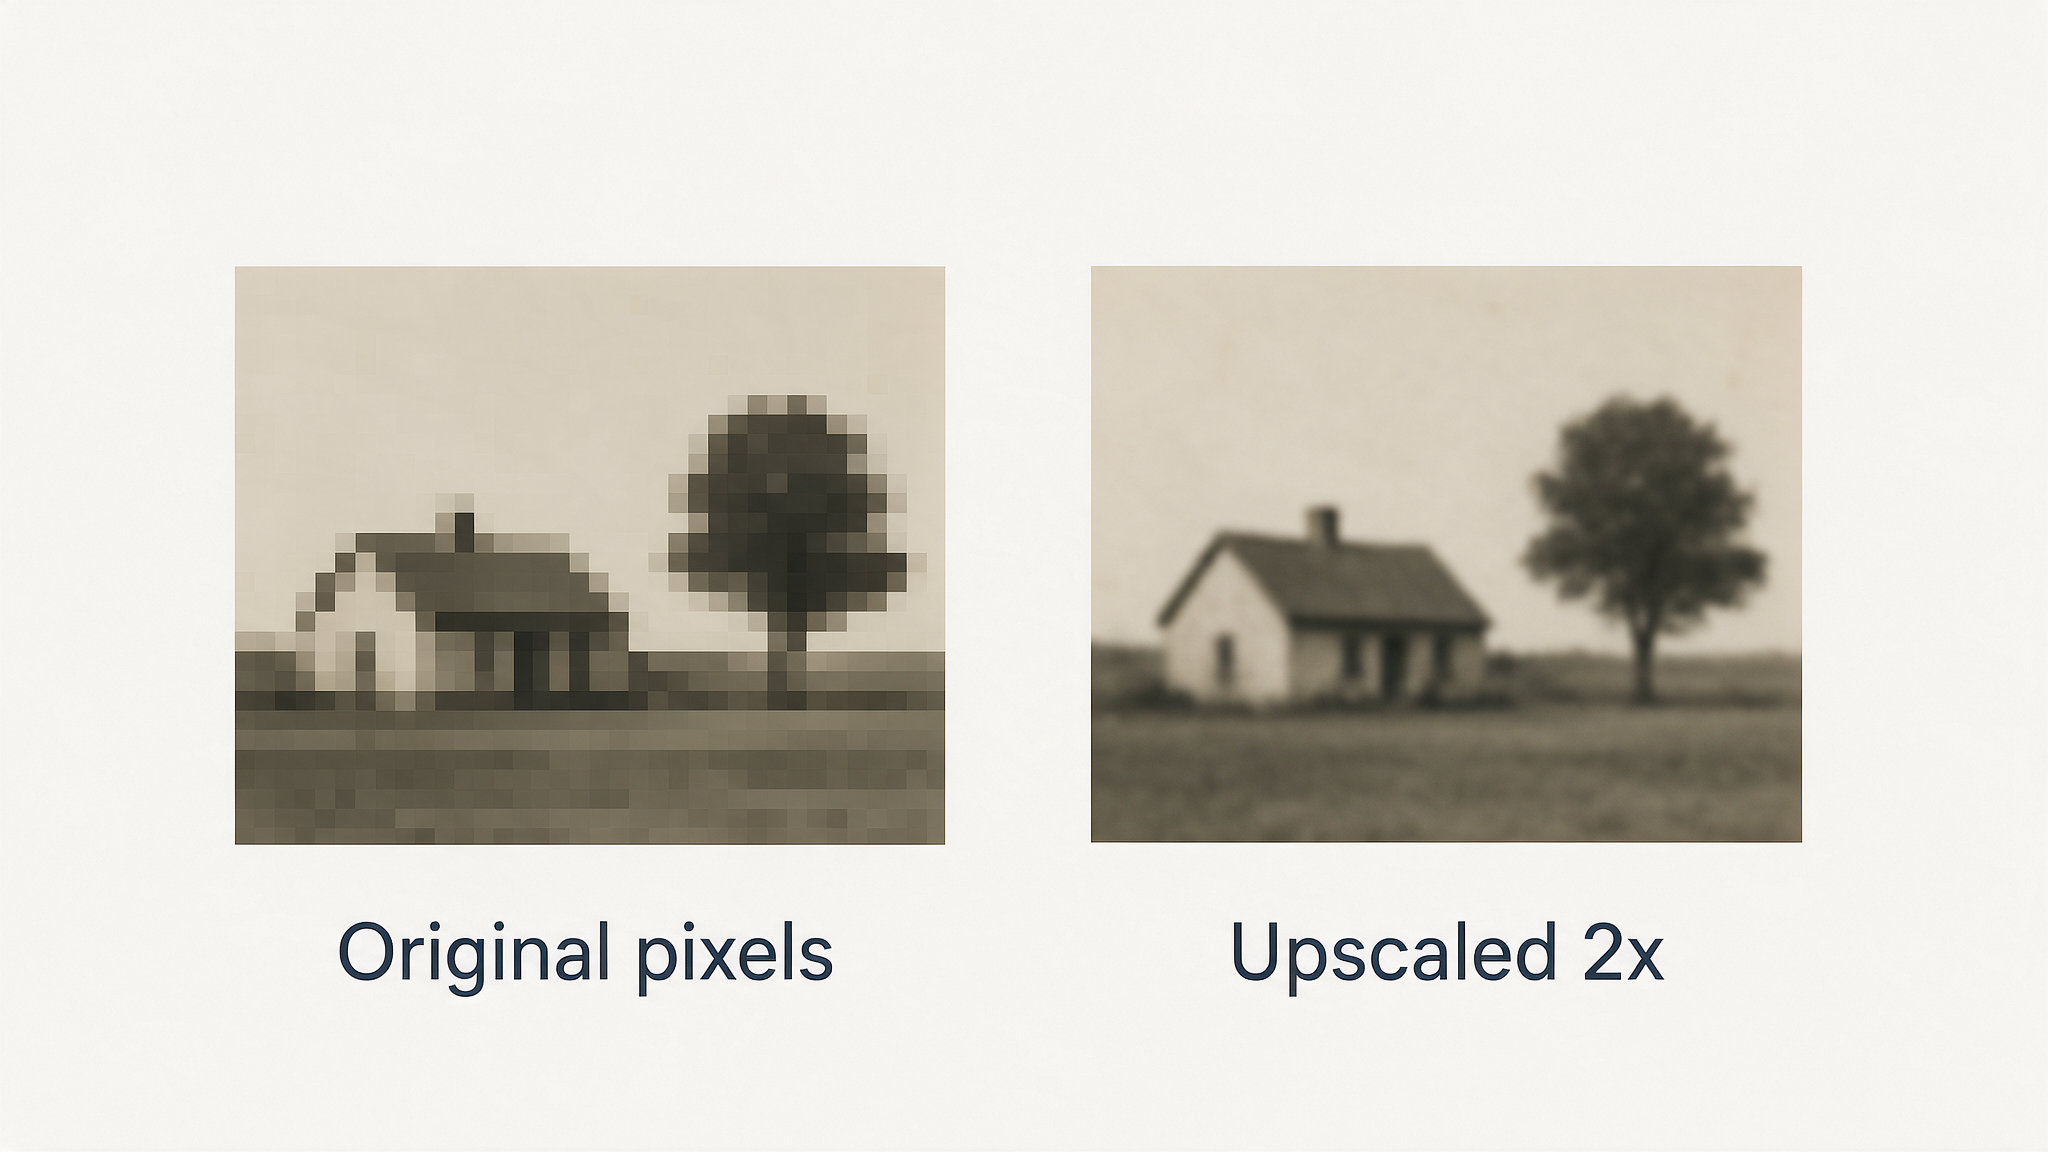
Illustrative example. Left: original pixels. Right: the same area upscaled to twice the size. Enlarging adds pixels, not verified detail.
Whoever does the work, human or AI, ask these questions:
- Which areas were repaired from surviving detail, and which were generated?
- Can I compare the result with the untouched original scan?
- Does the face still match other photos of the same person?
Digital Restoration Does Not Repair the Original Print
Digital restoration repairs a digital image. It does not physically repair the print, negative or slide you scanned. The original keeps its tears, stains and fading.
That affects what you do first:
- Scan before you try anything else. A good scan protects the image even if the original keeps deteriorating.
- Do not tape, glue or flatten a damaged print yourself. The Library of Congress notes that self-stick tape can be extremely difficult to remove and often causes condition problems over time.
- Consult a photograph conservator for valuable or fragile originals. The Library of Congress advises doing so when an item is of particular value, has progressing damage, or is stuck to glass, to another photo or to an album page. The American Institute for Conservation lists conservators in its Find a Professional directory.
You can do both: have the original assessed by a conservator and have a copy of the scan restored digitally.
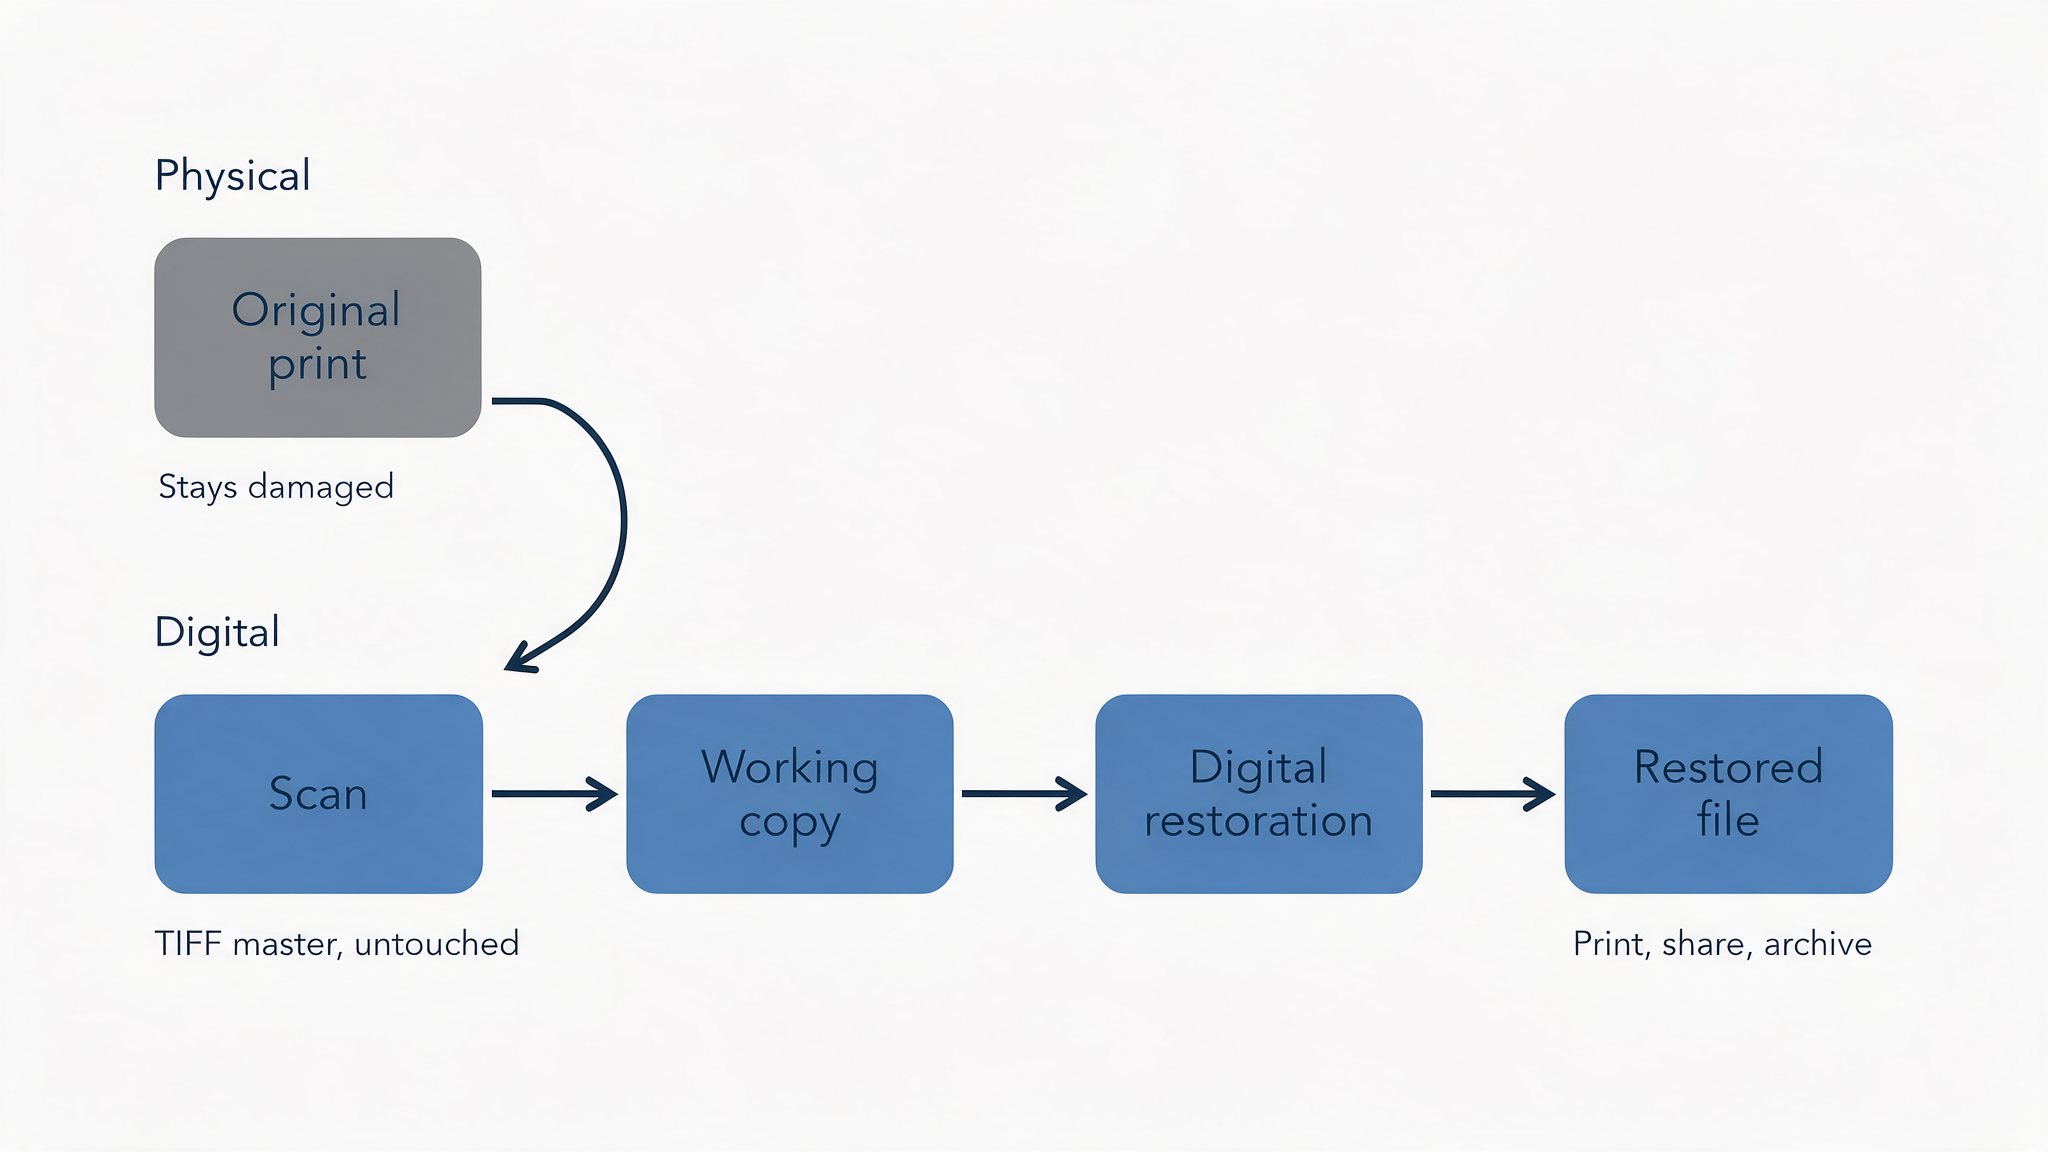
Digital restoration changes the file, not the original print.
Sources: Library of Congress, Care, Handling and Storage of Photographs and National Archives, When to Call a Conservator.
How to Prepare and Scan a Damaged Vintage Photograph
A restoration can only be as good as the scan it starts from. A little care before scanning protects both the original and the result.
Handle the photograph gently
- Wash and dry your hands first. Clean, lint-free cotton or nitrile gloves are recommended for handling photographs.
- Hold prints by the edges and keep them flat and supported.
- Do not peel photos from album pages, frames or glass. If a photo resists, stop and ask a conservator.
- Heavily damaged, flaking, curled, brittle or historically valuable photographs may need a conservation assessment or a professional scanning service before anyone puts them on a scanner. Do not try to flatten, unroll or press them yourself.
- Do not clean the surface with liquids or wipes. Leave dust and marks for the digital restoration stage.
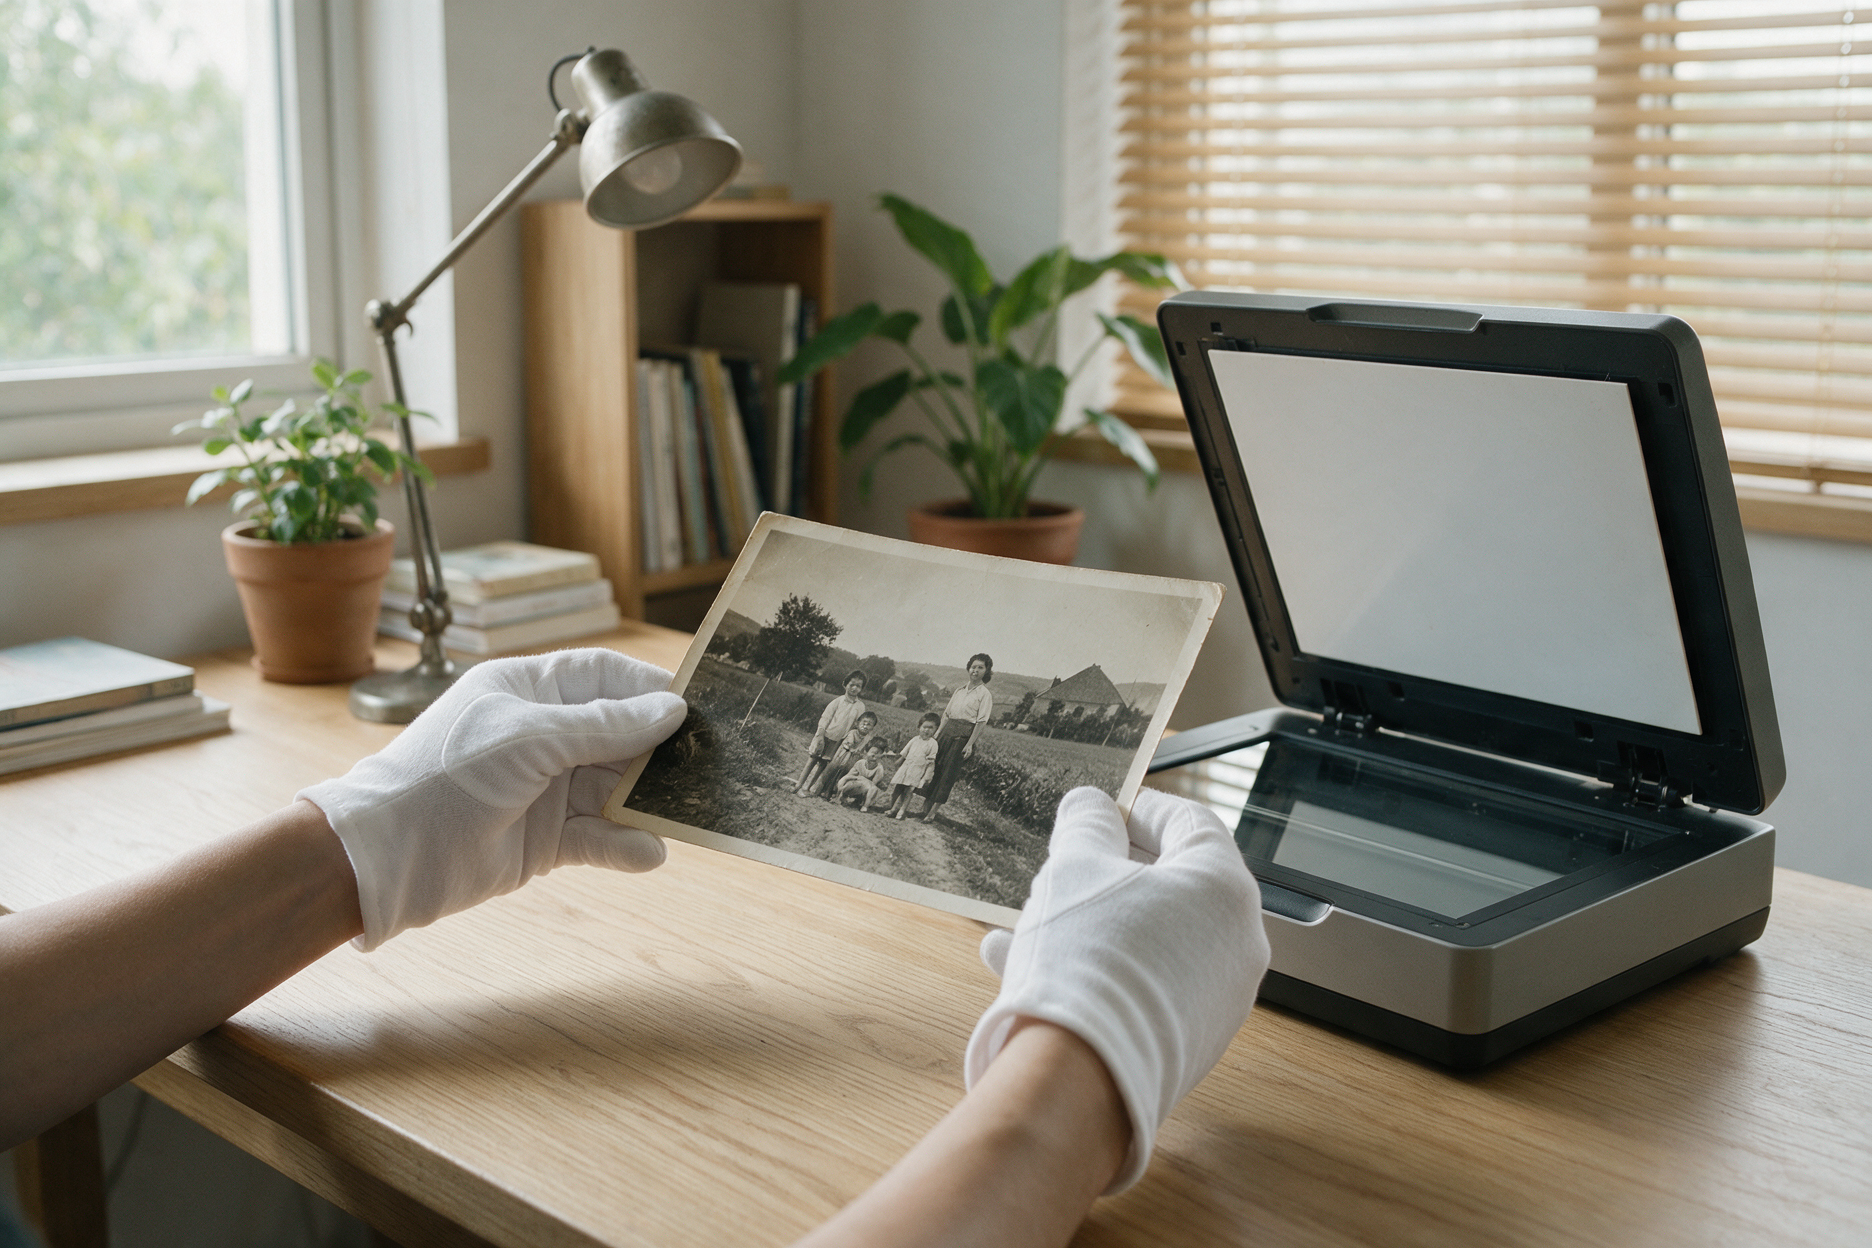
Hold prints by the edges and support them flat. Fragile or valuable prints need a professional.
Choose a resolution that fits your goal
There is no single correct setting. The right resolution depends on the size of the original, its condition and how you plan to use the result.
| Situation | Suggested approach |
|---|---|
| Small print you may enlarge | Scan at a higher resolution, such as 600 ppi or more, so there is room to enlarge |
| Print you will reproduce at about its original size | A lower resolution may be enough, depending on the final print size |
| Large print or poster-size original | Check the final print size first, then work back to the pixels you need |
| Badly damaged or very faded print | Scan at a higher resolution, since fine damage and surviving detail are easier to separate |
| Sharing on screen only | A moderate resolution is usually enough |
A simple check for printing: multiply the final print size in inches by 300 to get the pixel dimensions you need. An 8 × 10 inch print at 300 ppi needs about 2400 × 3000 pixels. Enlarging a low-resolution scan later does not add real detail.
Use a lossless format and keep the original scan
- Save the master scan as an uncompressed or losslessly compressed TIFF. Avoid repeatedly saving the same file as JPEG, because each save can lose detail.
- Keep the unedited master scan untouched, and give the editor a copy.
- Turn off automatic enhancement in your scanner software, so the file shows the photograph as it is.
- Scan the back of the photo too if it carries writing, stamps or dates.
Scan flat and clean
- For stable prints, a flatbed scanner is usually the best option. Phone photos often add glare, shadows and perspective distortion.
- Clean the scanner glass and make sure the print lies flat.
- If a photo is flaking, curled or fragile and will not lie flat on its own, do not force it. Stop and ask a conservator or a professional scanning service.
Damage, Recoverability, Method, Outcome
Use this table to size up your own photo.
| Damage | Recoverability | Method | Realistic outcome |
|---|---|---|---|
| Dust and surface defects | High | Spot cleanup | Clean, natural-looking original |
| Fading and flat contrast | High | Tonal restoration | Clear, readable image |
| Color cast | Good | Color correction | Natural color, possibly estimated |
| Creases and light tears | Good to high | Seam repair and blending | Damage barely visible |
| Scratches across faces or clothing | Partial | Careful manual repair | Natural result, with some reconstructed detail |
| Missing background area | Good | Careful reconstruction | Clean look, reconstructed content |
| Missing part of a face | Low | Reconstruction | Interpretation, not true recovery |
| Blurred or low-resolution detail | Low | Enhancement | Easier to view, no verified new detail |
Case Study: Restoring a Severely Damaged Family Photograph
This project from ClippingPathService.com shows the middle zone in practice. The photograph was badly damaged, but the scan still held enough information to work with. Some areas could be recovered. Others had to be reconstructed.
The brief
A severely damaged vintage family photograph came to ClippingPathService.com as a 2400 × 3200 px scan. The damage was too extensive for simple cleanup, so the goal was to restore the photograph while keeping its original character and making the result look as natural as possible.
The damage
- Deep scratches across the subjects and the background
- Fold and crease marks through important areas
- Faded and uneven contrast
- Numerous dust spots and small surface defects
- Damaged edges and corners
- Missing details around facial features and clothing
- Inconsistent texture caused by age and wear
The hardest part was where the damage crossed the subjects. Removing a scratch from an empty background is relatively simple. Repairing the same scratch where it crosses a face, hair or clothing takes much more care.
The workflow
- Assessment. The photograph was examined at high resolution to find the extent and type of damage. Areas were grouped by the repair they needed, so scratches, missing details, dust, tone and edges were each handled on their own terms.
- Scratch and crease repair. The larger scratches and creases came first. Simple background damage could be rebuilt from nearby image information. More complicated sections were edited manually so the repair followed the original texture and direction. Scratches through faces and clothing got particular attention, because they could not be repaired without reading the surrounding detail.
- Reconstruction of missing details. Where original detail was partly or fully obscured, the area was reconstructed using the surviving visual evidence in the photograph: facial proportions, clothing patterns, edges and surrounding textures. Reconstruction does draw new pixels. The aim was restoration, not redesign, so the new work was kept consistent with what the rest of the photo supported, and no decorative detail was added to make the image look more polished.
- Dust and surface cleanup. Smaller particles, spots and imperfections were cleaned after the major damage was fixed. The cleanup was selective, and natural grain was kept where possible, because too much smoothing makes an old photograph look artificial.
- Tonal and contrast correction. Age had flattened the photograph's tonal separation. Contrast was adjusted to improve visibility while keeping detail in both dark and light areas, without an overly sharp or heavily processed look.
- Final detail refinement. The image was inspected at high magnification. Faces, hair, clothing edges, background transitions and reconstructed areas were checked, and anything that looked too smooth, repetitive or disconnected from the surrounding texture was refined before delivery.
What was recovered and what was reconstructed
This is the distinction that matters most for anyone judging a restoration.
| Part of the photo | How it was handled | What that means |
|---|---|---|
| Faded tonal range | Contrast and tonal correction | Recovered. The information was still in the scan |
| Dust, spots and small defects | Selective cleanup | Cleaned. The image sat underneath |
| Scratches and creases over simple background | Repaired from nearby image information | Repaired from neighboring pixels. Reliable where the background is plain |
| Scratches and creases across faces and clothing | Manual editing guided by surrounding detail | Partly reconstructed. Accuracy depends on how much detail remained |
| Six large damaged areas | Reconstructed from surviving visual evidence | Reconstructed. A plausible continuation of the image, not verified original detail |
Reconstructed regions were built from evidence that survived in the photograph. They are informed continuations, not original details that have been historically verified. Recovered areas carry more certainty than reconstructed ones, and the final image should be read that way.
Quality control
The finished photograph was checked at both full-image and close-up views for:
- Remaining scratches or crease marks
- Visible cloning or repetitive patterns
- Inconsistent texture
- Artificial-looking facial details
- Uneven tonal transitions
- Damaged edges and corners
- Overall balance between restored and original areas
Close inspection matters because a restoration can look convincing at normal viewing size and still show obvious flaws when you zoom in.
The result
The major scratches and crease marks were removed, damaged sections were reconstructed, surface defects were cleaned, and the faded tonal range was improved. The original composition and photographic character were kept.
| Project detail | Result |
|---|---|
| Image type | Vintage family photograph |
| Original image | 2400 × 3200 px |
| Final output | 4800 × 6400 px |
| Restoration scope | Full image restoration |
| Major scratches | 47 repaired |
| Large damaged areas | 6 reconstructed |
| Minor defects | 100+ cleaned |
| Final formats | TIFF and high-resolution JPEG |
| Review | Final quality-control inspection |
The final file has twice the pixel dimensions of the scan. That makes it better suited to printing and preservation, but a larger file does not hold more of the original photograph. Detail that was lost before scanning was not recovered by enlarging.
Before and after
Side-by-side comparisons make the difference between recovered and reconstructed areas easiest to judge.
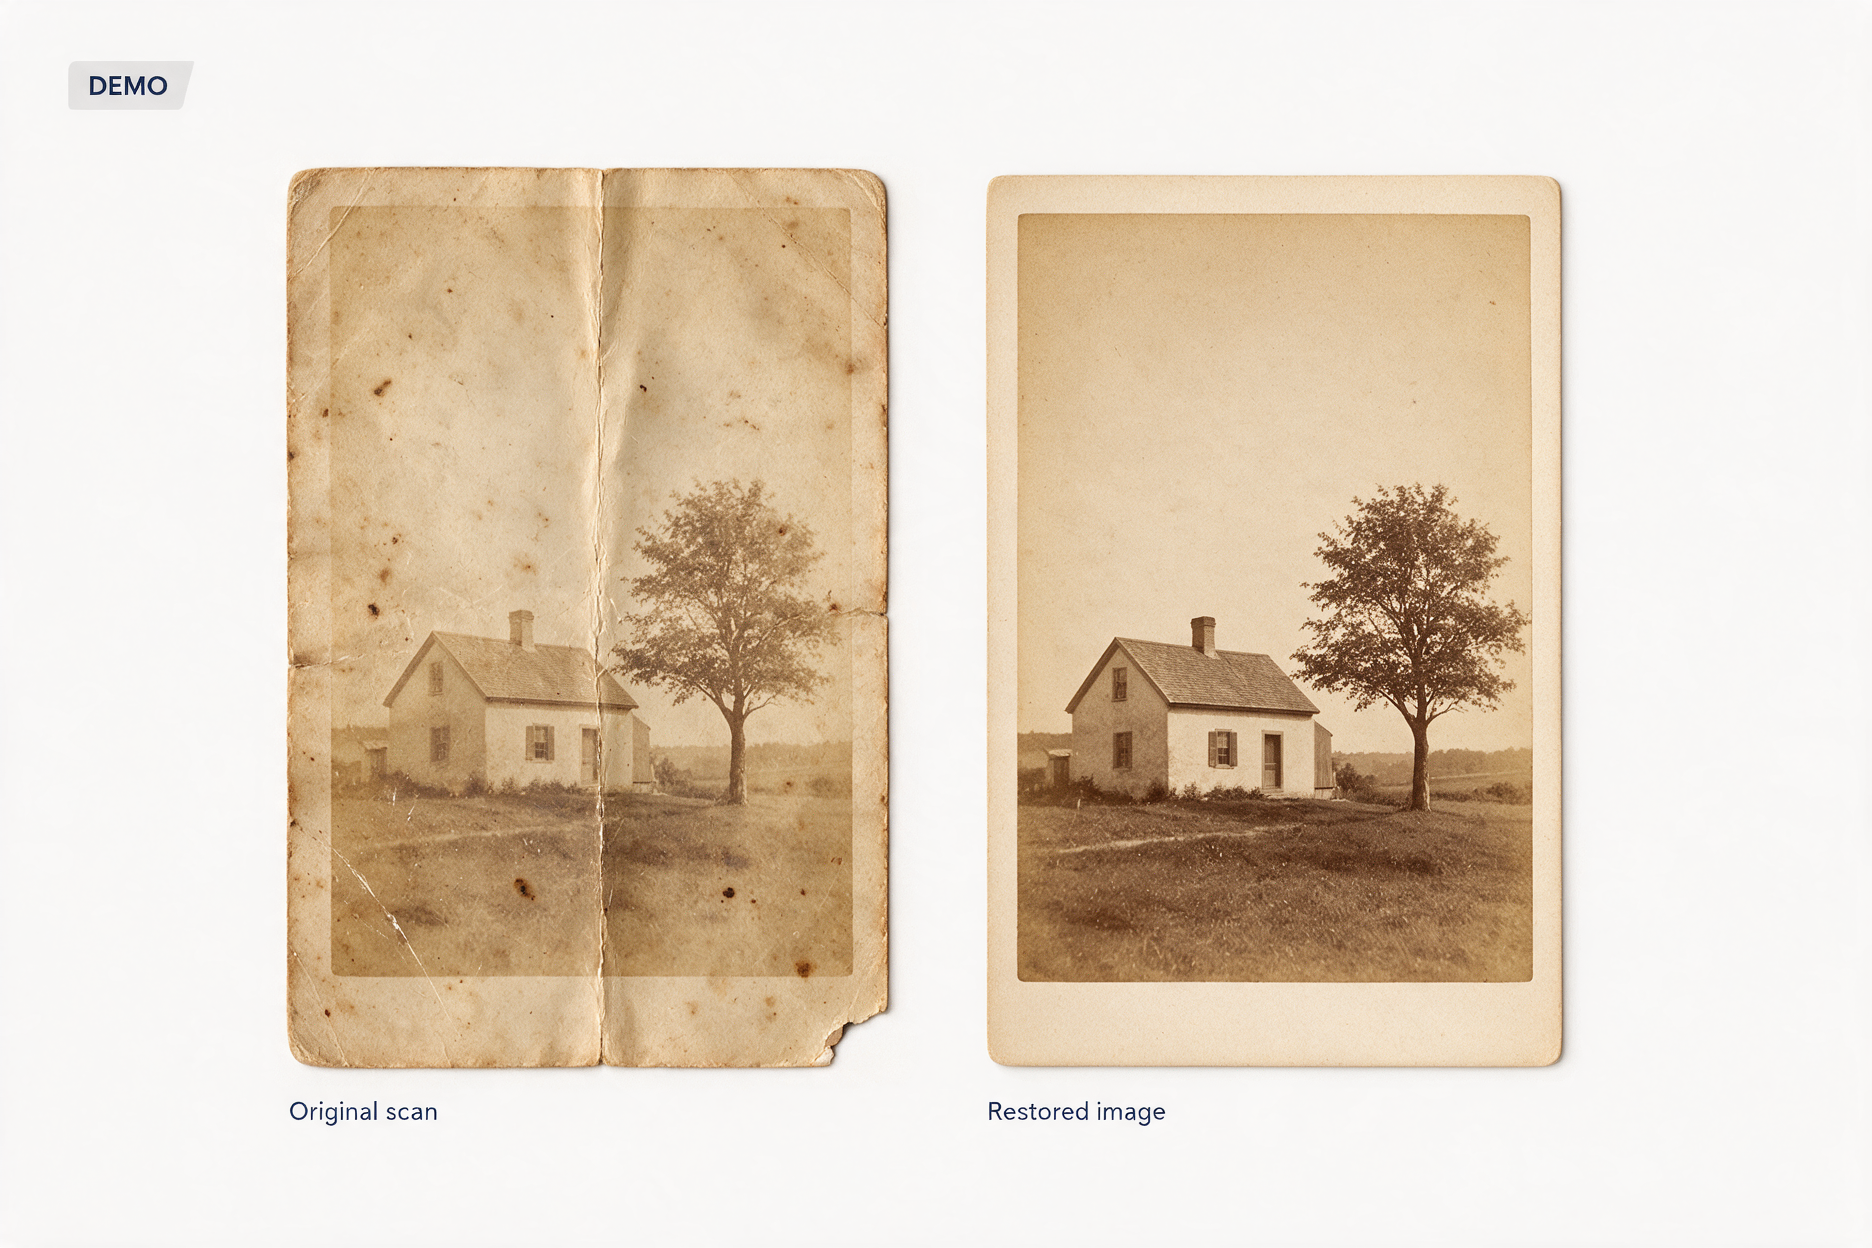
Demo image. Replace with the real original scan (left) and restored image (right) before publishing.
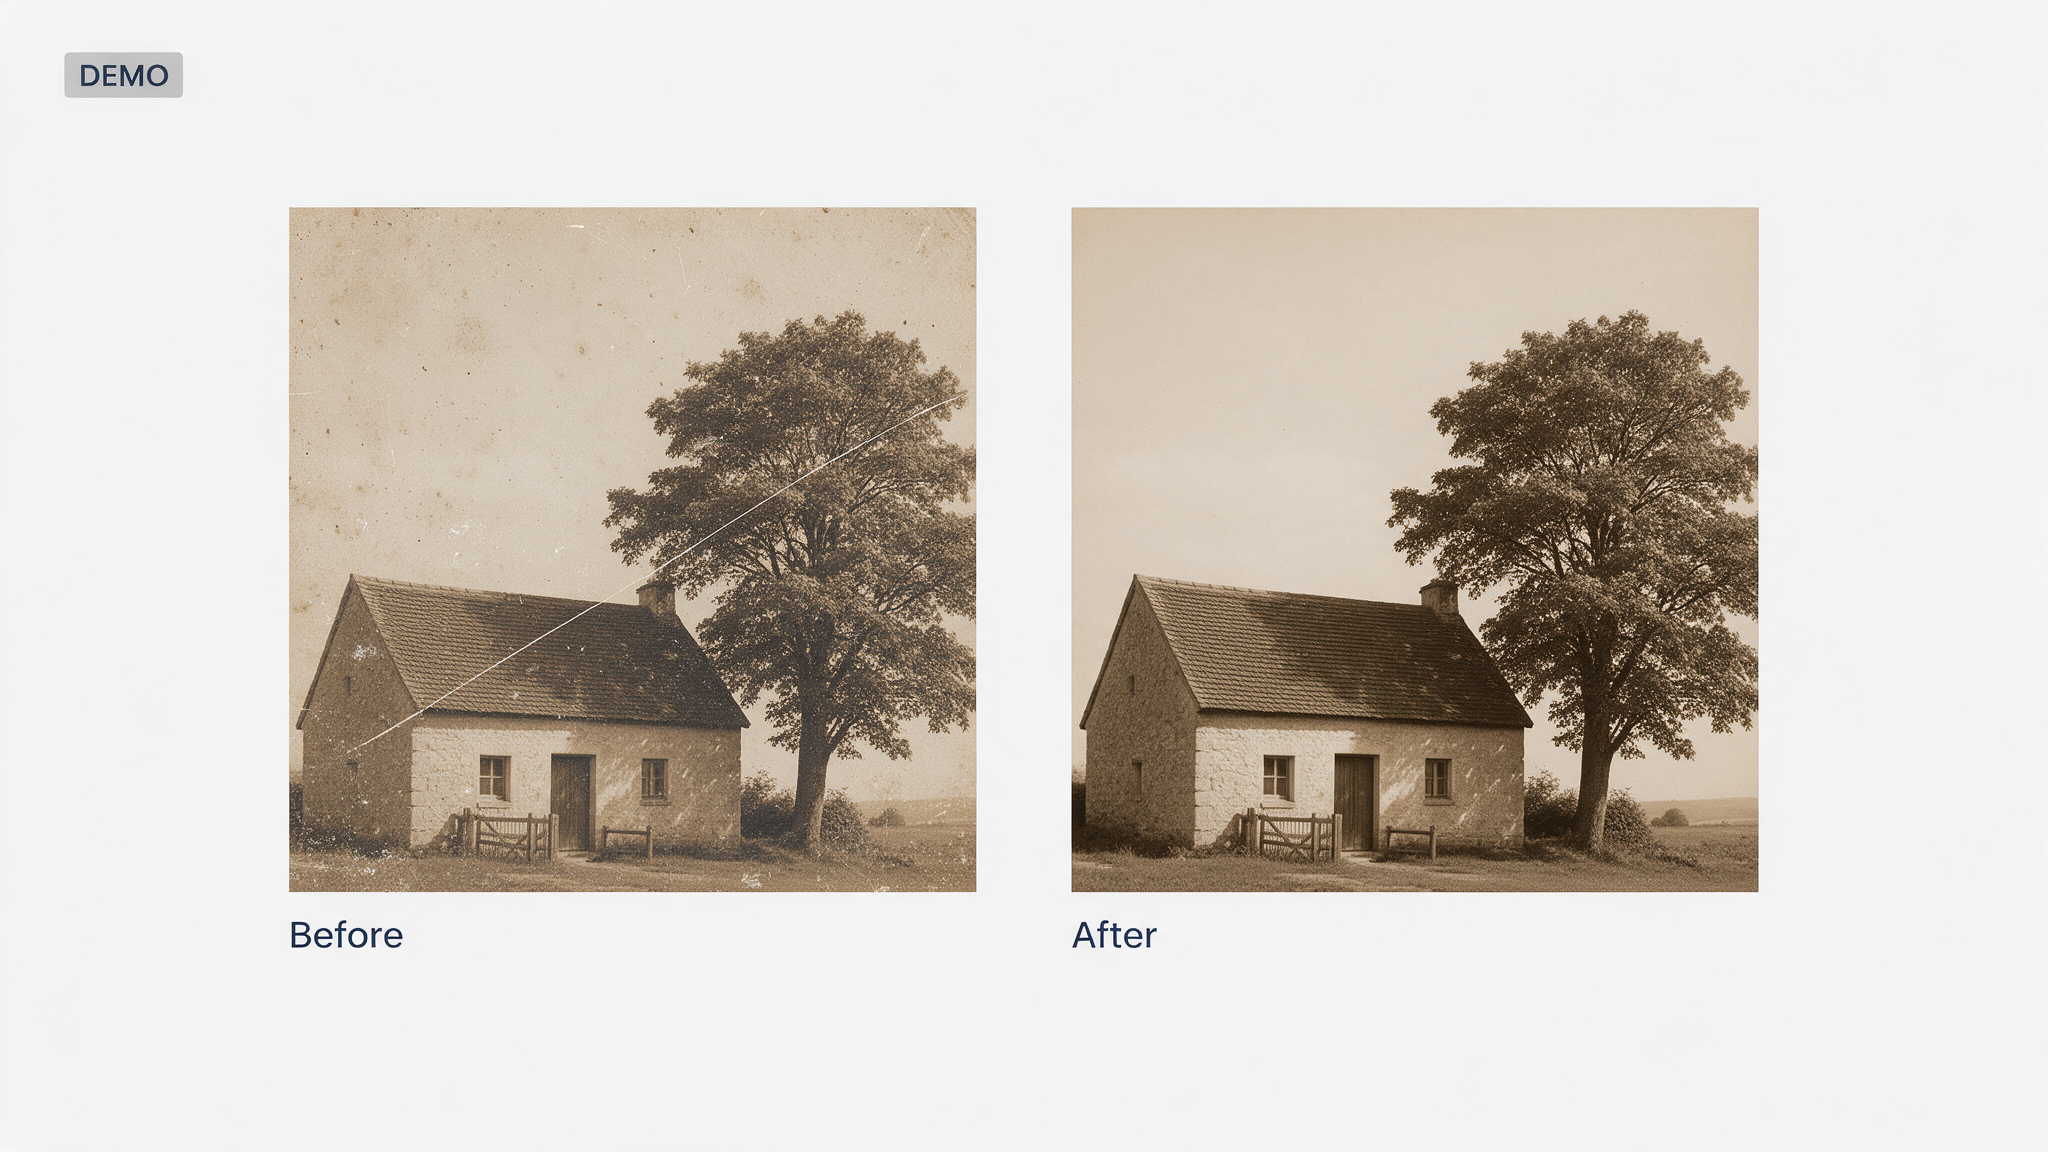
Demo image. Replace with the real close-up of a scratch across the subject, before and after manual repair, before publishing.
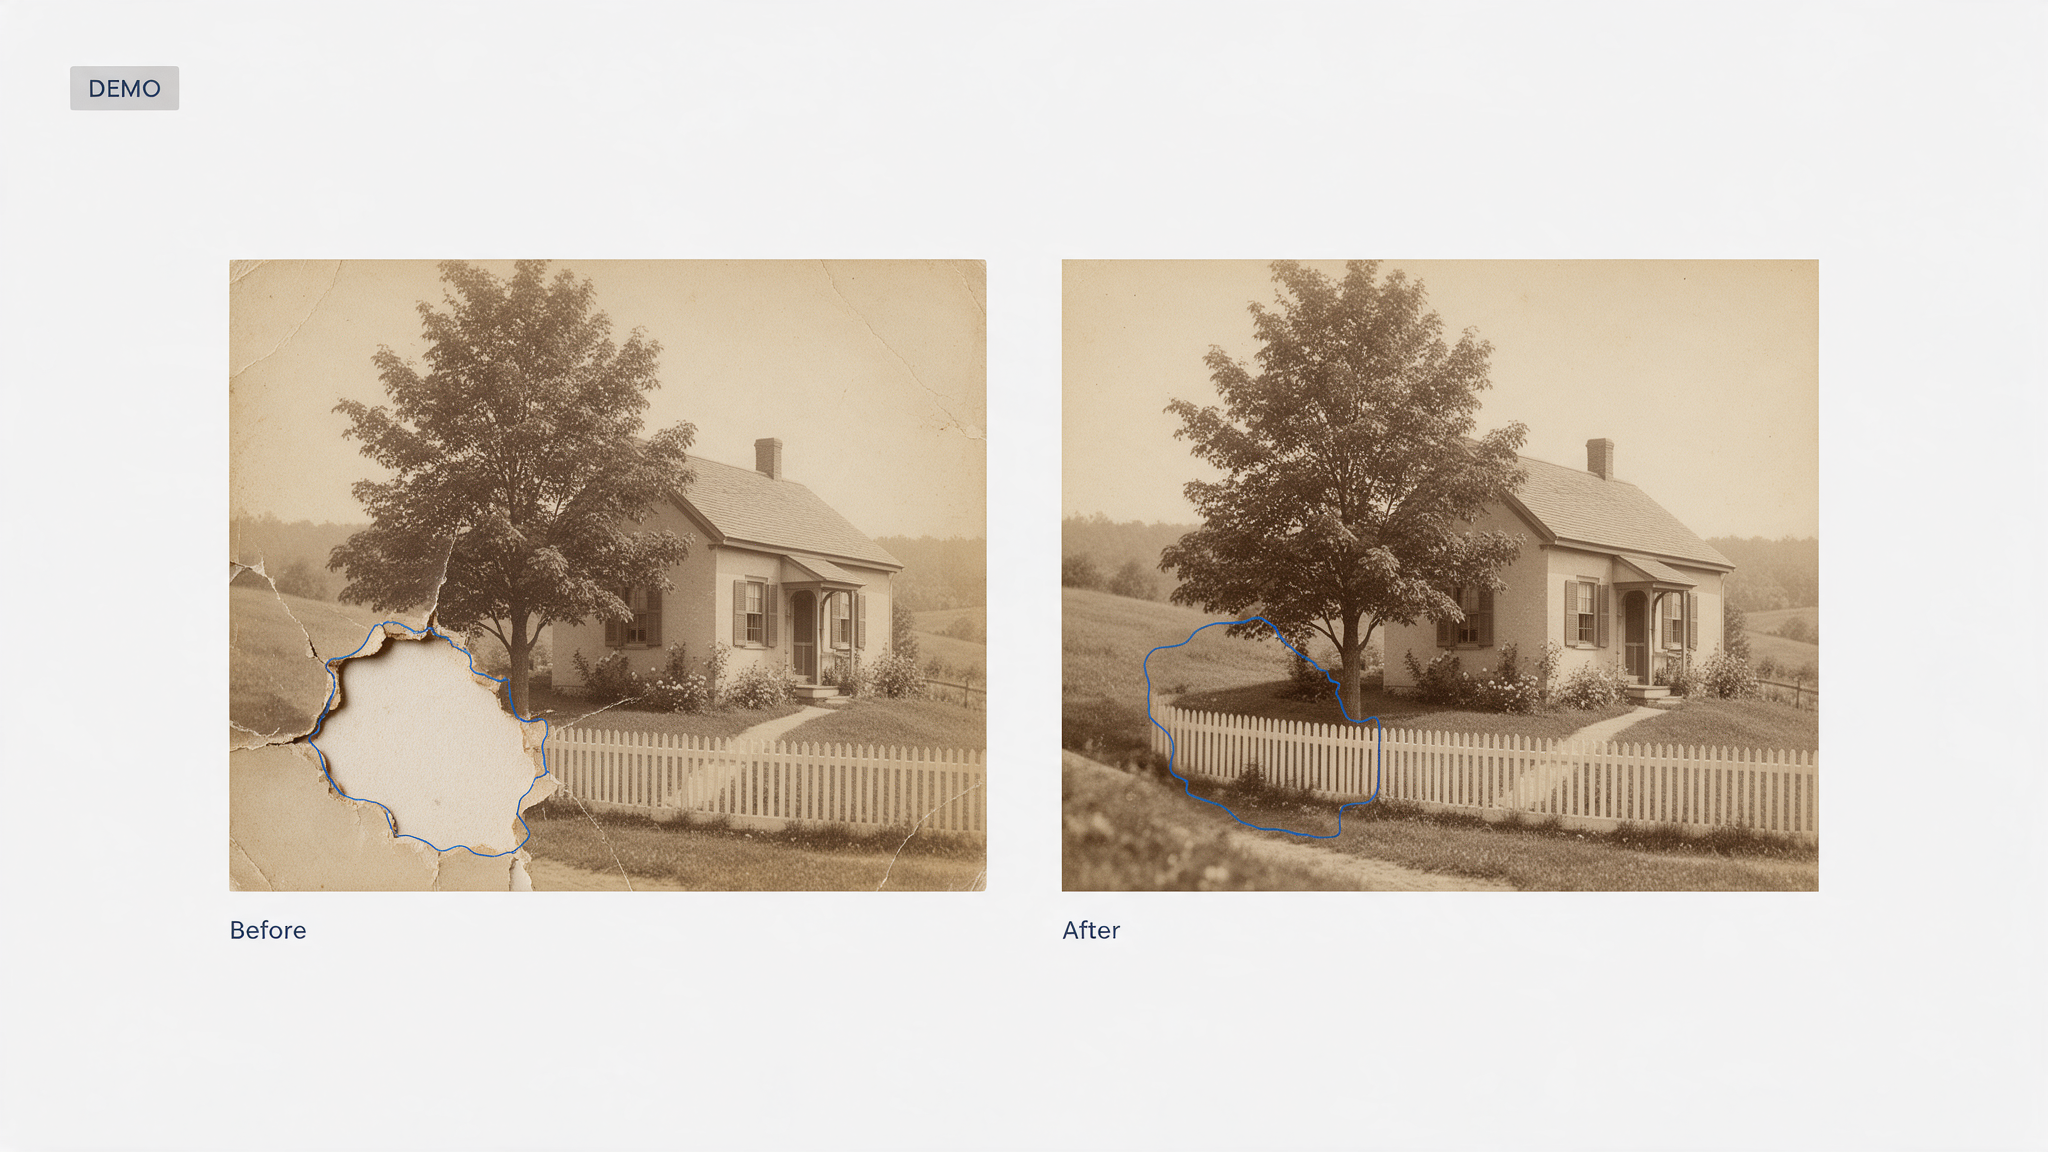
Demo image. Replace with the real crop of one of the six reconstructed areas, outlined, before publishing.
What this project shows
- Recovery and reconstruction usually happen in the same photo. Tone and surface defects were recovered or cleaned. Six large areas were reconstructed.
- Where the damage falls matters as much as how much there is. The same scratch is an easy fix on a wall and a careful repair on a face.
- Restraint is part of the skill. Keeping grain and texture, and not adding decorative detail, kept the photograph looking like the original.
How to Judge a Restoration Service
A service that promises "perfect results on any photo" is selling hope. Look for these signs of an honest one.
- They assess first. You get a plain answer on what can and cannot be recovered before work begins.
- They separate repair from reconstruction. You can tell which areas were restored and which were reconstructed.
- They show hard examples. A portfolio of only light-damage photos tells you little.
- They ask what the photo is for. A print for the living room and an archive record need different edits.
- They keep the original safe. Your source file is never overwritten.
- They check their own work up close. Ask whether results are reviewed at high magnification, not only at normal viewing size.
- They are clear about AI use. Ask whether any detail was generated by an AI tool, and where.
What Affects Restoration Cost and Turnaround
Restoration is usually quoted per image, and no honest provider can price it without seeing the file. These factors move both cost and delivery time:
- How much damage there is. A light cleanup takes far less work than a photo with many scratches and missing areas.
- Where the damage falls. Repairs across faces, hands and patterned clothing take more skill and time than repairs on plain background.
- How much must be reconstructed. Every reconstructed area needs careful checking against the surviving image.
- Scan size and quality. A clean, high-resolution scan makes damage easier to repair.
- How many photos you send. Volume can change per-image pricing.
- Output needs. Print-ready files, extra formats or a specific file size can add work.
- Your deadline. Faster delivery usually costs more, so ask what a rush would involve.
- Revisions. Ask what is included if you want changes.
ClippingPathService.com's pricing page lists rates for its standard clipping path and retouching services. It does not list a price or a turnaround time for photo restoration, so request a custom quote with a sample scan and your intended use.
How to Brief a Restoration Editor
A clear brief prevents most disappointment. Send these with your first photo:
- The best scan you can make, prepared as described above.
- The purpose. Print, frame, archive, or share online.
- Your standard. Do you want strict preservation, or are you happy for missing areas to be reconstructed?
- What must not change. Faces, clothing details, writing on the back, a medal or a sign.
- Reference material. Other photos of the same person, or a note on the original colors.
- Output specs. File format and print size.
Test One Photo Before You Commit
Pick your hardest image: the one with the damaged face or the missing corner. Send it first.
Then check the result:
- Does the face still look like the person?
- Do the repaired areas match the grain of the rest of the photo?
- Were you told which parts were reconstructed?
- Does the image meet the purpose you named?
That test tells you more than any portfolio page.
About ClippingPathService.com
ClippingPathService.com is a commercial image-editing company. It reports 78,066+ projects delivered and 450+ global brands and retailers served. These figures cover all of its work and are not specific to photo restoration.
Its published services are clipping path, masking, retouching and related product-image editing. Its general retouching page covers commercial and product photography and does not describe historical-photo restoration, so if you have a damaged vintage photograph, contact the team to ask whether your photo is a good fit before you send it.
Frequently Asked Questions
What is photo restoration?
Photo restoration is the process of repairing damage to an old or degraded photograph while keeping as much of the original image as possible. It covers dust and scratch removal, tonal and color correction, and repair of creases and tears. Digital restoration repairs the digital image, not the physical print.
What is the difference between restoration and reconstruction?
Restoration uncovers information that is still in the photo. Reconstruction draws new content where the original is missing, using the surviving image as evidence. Reconstruction can look natural, but it is an informed continuation, not verified original detail.
Can a damaged face be restored?
If the features are faded, scratched or stained, often yes. If the eyes, nose or mouth are missing from the file, they can only be reconstructed, and the result may not look like the real person.
What was recovered and what was reconstructed in the case study?
The faded tones, dust and small defects were recovered or cleaned. Six large damaged areas were reconstructed from surviving visual evidence in the photograph. Scratches that crossed faces and clothing were repaired by hand, guided by the surrounding detail.
Can AI restore any old photo?
No. AI tools can help with some damage, but results vary, and they can generate realistic-looking detail that cannot be checked against the original. Compare any result with the untouched scan and with other photos of the same person.
Does upscaling restore lost detail?
No. Upscaling increases pixel dimensions, which helps with printing, but it cannot reliably recover original information that was never captured or has been lost.
Should I fix a torn print with tape before scanning?
No. Scan it as it is. Self-stick tape can be extremely difficult to remove and often damages prints over time. For valuable or fragile originals, consult a photograph conservator.
What scan settings should I use?
It depends on the size of the original, its condition and how you will use the result. Save a lossless TIFF master, keep it untouched, and work from a copy. Choose a resolution that gives you enough pixels for your final print size.
How much does photo restoration cost and how long does it take?
Both depend on the amount and location of the damage, how much must be reconstructed, scan quality, the number of photos, output needs and your deadline. Ask for a quote based on a sample scan.
Should the original color be restored exactly?
Where dyes have fully faded, color can only be estimated. Reference photos and family memory are the best guide.
P.S. Have a photo you are not sure about? Ask for a plain assessment of what can and cannot be recovered before any work starts. Knowing that first is worth more than any before and after.