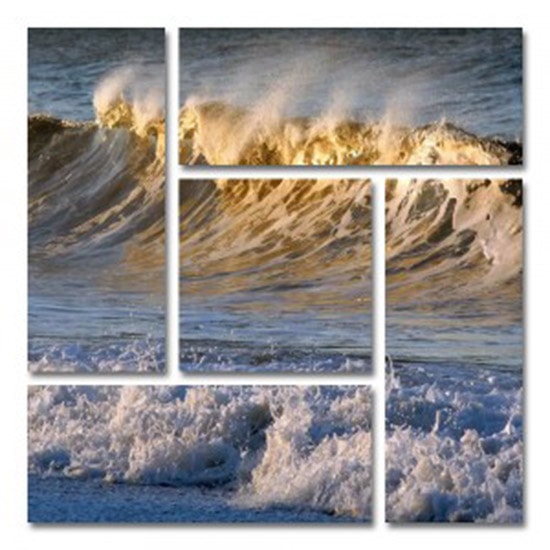
How to Create Shape Cluster Effect in Photoshop
Here, you will learn on how to create shape cluster effect in Photoshop. I hope it will help you both beginner and advanced level of students in a great deal.

Photo Courtesy – http://www.tutorialized.com/
At first, open an image which will be the background layer. Create a new layer. Close the eye of a background layer. Go to Edit> Preferences> Guides> Grid and Slices from the above toolbar. Set the ‘gridline every’ to 2.5 percent and ‘subdivision’ to 1. Select the ‘Rectangular Marquee Tool.’ Draw an initial selection outline around the grid. However, leave a border the width of two squares between the selection outlines and the edges. Now, right click on the selection and choose ‘fill.’ Make sure that you select it as color black. With the ‘Rectangular Marquee tool’ selected, divide the initial shape into several smaller shapes. It would be better if stick to one square line is possible. It would look as even as a result of that. Hold ‘Shift’ key down to make another selection. Click ‘Delete’ on the keyboard after finished. Double click on the background to make sure it is unlocked. Move it above Layer 1. Right click on Layer 0 and select ‘Create Clipping Mask.’ Select View> Show> Grid from the above toolbar. Create new layer. Bring it under Layer 1 and fill it with ‘white’ with the help of ‘Paint Bucket tool.’ Right click on Layer 1 and select ‘Blending Options.’ Click on the ‘Drop Shadow’ and make some adjustments. Preferably reduce the opacity level to 40-50 percent, distance 11 and size 21 pixels while spread 0 percent. This will sum up the whole process.
I hope that it will help you and from now on, hopefully you will follow this procedure more often in Photoshop and be an expert in this field in the future.

