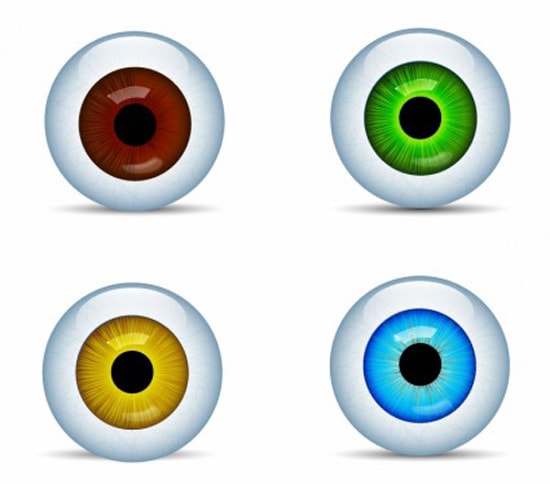
How to Create Realistic Eyeballs in Photoshop
Here you will learn on how to create realistic eye balls in Photoshop. Hopefully, this will help both beginner and advanced level of students in a great deal.
At first, create a new document. Set foreground and background colors to blue and white. Take a new layer and fill it with white color. Go to Filter> Render> Clouds. Again go to Filter> Render> Difference Clouds. One more time, go to Filter> Render> Difference Clouds. All this process is to get sharp white lining in the clouds. Next, duplicate the layer for back up. Go to Filter> Blur> Radial Blur. In Radial Blur palette, select ‘zoom’ option with necessary parameters. Duplicate the zoomed layer and add a filter to this duplicated layer. Go to Filter> Stylize> Glowing edges with required properties. Set blending mode for the layer to ‘Exclusion.’ Make selection with ‘Elliptical Marquee Tool.’ Now, make inverse selection by clicking Ctrl + Shift + I and delete the outside area of the circle. Go to ‘Layer style’ and set ‘inner shadow’ with necessity parameters. Duplicate the layer, remove layer style and re-size it. If you see the sharp edges of the duplicated layer, it needs to be removed. To do it, make selection of it with ‘Elliptical Marquee Tool’ with Feather 50px. Make inverse the selection and delete. Let’s change the color of the inner circle. Select “Hue/Saturation” with necessary adjustments.
Photo Courtesy – http://all-free-download.com/
Let’s lighten up few areas of the inner circle using ‘Dodge Tool.’ Let’s add pupil with black color circle in new layer. Add ‘Drop Shadow’ to the same pupil with layer style. Let’s add reflection with white rectangle. Erase the sharp edges with soft brush. Decrease the brightness of the whole eye by brushing with gray color in new layer keeping the opacity to 10% to get the result. Let’s create the white ball for this. Draw a circle with white color using ‘Elliptical Marquee Tool’ and add ‘Inner Shadow.’ Now, create small blood arteries over the white ball. For this, make selection of the white eye ball. In new layer, brush the edges with red color using soft brush with 50% opacity. Select ‘Smudge Tool’ and decrease the size of the brush size as per requirement and drag red color from the edge to the center of eye. Repeat this process along the edges to get desired result. To increase the opacity of the arteries, simply duplicate the layer. Let’s add little darkness to the bottom part of the eye ball in new layer using black color with soft brush. Add gray colored elliptical and blur it using Gaussian blur. Duplicate the same blurred object and resize it to fit the bottom. Finally, duplicate the whole eye to get pair of eyes.
That ends the process. In this way, you can photo edit and create this realistic and trendy effect. Hope that helps!
In this tutorial, you will get to know about the tool that is used for many purposes and one of the most important tools in Photoshop coined as the ‘paint bucket tool.’ When you click … Continue reading Usage of ‘Paint Bucket Tool’ in Photoshop
Read More
Here, you will learn on how to create a snow effect in Photoshop. I hope it will help you both the beginner level and advanced level of students in a great deal. Many expensive photographers … Continue reading How to Create a Film Look by one curve layer in Photoshop
Read More