Picture an 80-product shoot that just wrapped. You open the files on a big screen.
There is dust on the black leather. A fingerprint on the glass. A wrinkle across the front of the shirt. Half the images look warmer than the other half.
Now you have two options: spend hours on corrections, or book a reshoot.
Both cost time and money, and both were avoidable. Most product photography mistakes are made before the camera clicks.
These 20 product photography tips are fixes you make during preparation and setup, so you spend less time retouching and less money on reshoots. They apply to ecommerce product photography for any catalog, from a few SKUs to thousands, and they are written for photographers, studios, agencies and marketing teams that shoot products on a regular basis.
If your photos are already shot and look inconsistent, start with our guide to fixing inconsistent product photos after a shoot. This article covers what to do earlier: before you shoot.
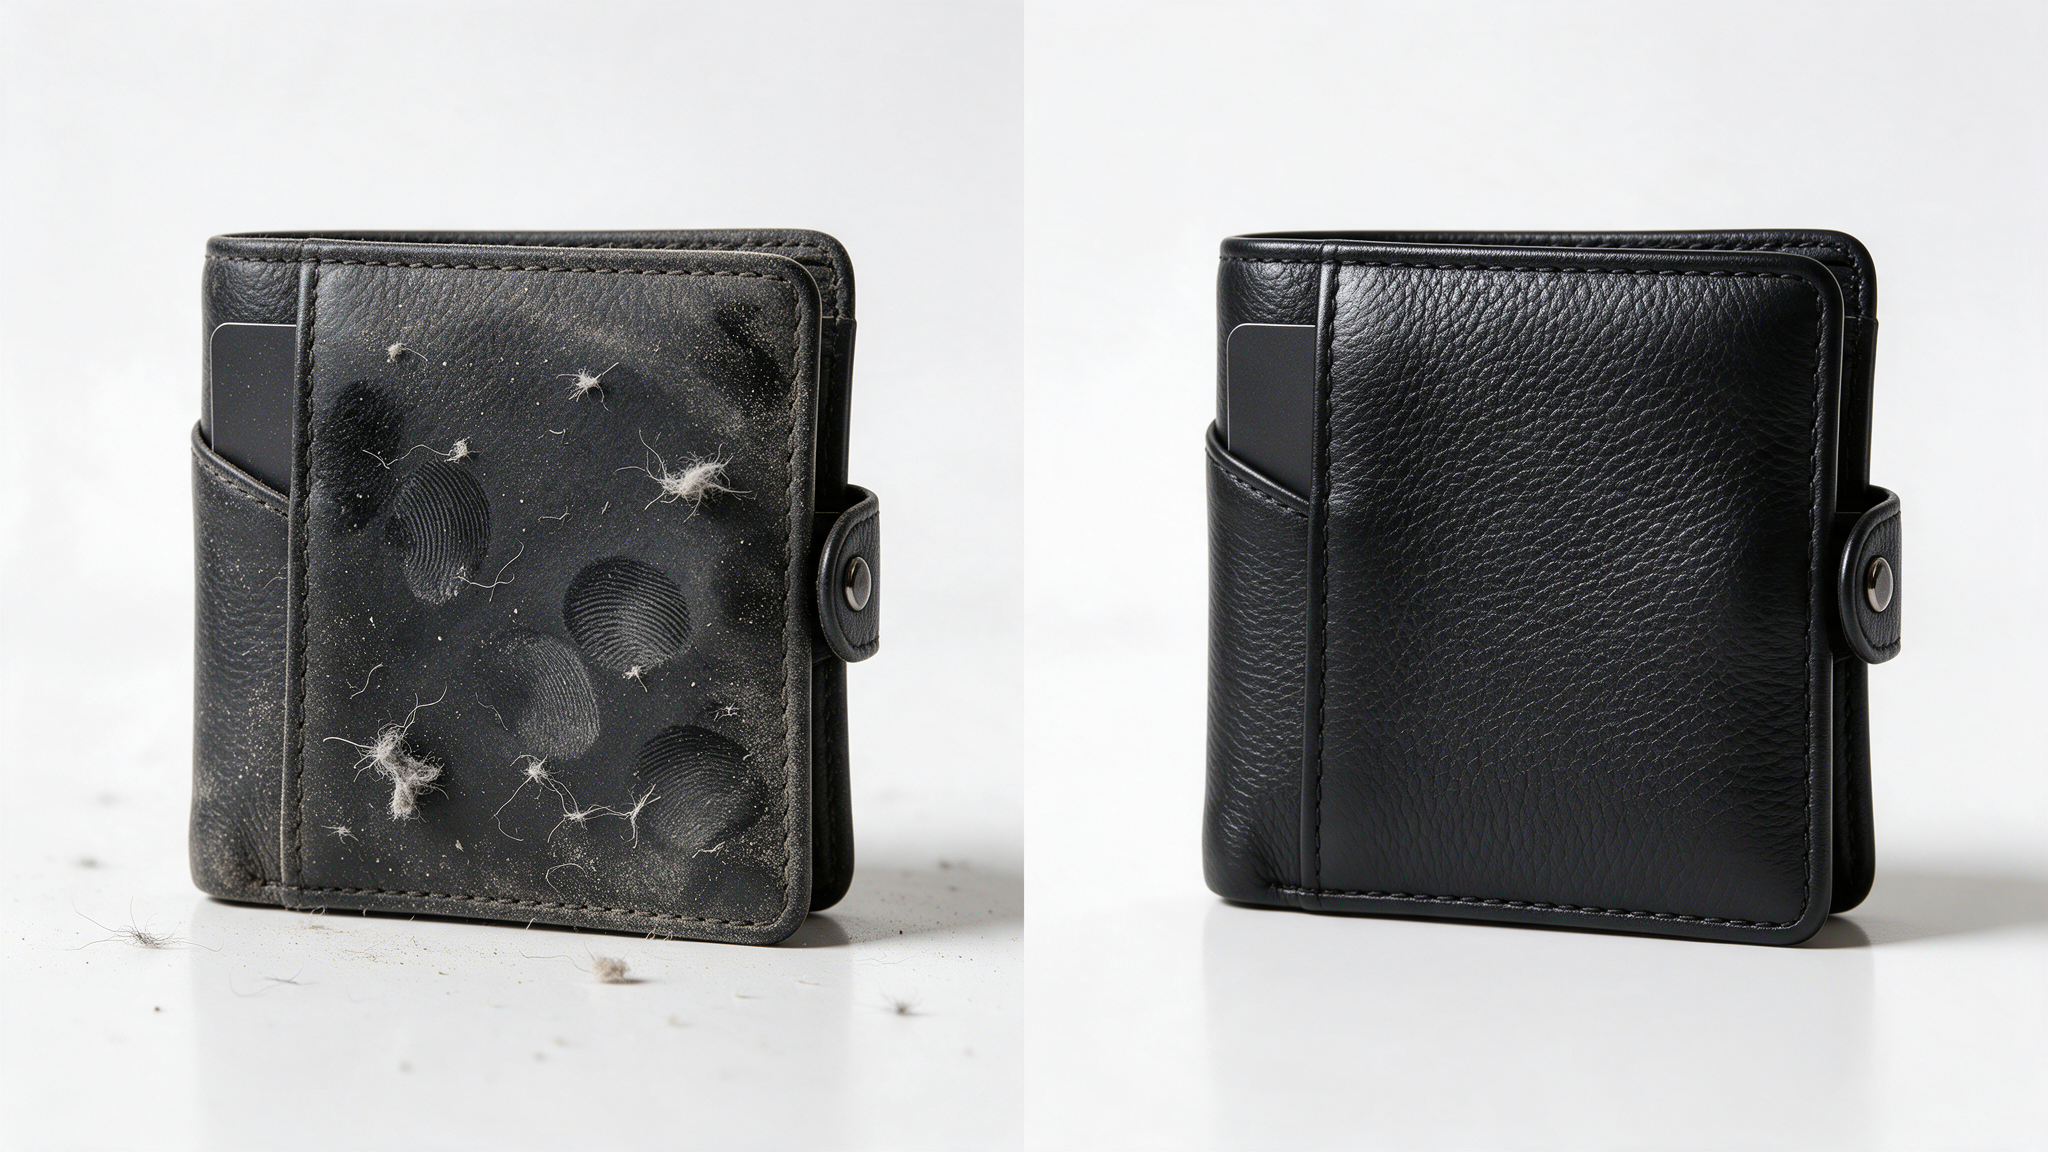
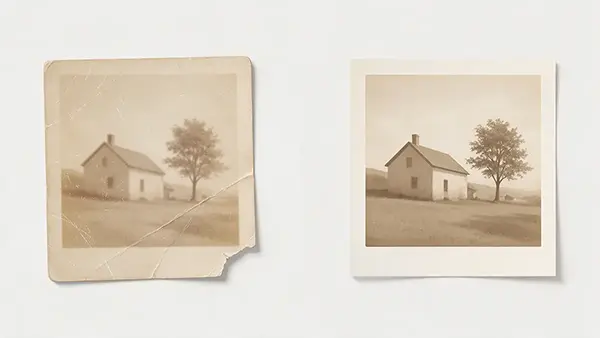
Illustration: left, before preparation. Right, after cleaning.
Prevent First, Edit Less Later
Many teams treat editing as the safety net: "We'll fix it in post."
Editing can fix a lot. But every problem left in the shot becomes a task for someone later. More tasks mean more cost, more delay, and a higher chance that two images in the same catalog end up looking different.
Use this chain on every shoot: Problem, prevention, better photo, less editing.
| Problem | Prevention before the shoot | What you get |
|---|---|---|
| Dust and lint | Clean the product and the set | Cleaner image, faster retouching |
| Fingerprints | Handle with gloves, inspect before each frame | Fewer spot repairs |
| Wrinkles | Steam or press the product | Smoother surfaces, less manual work |
| Uneven lighting | Diffuse the light and mark its positions | More even exposure across the batch |
| Color shifts | Reference shot and custom white balance | One color standard per setup |
| Cropped product edges | Leave margin around the product | Freedom to crop to any ratio |
Fixing these on set takes minutes. Fixing them across 80 files takes hours.
Part 1: Prepare the Product (Fixes 1 to 5)
Product photography preparation is the cheapest stage to get right. Nothing else on this list costs less per image.
1. Clean every product before it reaches the set
Use a microfiber cloth and a hand blower to remove dust and lint. Dark, glossy and transparent products show every speck. A speck you remove now is a spot nobody has to retouch later.
2. Handle products with gloves, or by the edges
Fingerprints show on glass, metal, plastic and polished wood. Wear lint-free gloves for jewelry, glassware and electronics, and wipe the surface once more before the first frame.
3. Steam or press apparel and fabric
Wrinkles photograph deeper than they look in person. Steam garments and textiles before shooting. If you use a mannequin, steam after dressing it, not before.
4. Inspect each product under raking light
Hold a light low and to the side of the product. Scratches, lint, dents and glue marks that disappear in normal light will stand out. Fix what you can by hand and note what you cannot.
5. Remove tags, stickers and residue
Peel off price stickers and wipe away adhesive residue. If a label must stay in the shot, place it deliberately. Unwanted marks multiply across every angle of the same product.
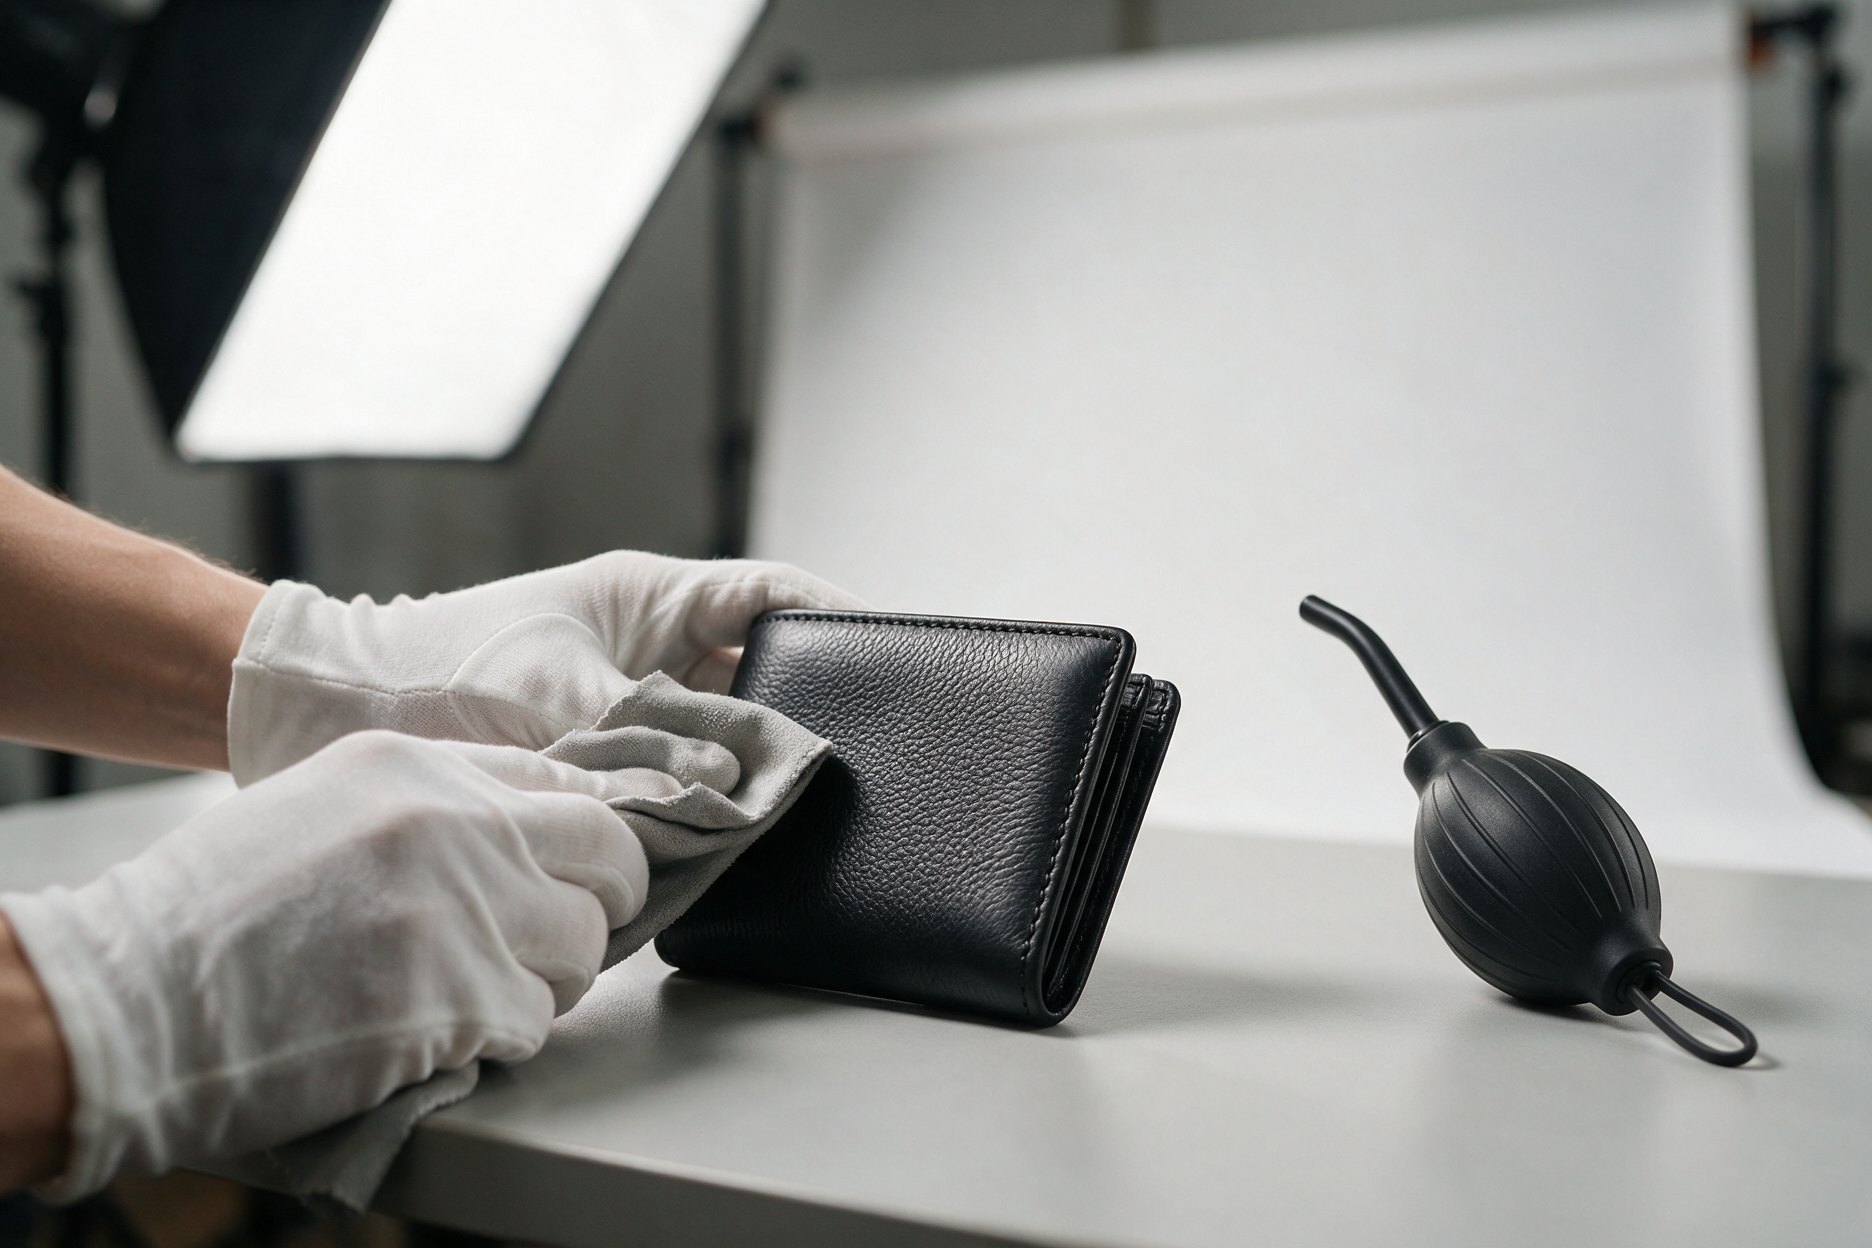
Illustration: cleaning and a side-light check take minutes on set and save retouching later.
Part 2: Build the Set (Fixes 6 to 10)
Your product photography setup decides how much cleanup the image needs. Most of these fixes cost nothing but a few minutes.
6. Prepare the background
Wipe the seamless paper or sweep and smooth out creases. Replace it once it is marked.
Where your setup allows, place the product some distance from the background instead of right against it. That separation helps in three ways. Shadows fall less harshly against the backdrop, so they are easier to control. Shiny or light-colored products pick up less unwanted reflection and color from the backdrop. And the product stands apart from the background, which leaves a clean edge to work with.
7. Diffuse your light
Hard light creates hard shadows and harsh highlights. Put a softbox or diffusion panel between the light and the product.
A practical starting setup for small products is one large softbox placed to one side of the product and slightly above it, with a white reflector on the opposite side to bounce light back into the shadows.
A two-light setup is an optional alternative when one light and a reflector do not give you enough control, for example to fill shadows or to light the background separately. No single arrangement suits every product. Treat either setup as a starting point, review a test frame, and adjust the distance and angle for your product's size, shape and surface. Note what works so you can repeat it.
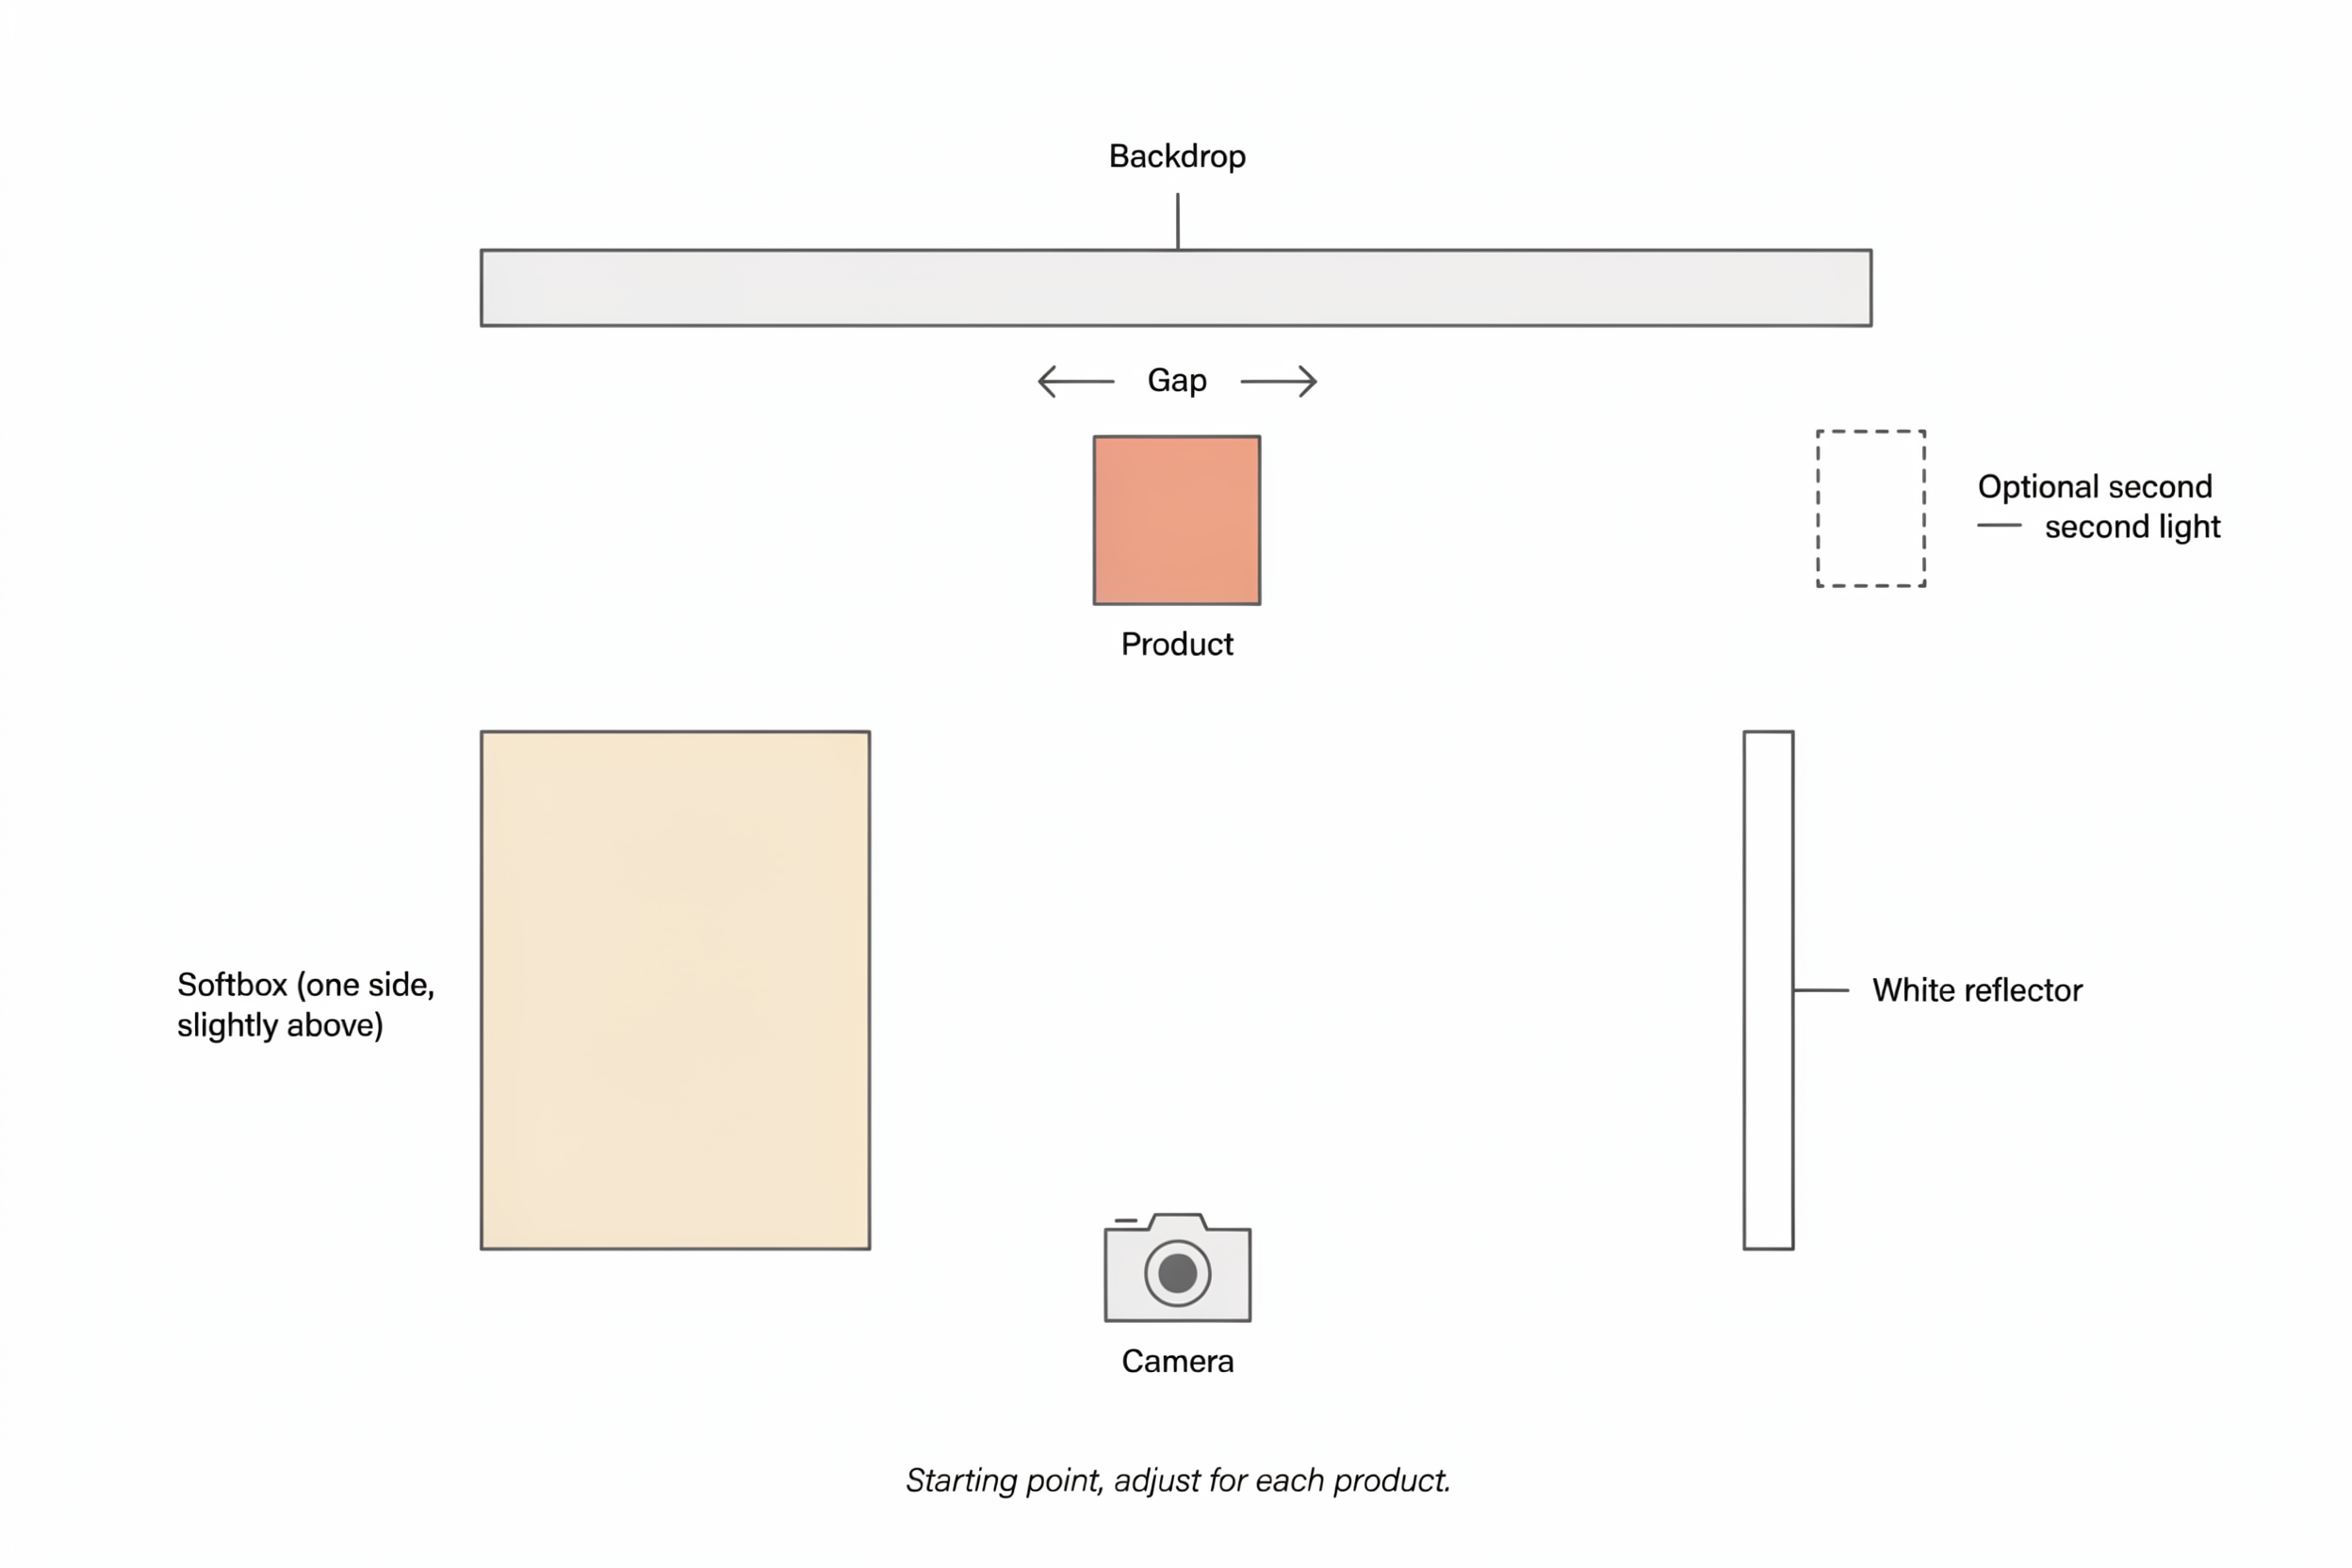
Illustrative setup: one large softbox, a white reflector, and space between the product and the backdrop. A second light is optional.
8. Control reflections before you shoot
Glass, metal, chrome and glossy packaging reflect your studio: the lights, the camera, and you.
A polarizing filter helps on many non-metallic surfaces such as glass, plastic, lacquer and glossy packaging, because it can reduce glare from those materials. It has limited effect on bare metal and chrome, so do not count on it there.
For reflective products, control what the surface can see instead:
- Use large, diffused light sources so highlights are smooth rather than sharp.
- Place black flags or cards to define edges and keep unwanted reflections out.
- Place white cards where you want a soft, bright reflection to fill an area.
- Change the product angle or the camera angle by a few degrees and check the result.
Reflections that you can remove in the studio are slower and riskier to remove afterward.
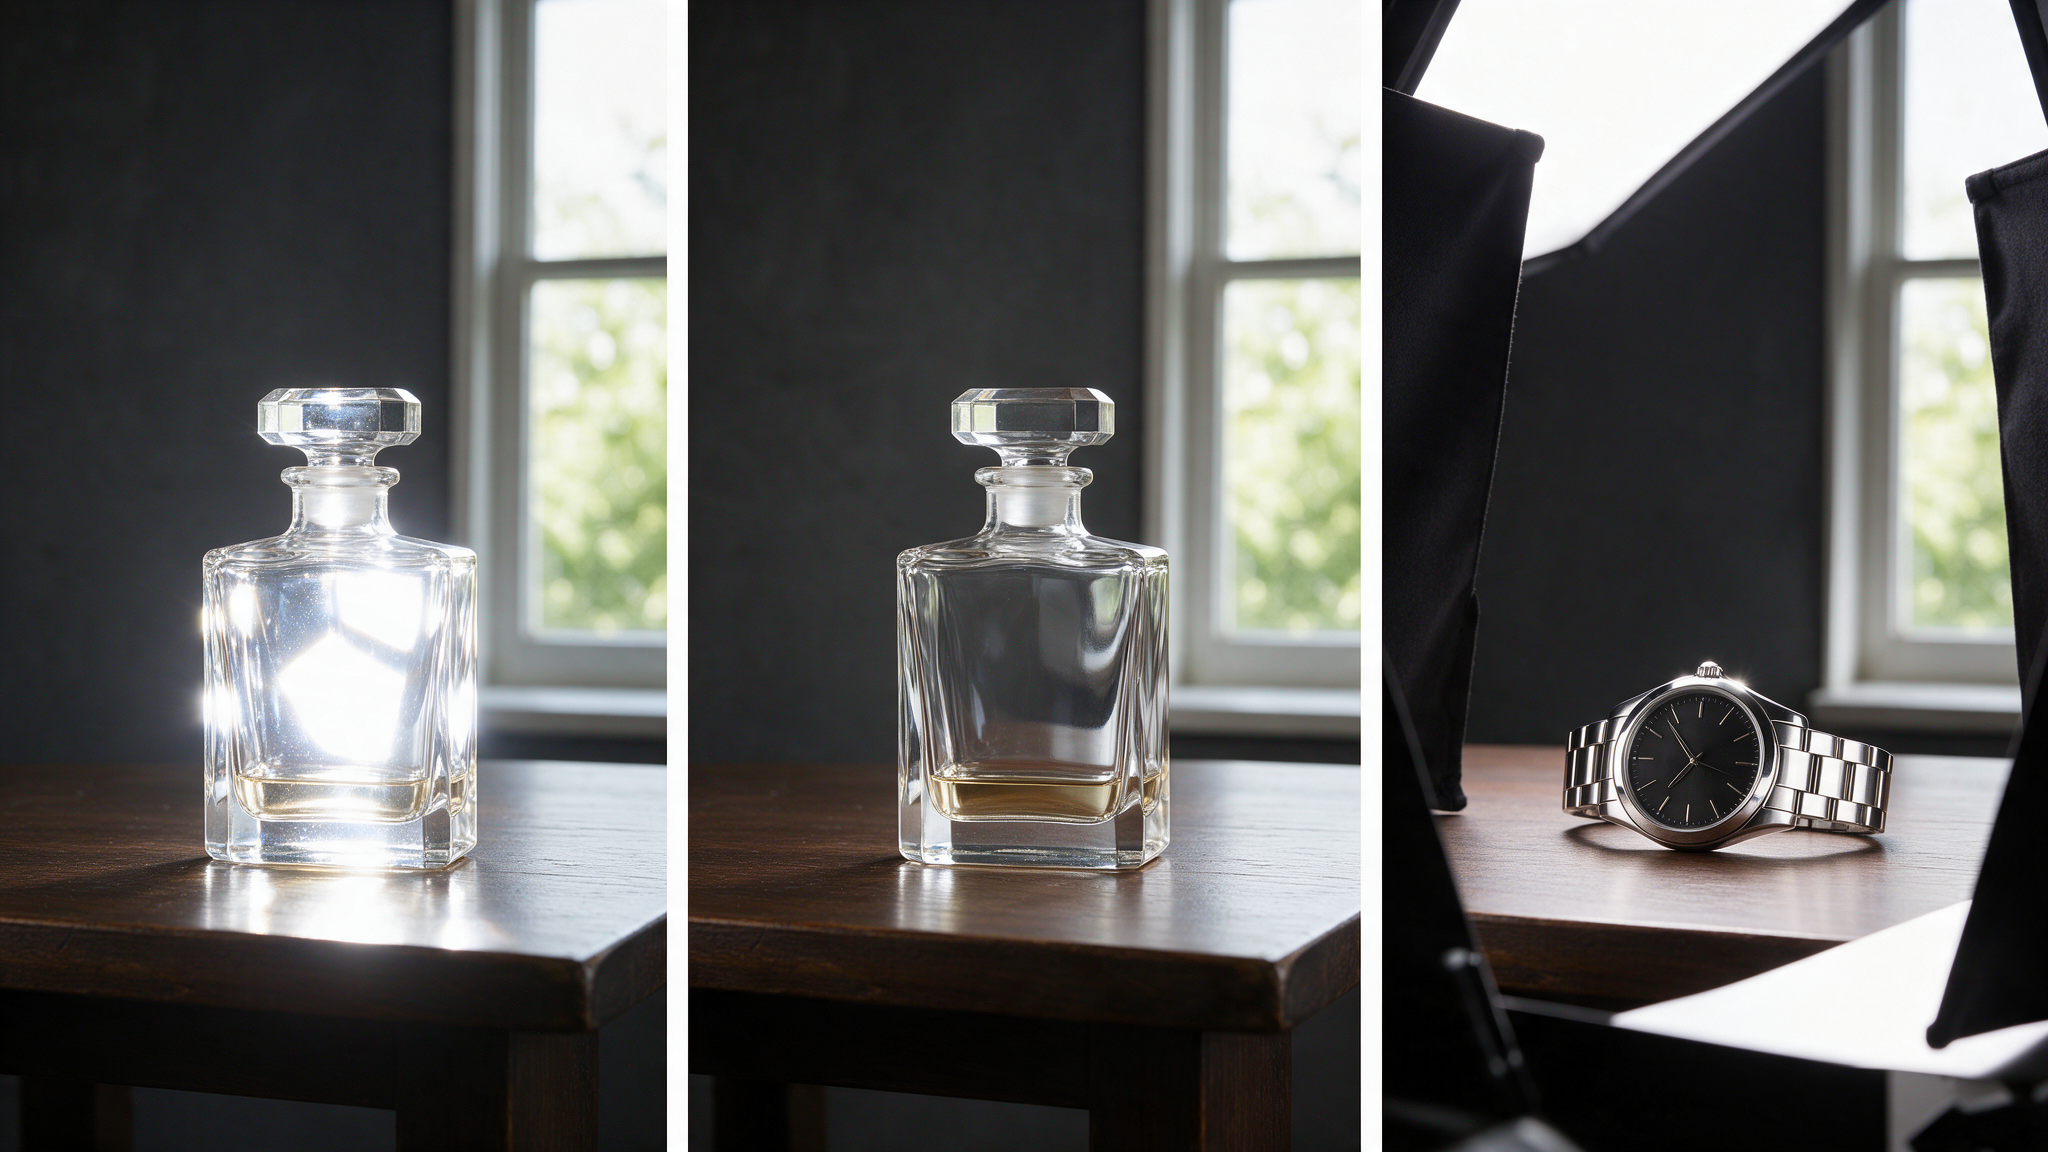
Illustrative example. A polarizer helps on many non-metallic surfaces. Metal needs large soft light, flags and cards.
9. Decide your shadow style first
Choose one: no shadow, natural shadow, drop shadow or reflection. Then set the light to support it. A shadow decided during planning stays consistent across the catalog. A shadow decided later has to be built image by image.
10. Mark light and product positions
Tape the floor and the table. Write down the distance and angle of each light. The next session, or the next photographer, can rebuild the same setup. A phone photo of the layout works well as a record.
Part 3: Lock the Camera and Color (Fixes 11 to 16)
Consistency across a catalog starts with settings you control. Product photo consistency is easier to hold than to restore.
11. Shoot a gray card or color checker, and repeat it when conditions change
A gray card gives a neutral reference for exposure and white balance. A color checker has many patches of known color, so it helps with color accuracy as well, especially for products whose exact color matters.
Shoot a new reference frame whenever the lighting conditions or the setup change: a moved light, a different modifier, a new background or a different time of day if you use window light. A reference from the morning session does not describe the afternoon one.
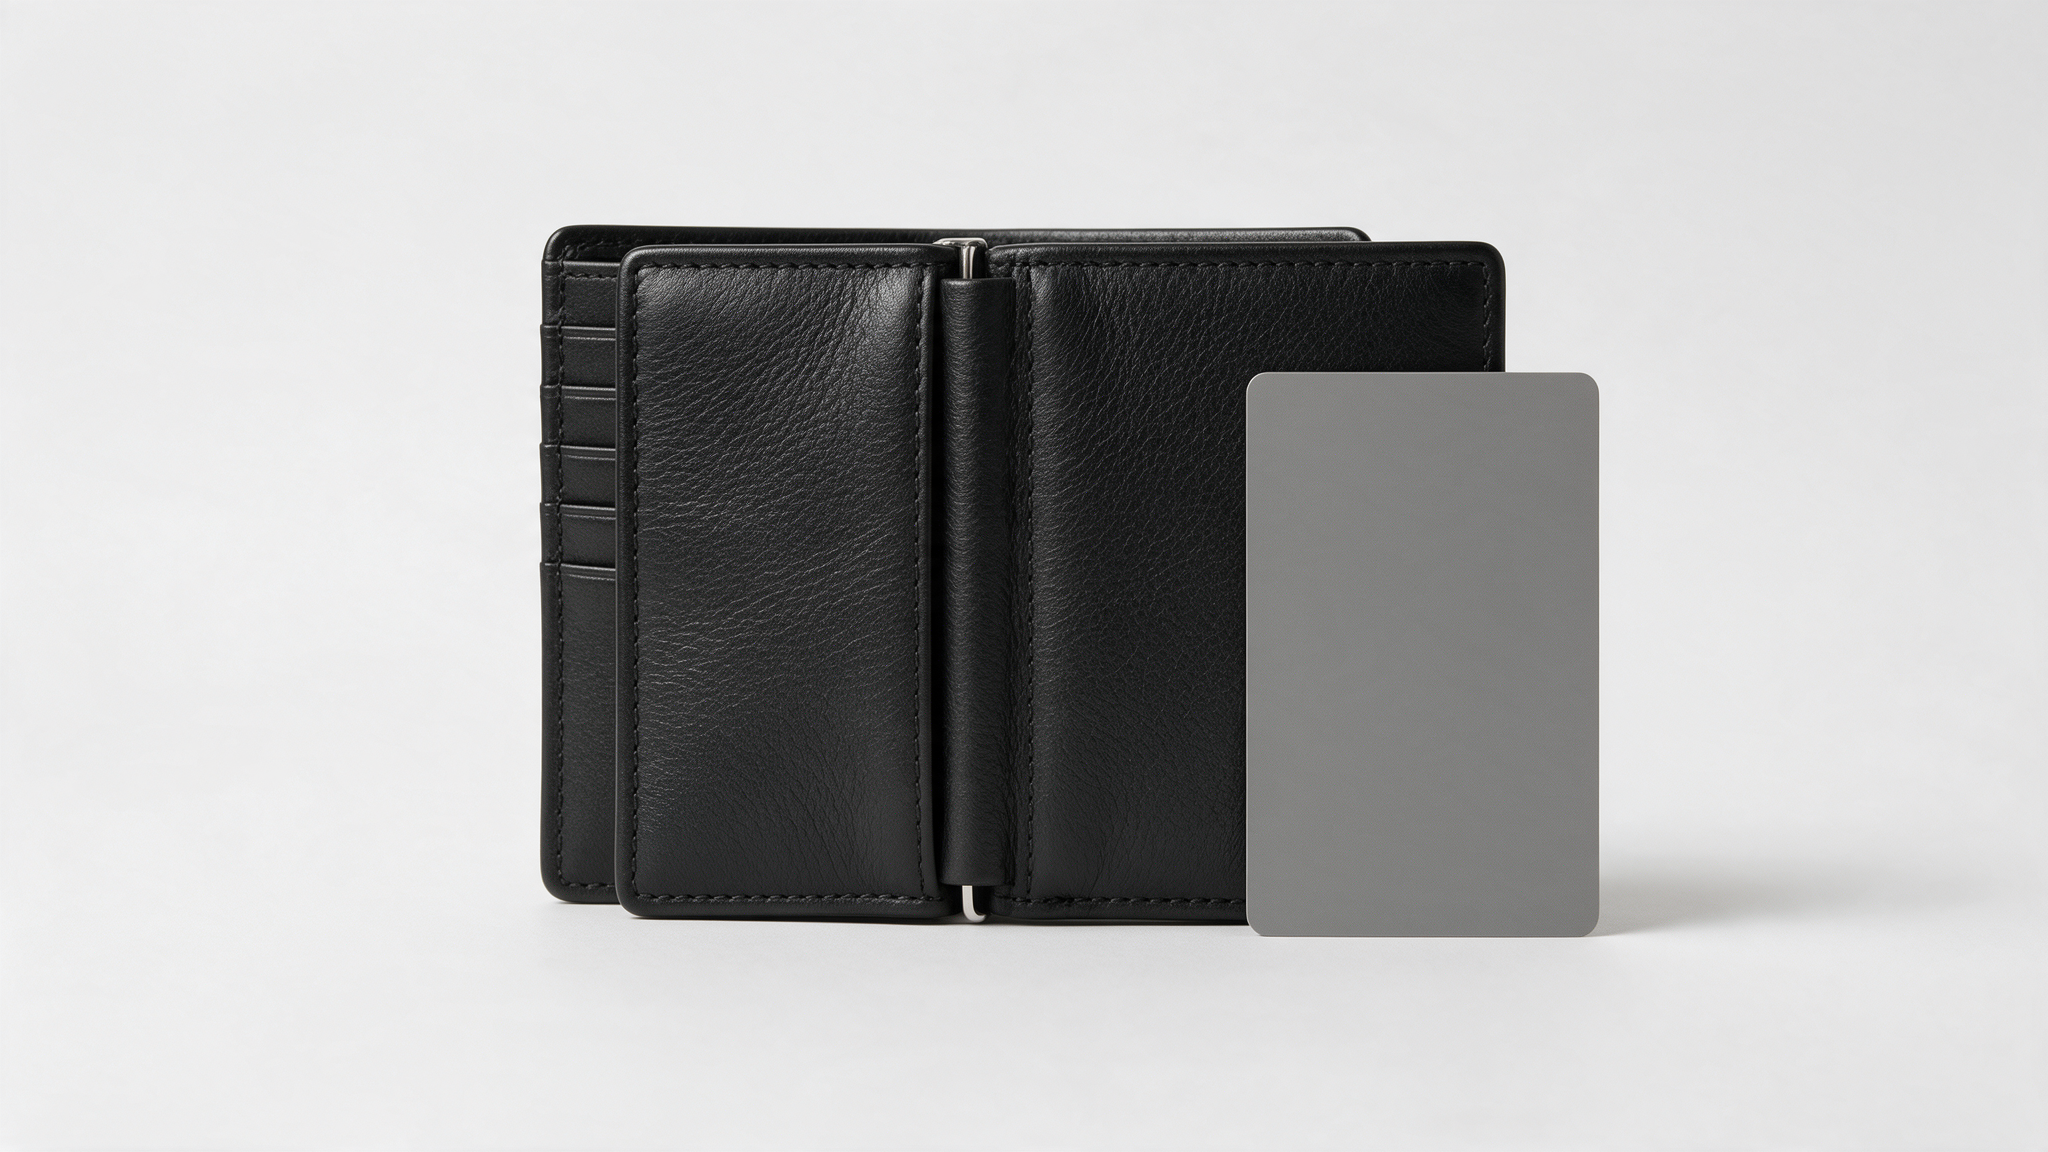
Illustrative example. A reference frame for this lighting setup. Shoot a new one when the setup changes.
12. Set a custom white balance
Auto white balance can shift from frame to frame as the camera reads the scene. Use a custom or manual setting, and check it again whenever a light moves. Warm and cool batches in the same catalog are one of the most visible inconsistencies.
13. Choose RAW or JPEG on purpose
RAW files keep more image data than JPEG files. That gives an editor more flexibility to correct white balance, recover highlight and shadow detail, and fine-tune color without visible quality loss. JPEG files can be edited too, but they have less room before the corrections show.
Choose RAW when color accuracy matters, when the products are reflective or high contrast, or when you expect heavy retouching. A high-quality JPEG can be a practical choice for simple ecommerce workflows where exposure and white balance are controlled well and files are only lightly edited. If in doubt, shoot RAW.
14. Keep exposure consistent within a setup, and check it for each product
Keep camera settings the same for products shot in the same setup under the same light. Do not carry one set of numbers across every product regardless of the material, light and depth involved. A black leather bag, a white ceramic mug and a chrome faucet do not expose the same way.
- Use a mid-range aperture as a starting point and adjust it for the depth the product needs, so the whole product stays in focus.
- Keep ISO low.
- Check the histogram and your camera's highlight warning for each new product type. Clipped highlights, where bright areas lose all detail, cannot be fully recovered.
- When you change a setting for a product, note it so the next shoot can match it.
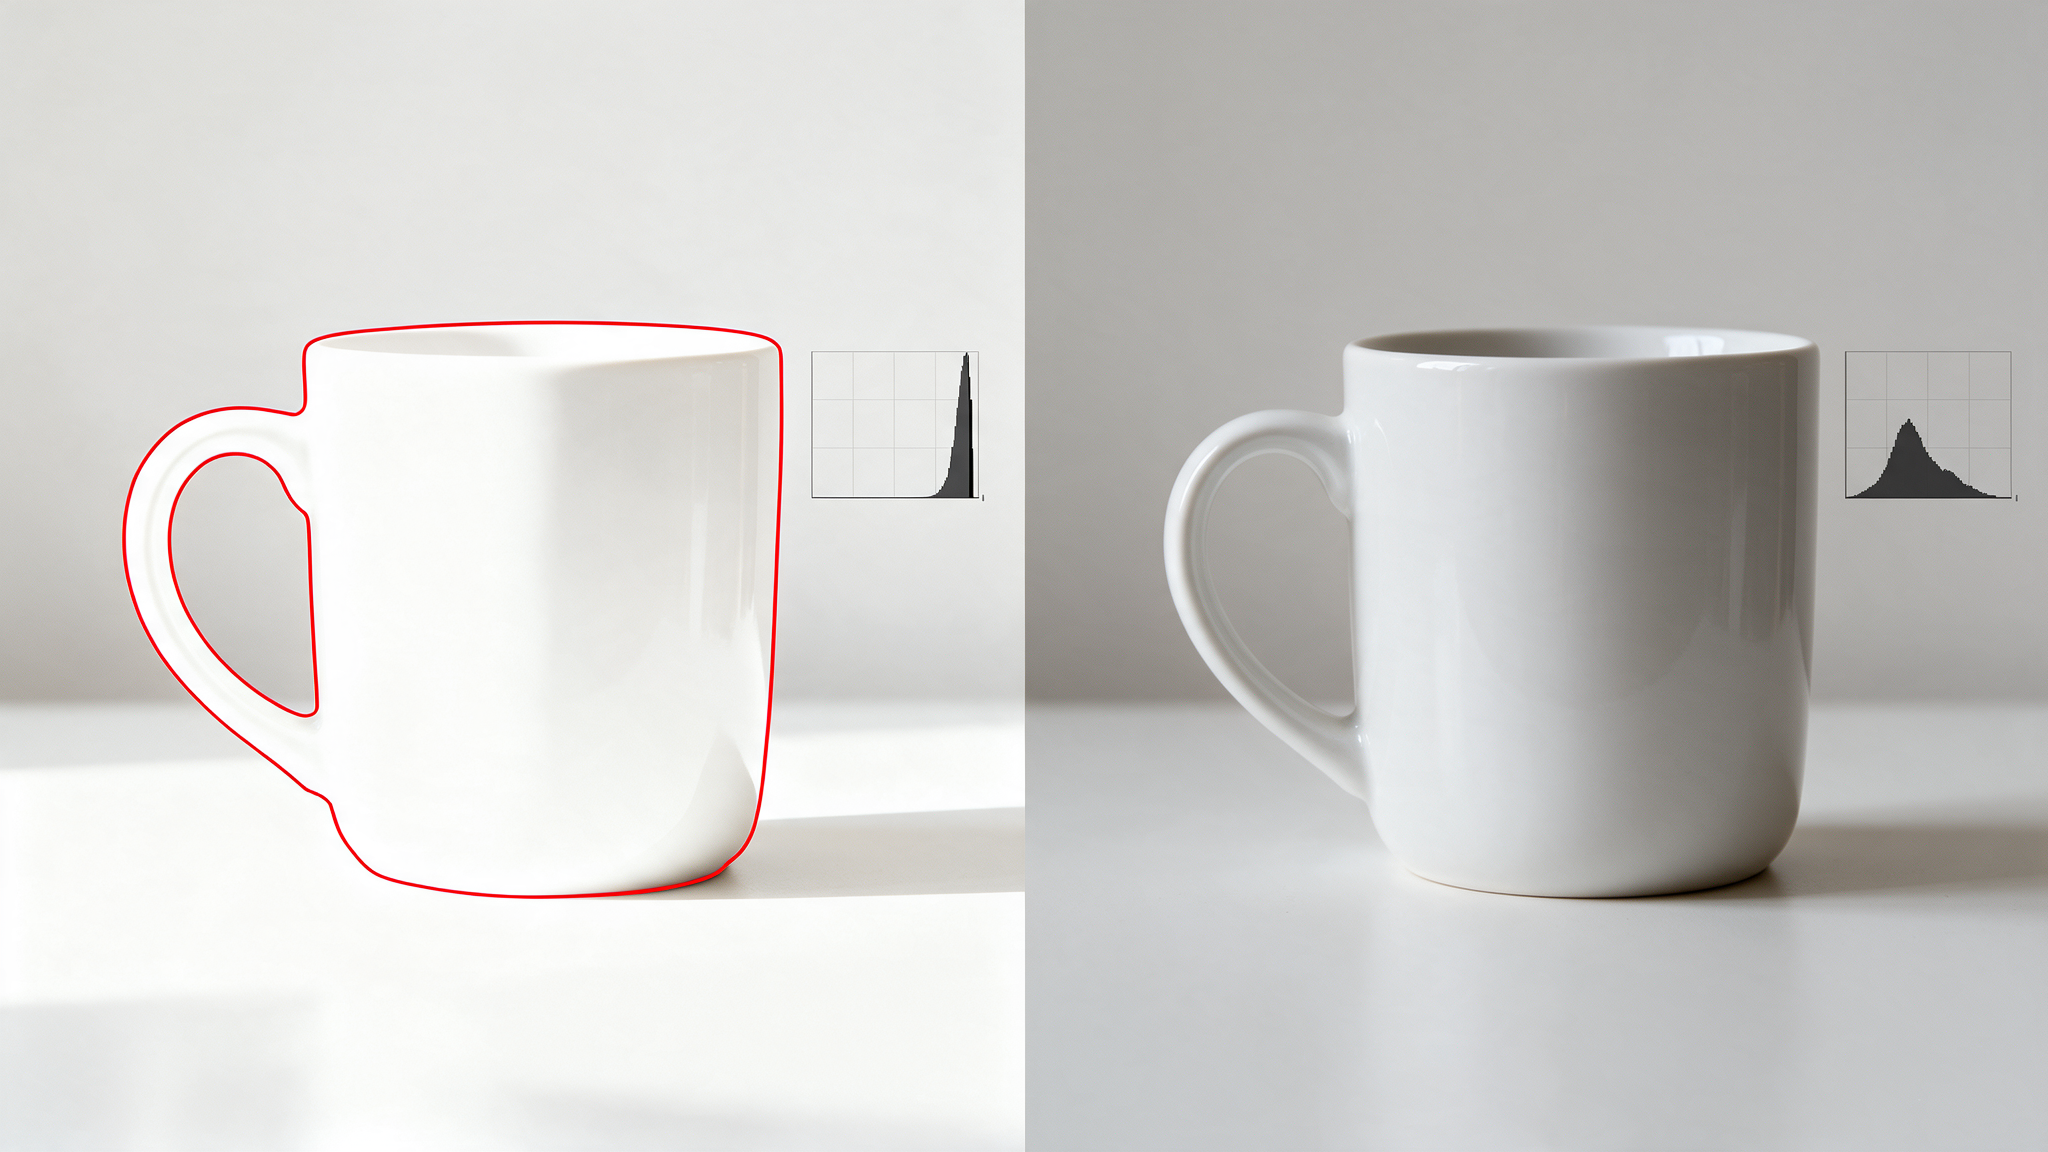
Illustrative example. Left: clipped highlights. Right: exposure corrected for this product.
15. Use a tripod
A locked camera keeps every frame aligned. It protects sharpness and makes consistent crops and angles much easier, especially across several views of the same product.
16. Keep the same lens, height and distance within a collection
Lens choice and camera position change how a product's proportions look. Pick one setup per collection and keep it. If you change it, write the change down.
Part 4: Capture and Check (Fixes 17 to 20)
17. Leave margin around the product
Do not crop tight in camera. Leave space on every side. Marketplaces and storefronts ask for different ratios and canvas sizes. For example, Amazon main images need the product to fill most of the frame (see our Amazon image requirements summary and confirm the current rules in Seller Central). Extra margin lets you crop to the right ratio later, while a cut-off edge cannot be added back.
18. Shoot every angle in one session
Front, back, side, detail and scale shots belong to the same session. Coming back later usually means different light and a different look. For apparel that will use ghost mannequin editing, plan the shots the editor needs while the garment is on the form: typically a front shot, a back shot and an inside-neck shot.
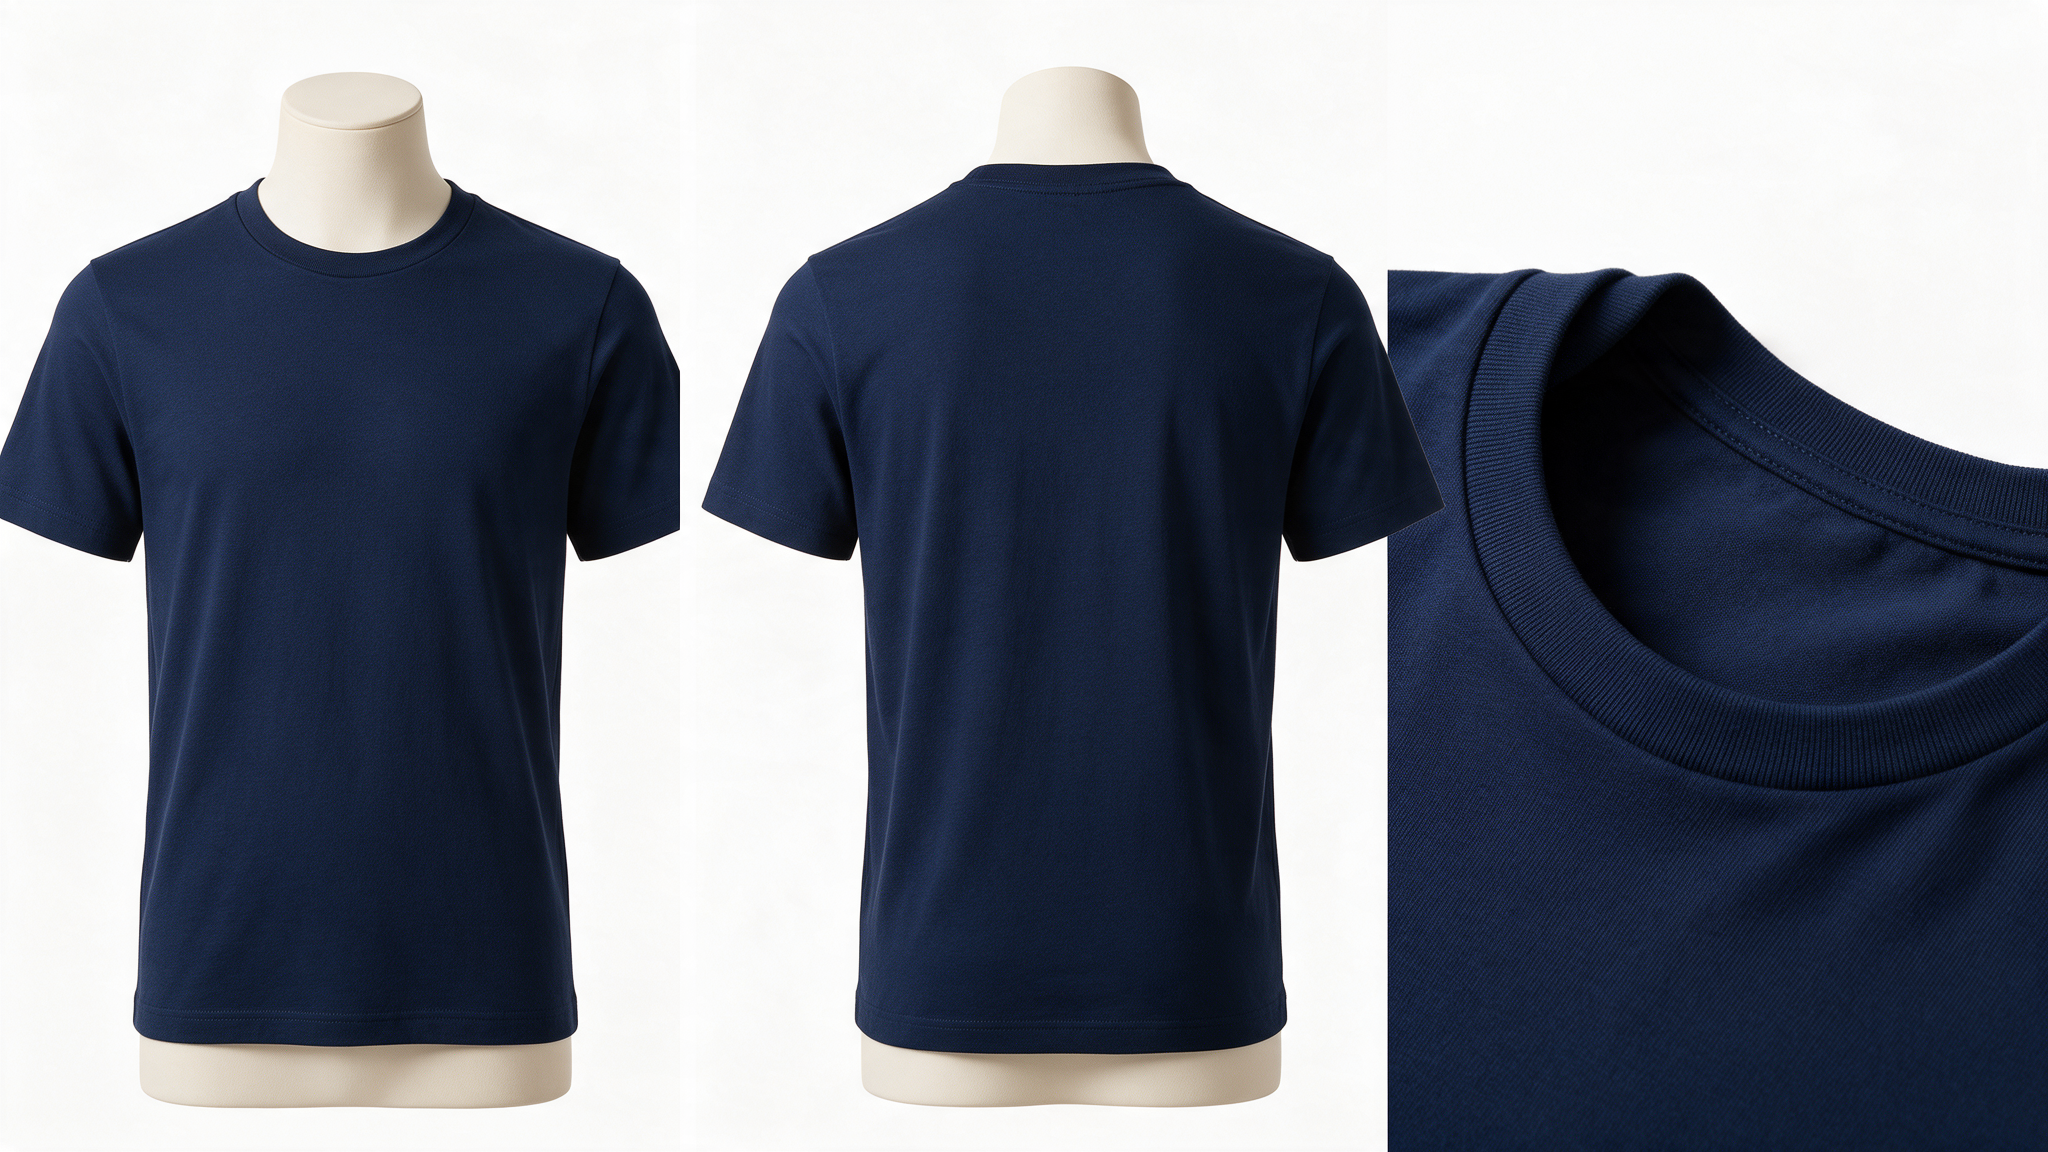
Illustrative example. The three source shots a ghost mannequin edit usually needs.
19. Inspect at close range and at normal size
Zoom in on the first frame of each new product to check focus, dust, scratches and fingerprints. At normal viewing size, check what close inspection hides: framing, product position, lighting balance and color.
A practical routine: check one frame per product or setup at high magnification, then view the full set at fit-to-screen size. If you shoot tethered, do both on the first frame of each new setup.
20. Review a contact sheet before you break down the set
Put the whole batch on one screen with your reference frame beside it. Outliers in brightness, color, framing and shadows are easy to see in a group. Finding them before you pack up is the cheapest fix there is.
Category Notes: Apparel, Jewelry, Glass and Reflective Products
The 20 fixes apply to every product. These categories add specific risks.
| Category | Biggest pre-shoot risk | What to do before shooting |
|---|---|---|
| Apparel | Wrinkles, uneven draping, missing views for ghost mannequin | Steam, pin or clip for a clean shape, and shoot the front, back and inside-neck views |
| Jewelry | Dust, fingerprints, harsh reflections in metal and stones | Clean under magnification, use gloves, and control reflections with diffusion and cards |
| Glass | Fingerprints, unwanted reflections, lost edges | Clean thoroughly, control reflections with large diffused light and flags, and use a polarizer where it helps |
| Reflective and metal products | Mirror-like surfaces that show the studio | Use large soft sources, black flags for edges and white cards for fill, and test several angles |
Pre-Shoot Checklist You Can Copy
Use this product photography checklist before every session.
| Stage | Check | Done |
|---|---|---|
| Product | Cleaned, handled with gloves, steamed or pressed | ☐ |
| Product | Inspected under side light, tags and residue removed | ☐ |
| Set | Background clean and creases removed | ☐ |
| Set | Light diffused, reflections controlled | ☐ |
| Set | Shadow style decided, positions marked | ☐ |
| Camera | Gray card or color checker shot for this lighting setup | ☐ |
| Camera | Custom white balance set, RAW or JPEG decision made | ☐ |
| Camera | Exposure checked for the product, highlights not clipped | ☐ |
| Camera | Tripod locked, lens, height and distance noted | ☐ |
| Capture | Margin around the product, all angles shot | ☐ |
| Review | Checked at close range and at normal size, contact sheet reviewed | ☐ |
Print it and keep it next to the set.
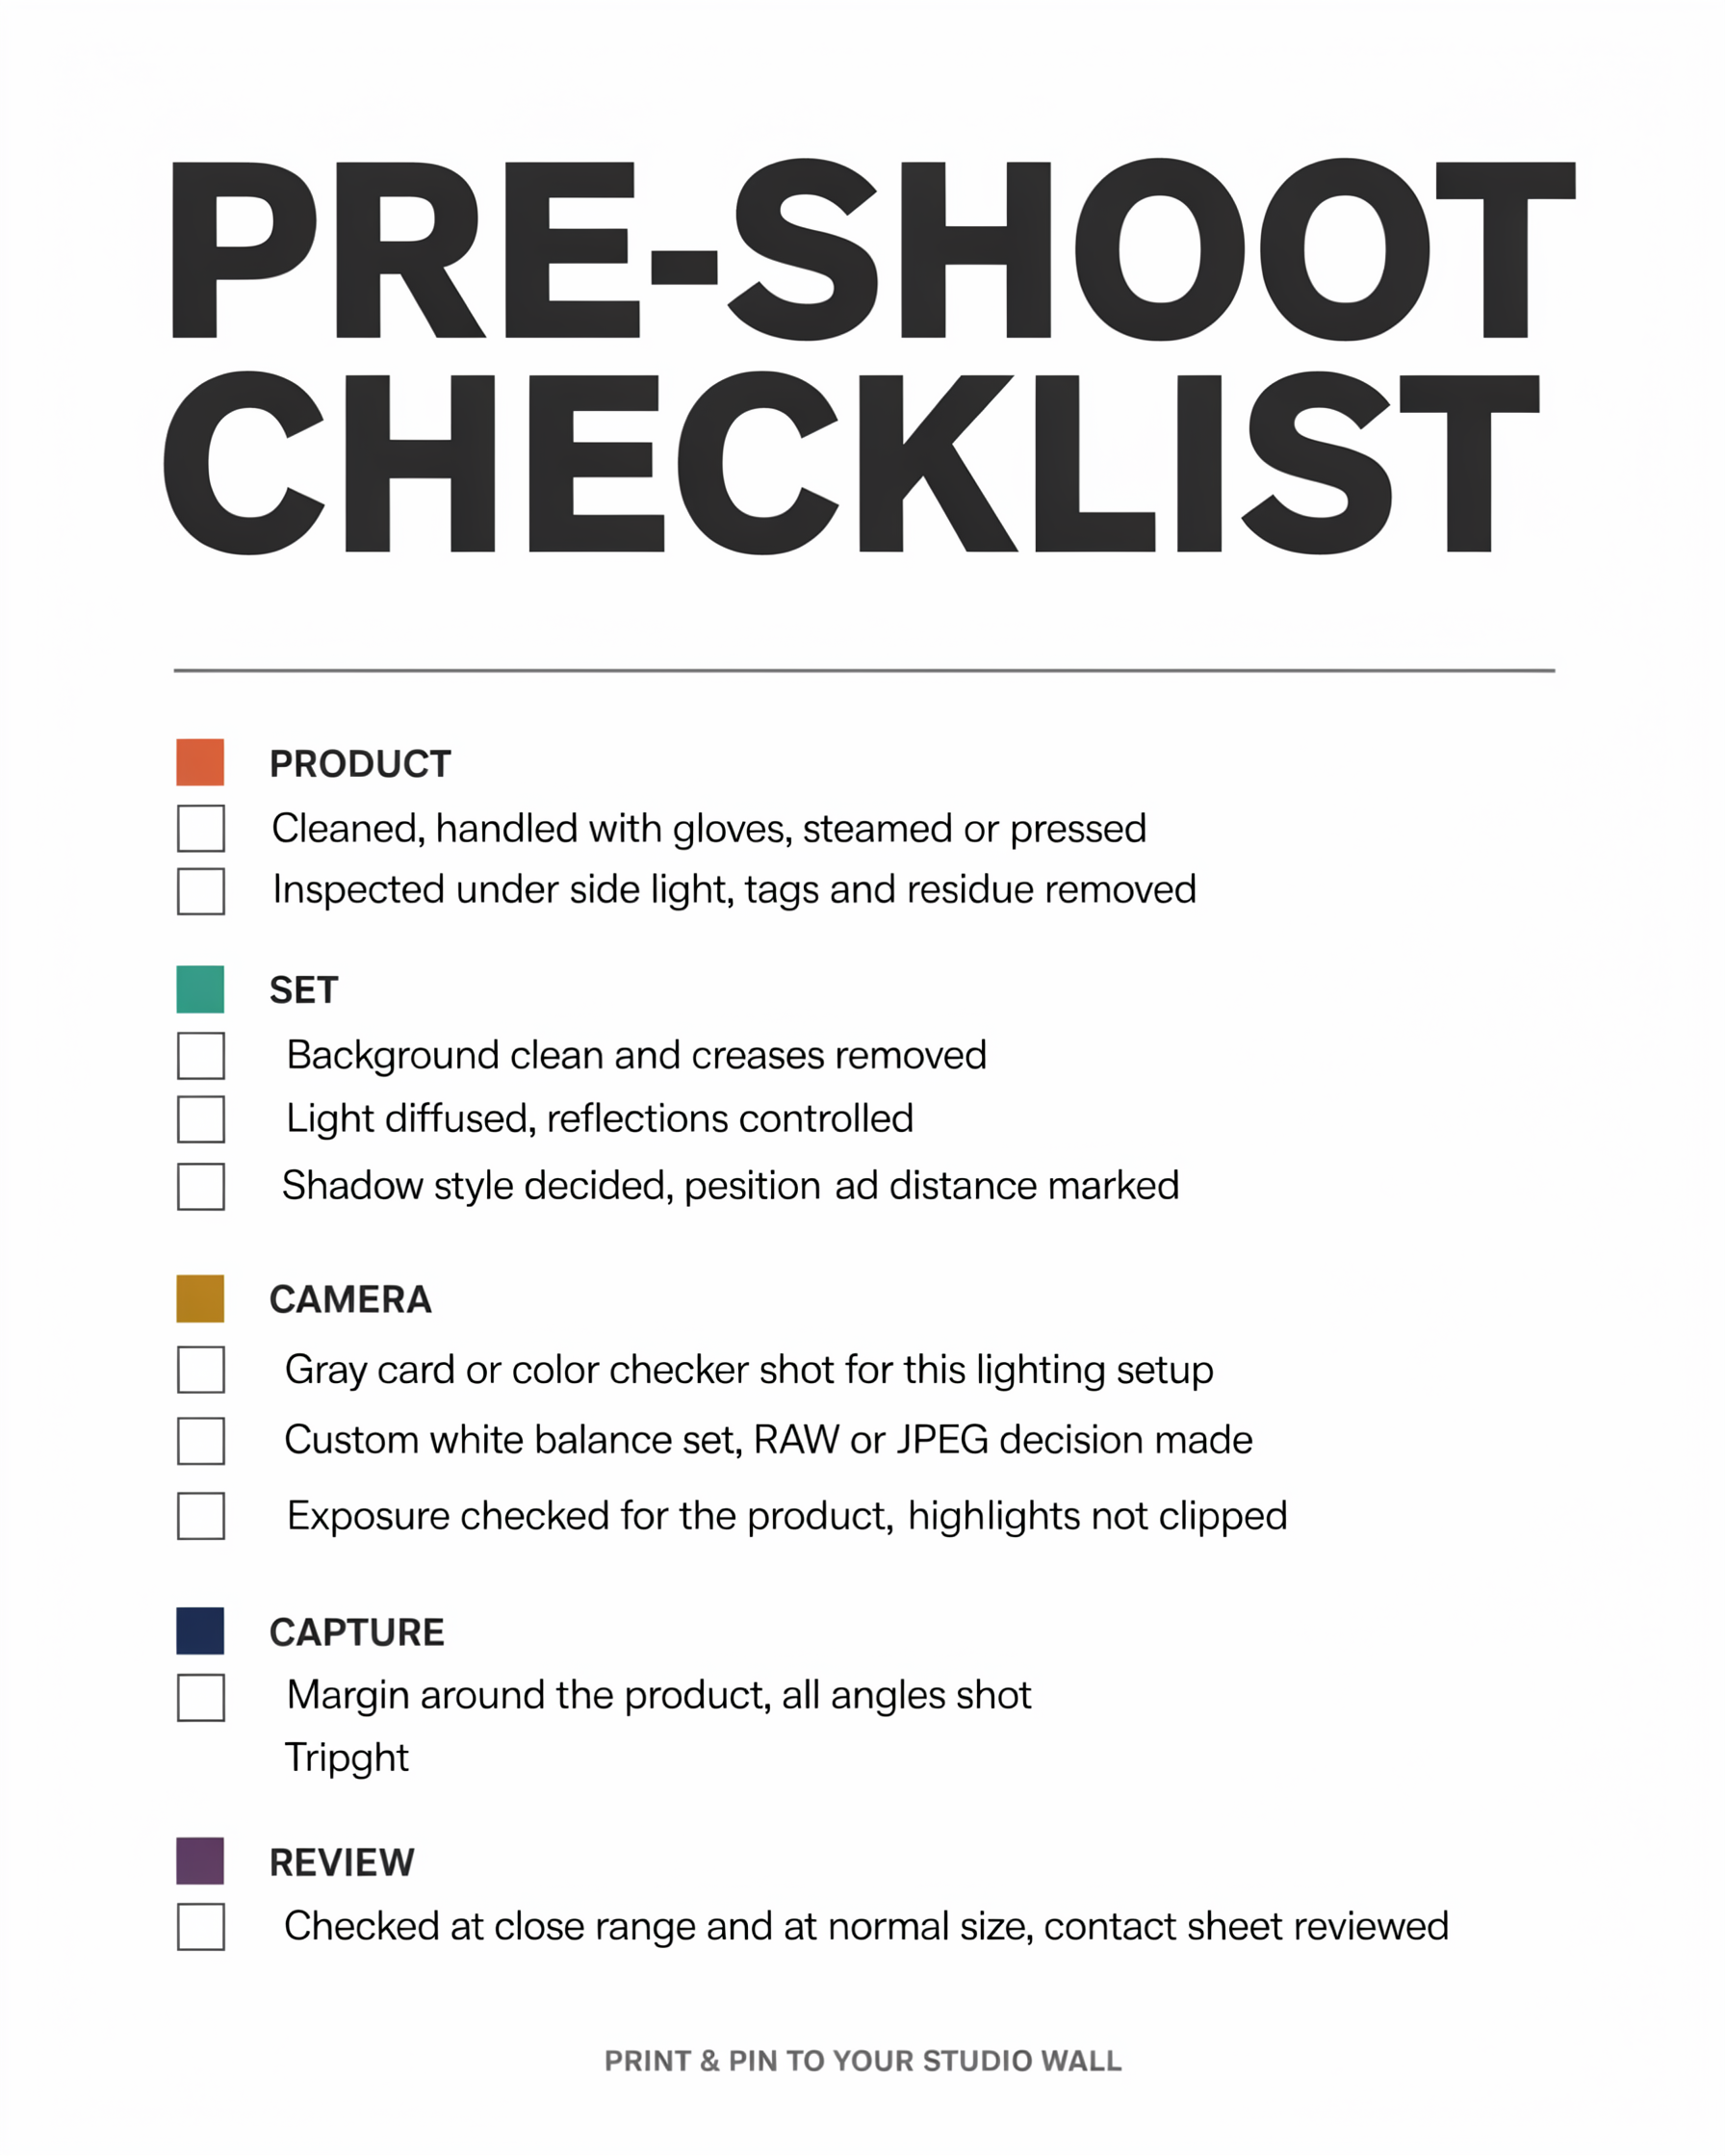
A printable version of the pre-shoot checklist.
What Preparation Cannot Do (and What an Editing Team Handles)
Even a well-prepared shoot leaves work to do. Careful preparation does not draw a precise edge around a product, place it on a pure white background, or remove the last stray hair from a model's shoulder.
| You handle before and during the shoot | An editing team handles afterward |
|---|---|
| Cleaning, steaming and inspection | Spot removal and detail retouching |
| Lighting and reflection control | Precise cut-outs with clipping paths and masking |
| Reference shots and white balance | Color correction and color matching |
| Shadow decisions | Natural shadows, drop shadows and reflections |
| Margin and framing | Cropping and resizing to platform specifications |
| Mannequin shots | Ghost mannequin editing |
Preparation makes each of those jobs smaller and faster. Some problems still need a reshoot: a blown highlight that lost its detail, a product out of focus, or an angle that was never captured. Editing cannot rebuild information that is not in the file, which is why the fixes above come first.
How ClippingPathService.com Works With Teams That Shoot Products Regularly
Recurring shoots are where preparation and editing pay off most. If you photograph products every week or every season, a small saving on each image multiplies across the catalog.
ClippingPathService.com works with photographers, product studios, agencies, fashion brands, ecommerce retailers and enterprise teams. Here is what the company reports:
- 78,066+ projects delivered, each edited by hand
- 450+ global brands and retailers served, with 200+ retouchers on the team
- A 3-step quality control process, with every image checked by a person before delivery
- Unlimited revisions on the original instructions at no extra charge
- Files accepted in all major formats, including JPEG, PNG, TIFF, PSD, RAW and WebP, and delivered in the format you specify, such as JPEG on white, transparent PNG, or layered PSD or TIFF
Clients describe the results in their own words:
"They remember our preferences project to project. I do not have to repeat instructions every time, and the quality stays consistent across large image sets."
Sophie Martin, Senior Photographer, Sportswear Brand
"We needed more than a vendor. We needed a team that could fit into our workflow and keep pace with daily production. They have done exactly that."
Michael Torres, Production Lead, Apparel Catalog Studio
"When launch deadlines get tight, their team responds fast and delivers clean files without compromising the details. That reliability matters to us."
Daniel Reeves, Creative Operations Manager, eCommerce Retailer
Pricing and turnaround, in brief
Published prices start at $1.00 per image for simple clipping paths: one object, a smooth outline and no holes. More complex clipping paths cost more, and advanced retouching, masking, ghost mannequin and color matching are priced by quote based on your images. See the current rates on the pricing page. Per-image prices depend on image complexity, volume and delivery time.
For turnaround, 48-hour and 20-hour (overnight) delivery are included. Faster options of 10, 4 and 1 hour are available for a surcharge on the order total. Complex images and large batches can take longer, and the timing for your files is confirmed when you get your quote.
Files are typically kept on secure servers for 30 days after delivery and then permanently deleted. An NDA is available on request.
What a typical recurring workflow looks like
- You shoot with the checklist above, including a reference frame for each lighting setup.
- You send the batch with a short brief: background, canvas size, shadow style and retouching notes.
- Editors prepare each image, from clipping paths to retouching and color matching, against your reference.
- Quality control checks the batch before delivery.
- You review the batch as a set. If anything misses the brief, request a revision.
- Your next shoot starts from the same checklist and brief instead of from scratch.
Questions to Ask Any Editing Partner
Use these with any provider, including us:
- Can you match an approved reference image, not just "clean up" the photo?
- Is every image edited by a person, or is masking automated?
- Who checks the batch before delivery?
- What happens if a batch does not match the brief? Are revisions limited?
- Can you keep the same style across months and collections?
- Which file formats do you accept and deliver, and are layers kept?
- What are the turnaround tiers, what do they cost, and what applies to complex images?
- How long are my files kept, and how are they deleted?
Your Next Step
Before your next shoot, run through the 20 fixes and tick the checklist. Shoot a reference frame for your lighting setup, then shoot the batch.
When you have images you want to hand off, you can test the editing first. ClippingPathService.com offers a free trial on up to 3 of your images, with no credit card needed. Send your hardest shots to see the quality before you place a paid order.
For a larger batch or advanced retouching, the free trial may not cover everything. Ask for a custom quote and the team will price it from your sample images.
Frequently Asked Questions
What is the most common product photography mistake before a shoot?
Skipping preparation. Dust, fingerprints, wrinkles and uneven lighting are easy to fix on set and slow to fix across a full batch.
Can't I just fix everything in editing?
Much of it, yes, but it takes time and adds cost. Poor preparation increases retouching work, and it can force a reshoot when detail was never captured.
How do I keep product photos consistent across a large catalog?
Keep the same camera settings, lens, height and lighting positions within a setup, shoot a reference frame whenever the lighting changes, and review the whole batch on a contact sheet before you finish.
Should I shoot RAW or JPEG for product photography?
RAW gives an editor more flexibility to correct color and exposure. A high-quality JPEG can work for simple ecommerce workflows with well-controlled light. If color accuracy or heavy retouching matters, choose RAW.
Do polarizing filters remove all reflections?
No. They help with many non-metallic reflections, such as glass, plastic and glossy packaging, but have limited effect on bare metal and chrome. For metal, control the reflections with large diffused light, flags and cards.
How much margin should I leave around the product?
Enough that you can crop to any marketplace or storefront ratio without cutting into the product. Leave space on all four sides.
Do I need both a gray card and a custom white balance?
They do different jobs. The custom white balance sets the camera, and the gray card or color checker in the frame gives you and your editor a reference to correct against. Shoot a new reference whenever the lighting changes.
How fast can a batch be edited?
At ClippingPathService.com, 48-hour and 20-hour delivery are included, and 10-hour, 4-hour and 1-hour options are available for a surcharge. Complex images and large batches can take longer, so timing is confirmed when you get your quote.