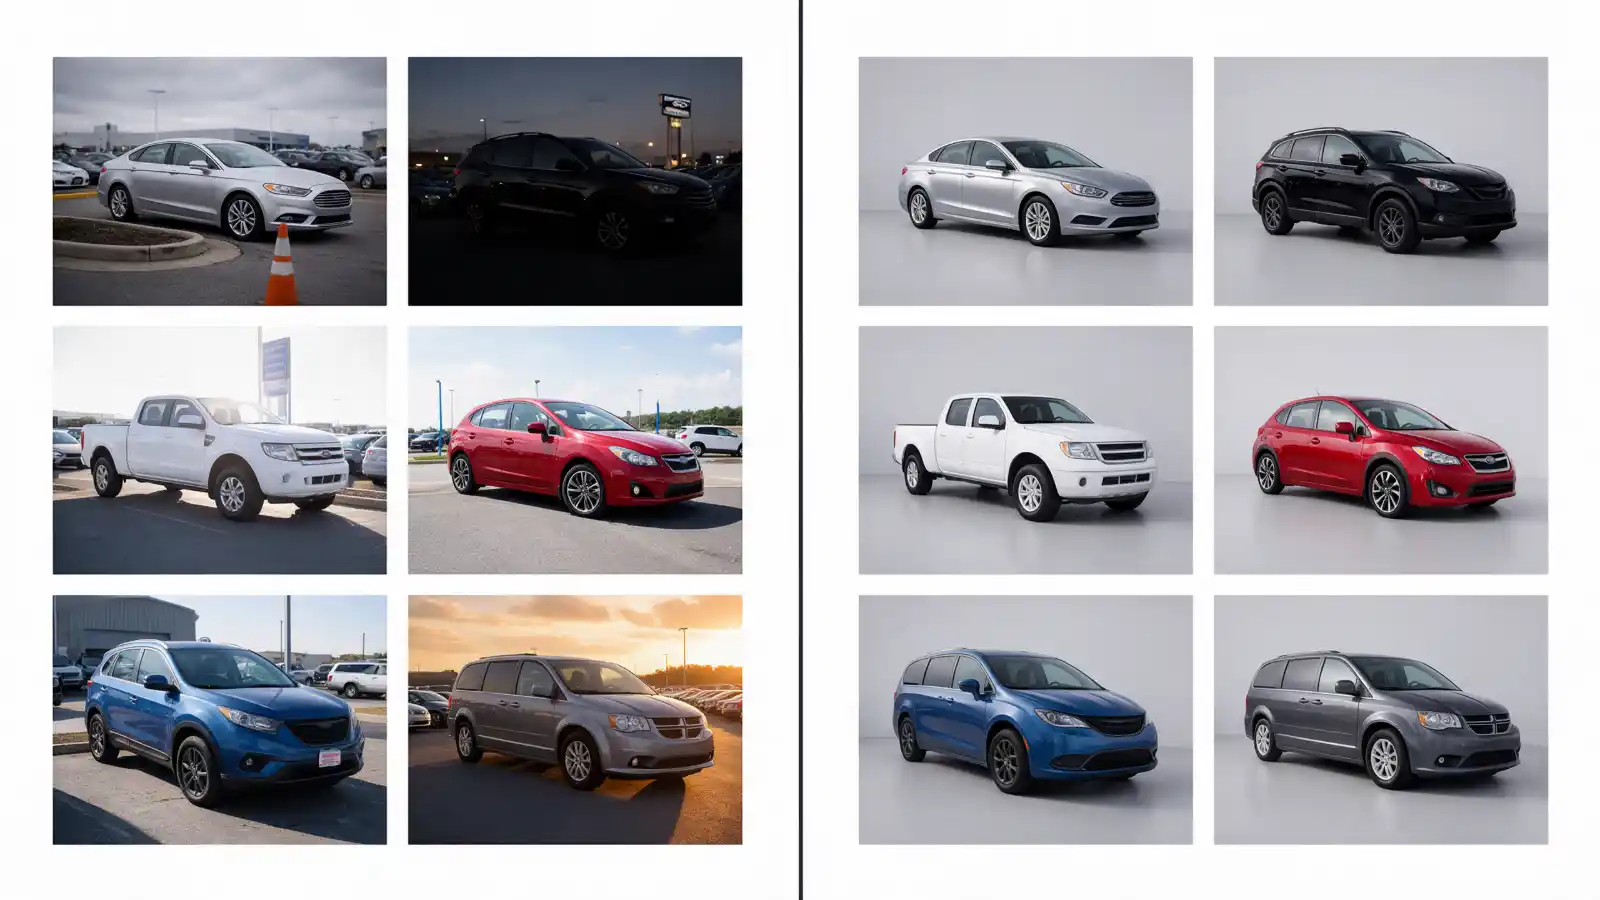
Illustrative example, AI-generated. Left: inconsistent inventory photos. Right: the same vehicles matched to one standard.
You have 100 vehicles on your website. Every photo is usable.
Then a shopper scrolls the inventory page and sees a bright silver sedan next to a dark gray SUV shot in a cluttered lot. The next listing is cropped tight. The one after that has a wash of orange evening light.
Nothing is wrong with any single photo. The page still looks unfinished.
That is the real dealership photo problem. It is rarely one bad image. It is a set of images that does not look like it belongs to one dealership.
This guide gives you a six-point Image Standard for inventory photos, shows what to edit and what to leave alone, and explains how to keep the standard in place across large batches.
Who This Guide Is For
Dealership groups, independent dealers, automotive photographers delivering large lots, and inventory platforms that receive photos from many dealers.
Why Dealership Photos Drift
A dealership lot is not a studio. Even with good photographers, images drift apart because of how the work happens:
- Multiple photographers, each with their own camera height, position and habits
- Different shooting days, with overcast, direct sun and late-day light
- Different areas of the lot, where cones, signs, other vehicles or building shadows creep into frame
- High inventory turnover, so there is rarely one big shoot that keeps everything uniform
- New arrivals photographed as they are prepped, often by whoever is free
- Used vehicles in different visible condition, each needing honest coverage
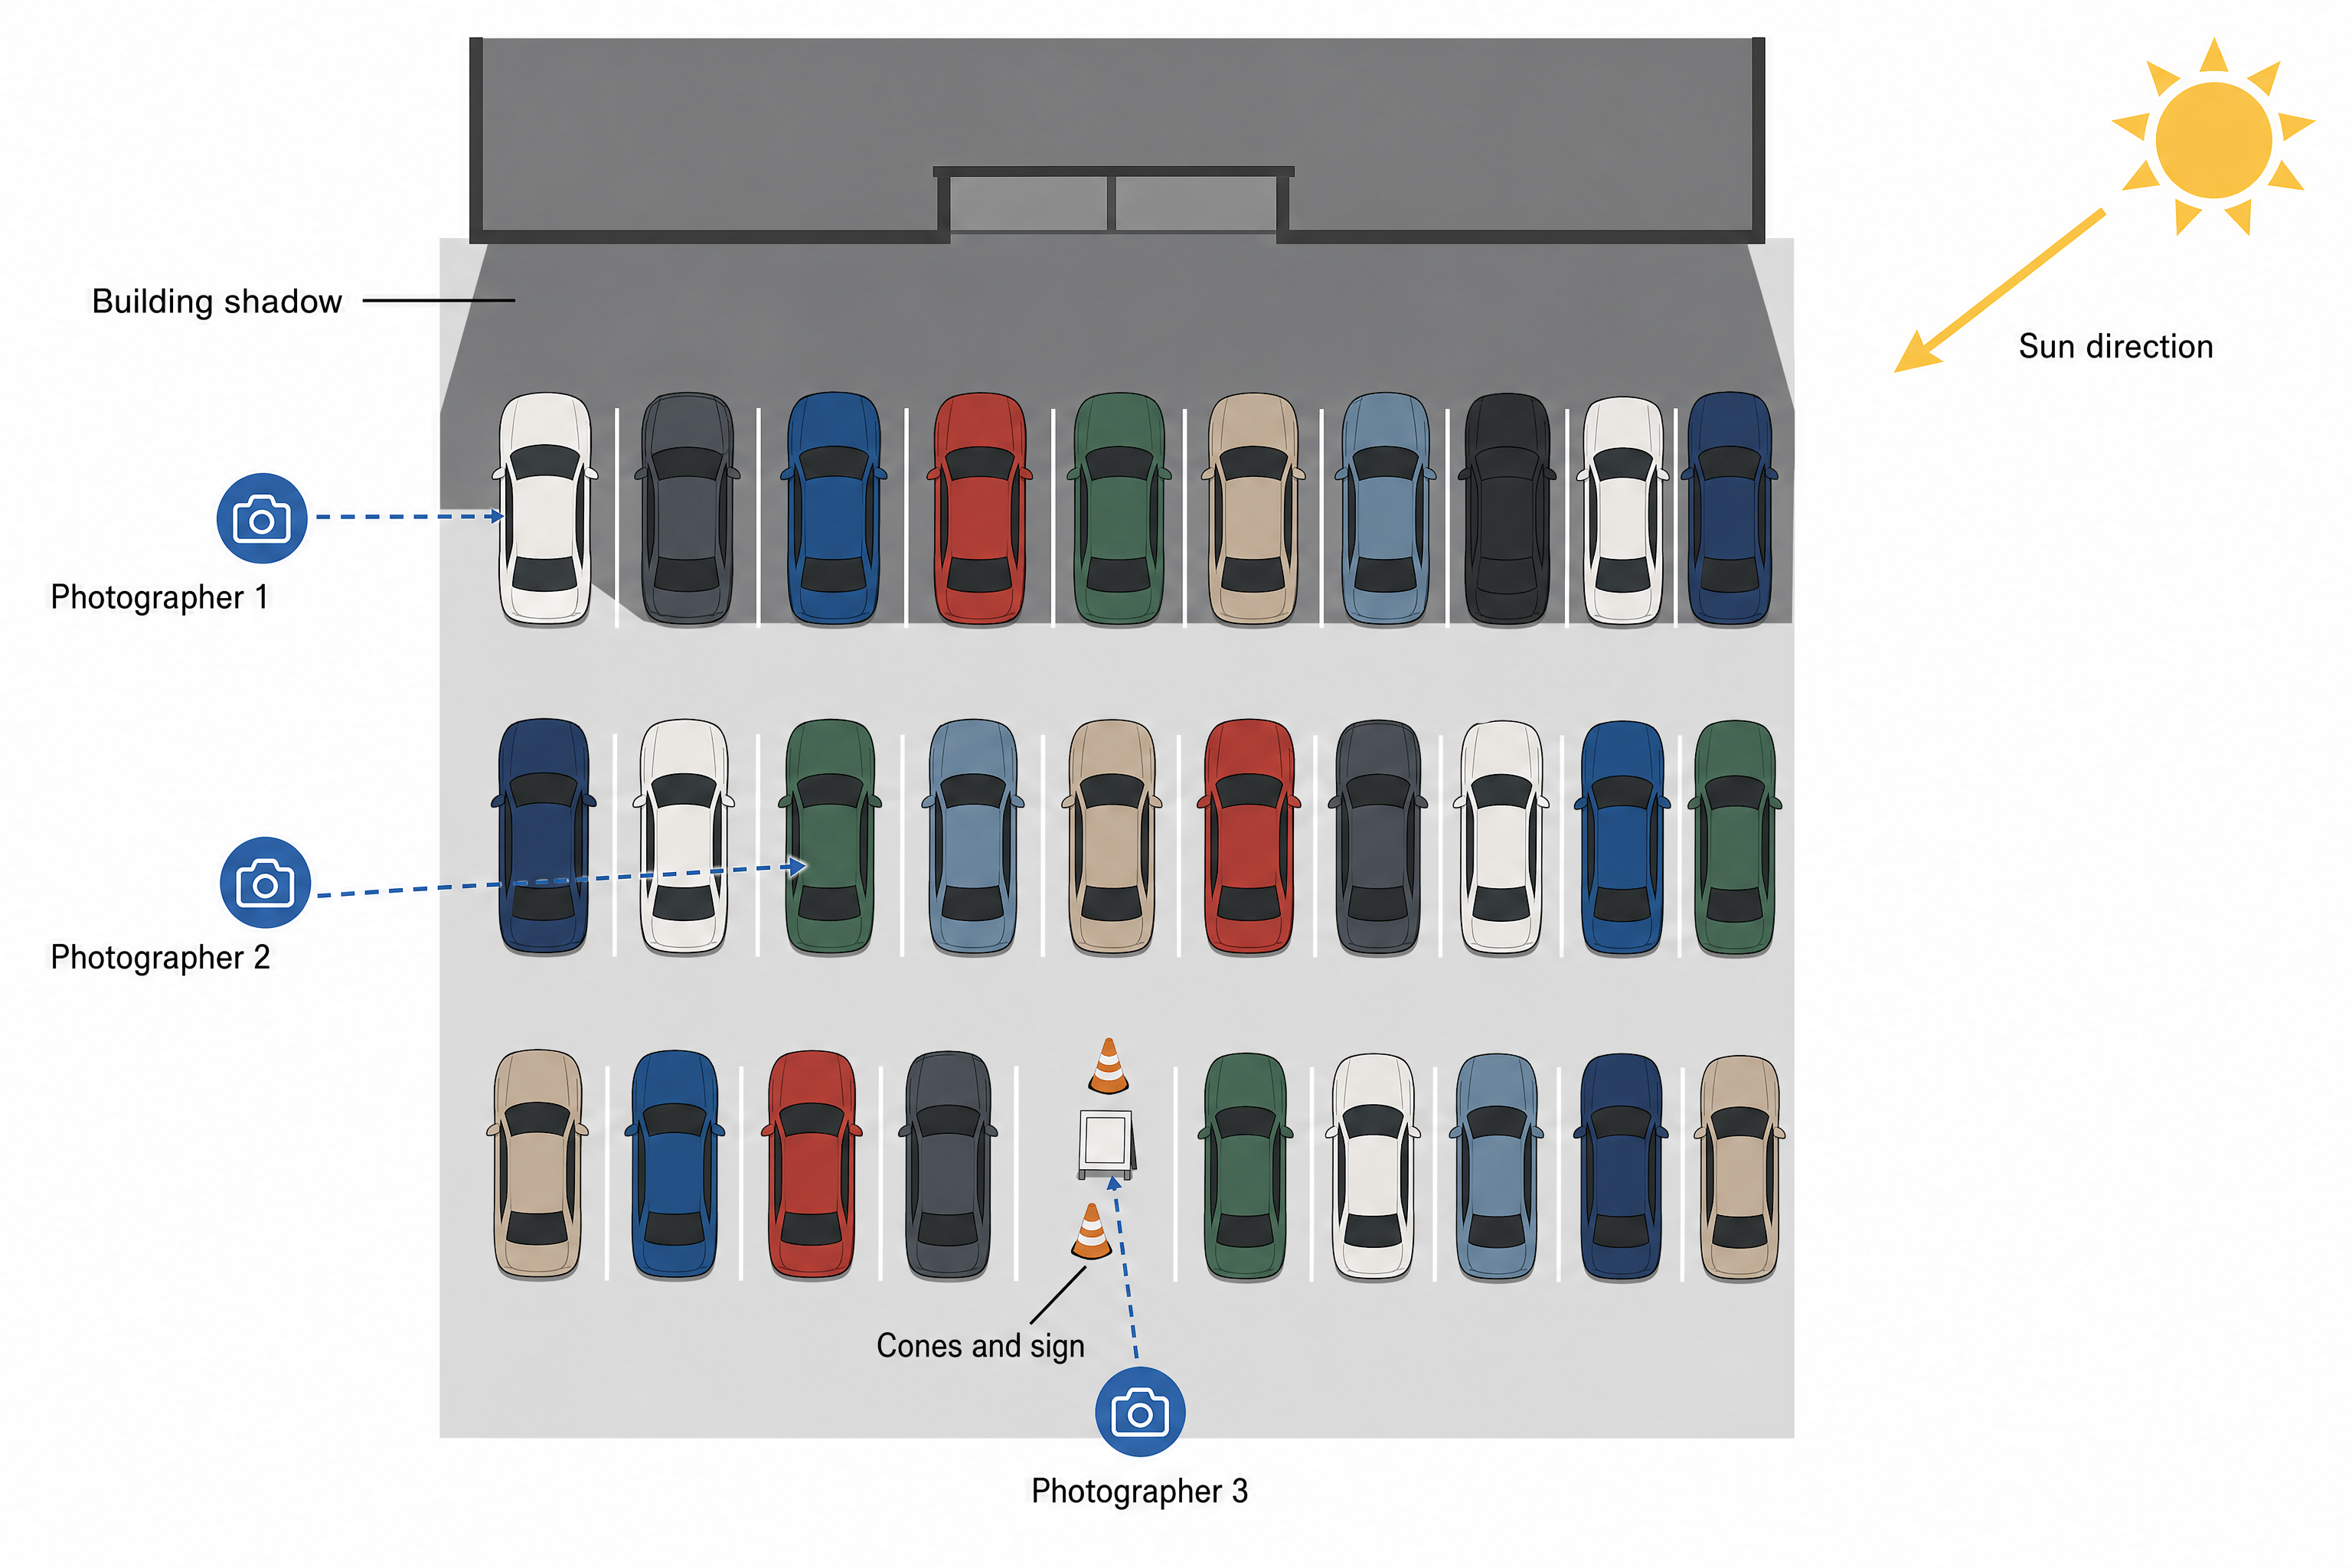
Illustrative example, AI-generated. On one lot, three photographers get three different results.
None of this is a failure of effort. It is how a lot runs. The fix is a written standard, so the output matches even when the shooting conditions do not.
Shoppers compare vehicles side by side. When lighting, framing and backgrounds change from car to car, the photos pull attention away from the vehicles. When they match, comparison is easier and the page reads as one inventory.
The goal: every vehicle follows the same visual standard, and every vehicle is shown honestly.
The Dealership Image Standard
These six points are the core of this article. Write them down once, give them to every photographer and editor, and use them as the checklist for editing, workflow and QC.
Add a reference image: one vehicle photo set that shows the standard done right. Every later photo and edit is compared to it, so "match the reference" replaces personal opinion about what looks right.
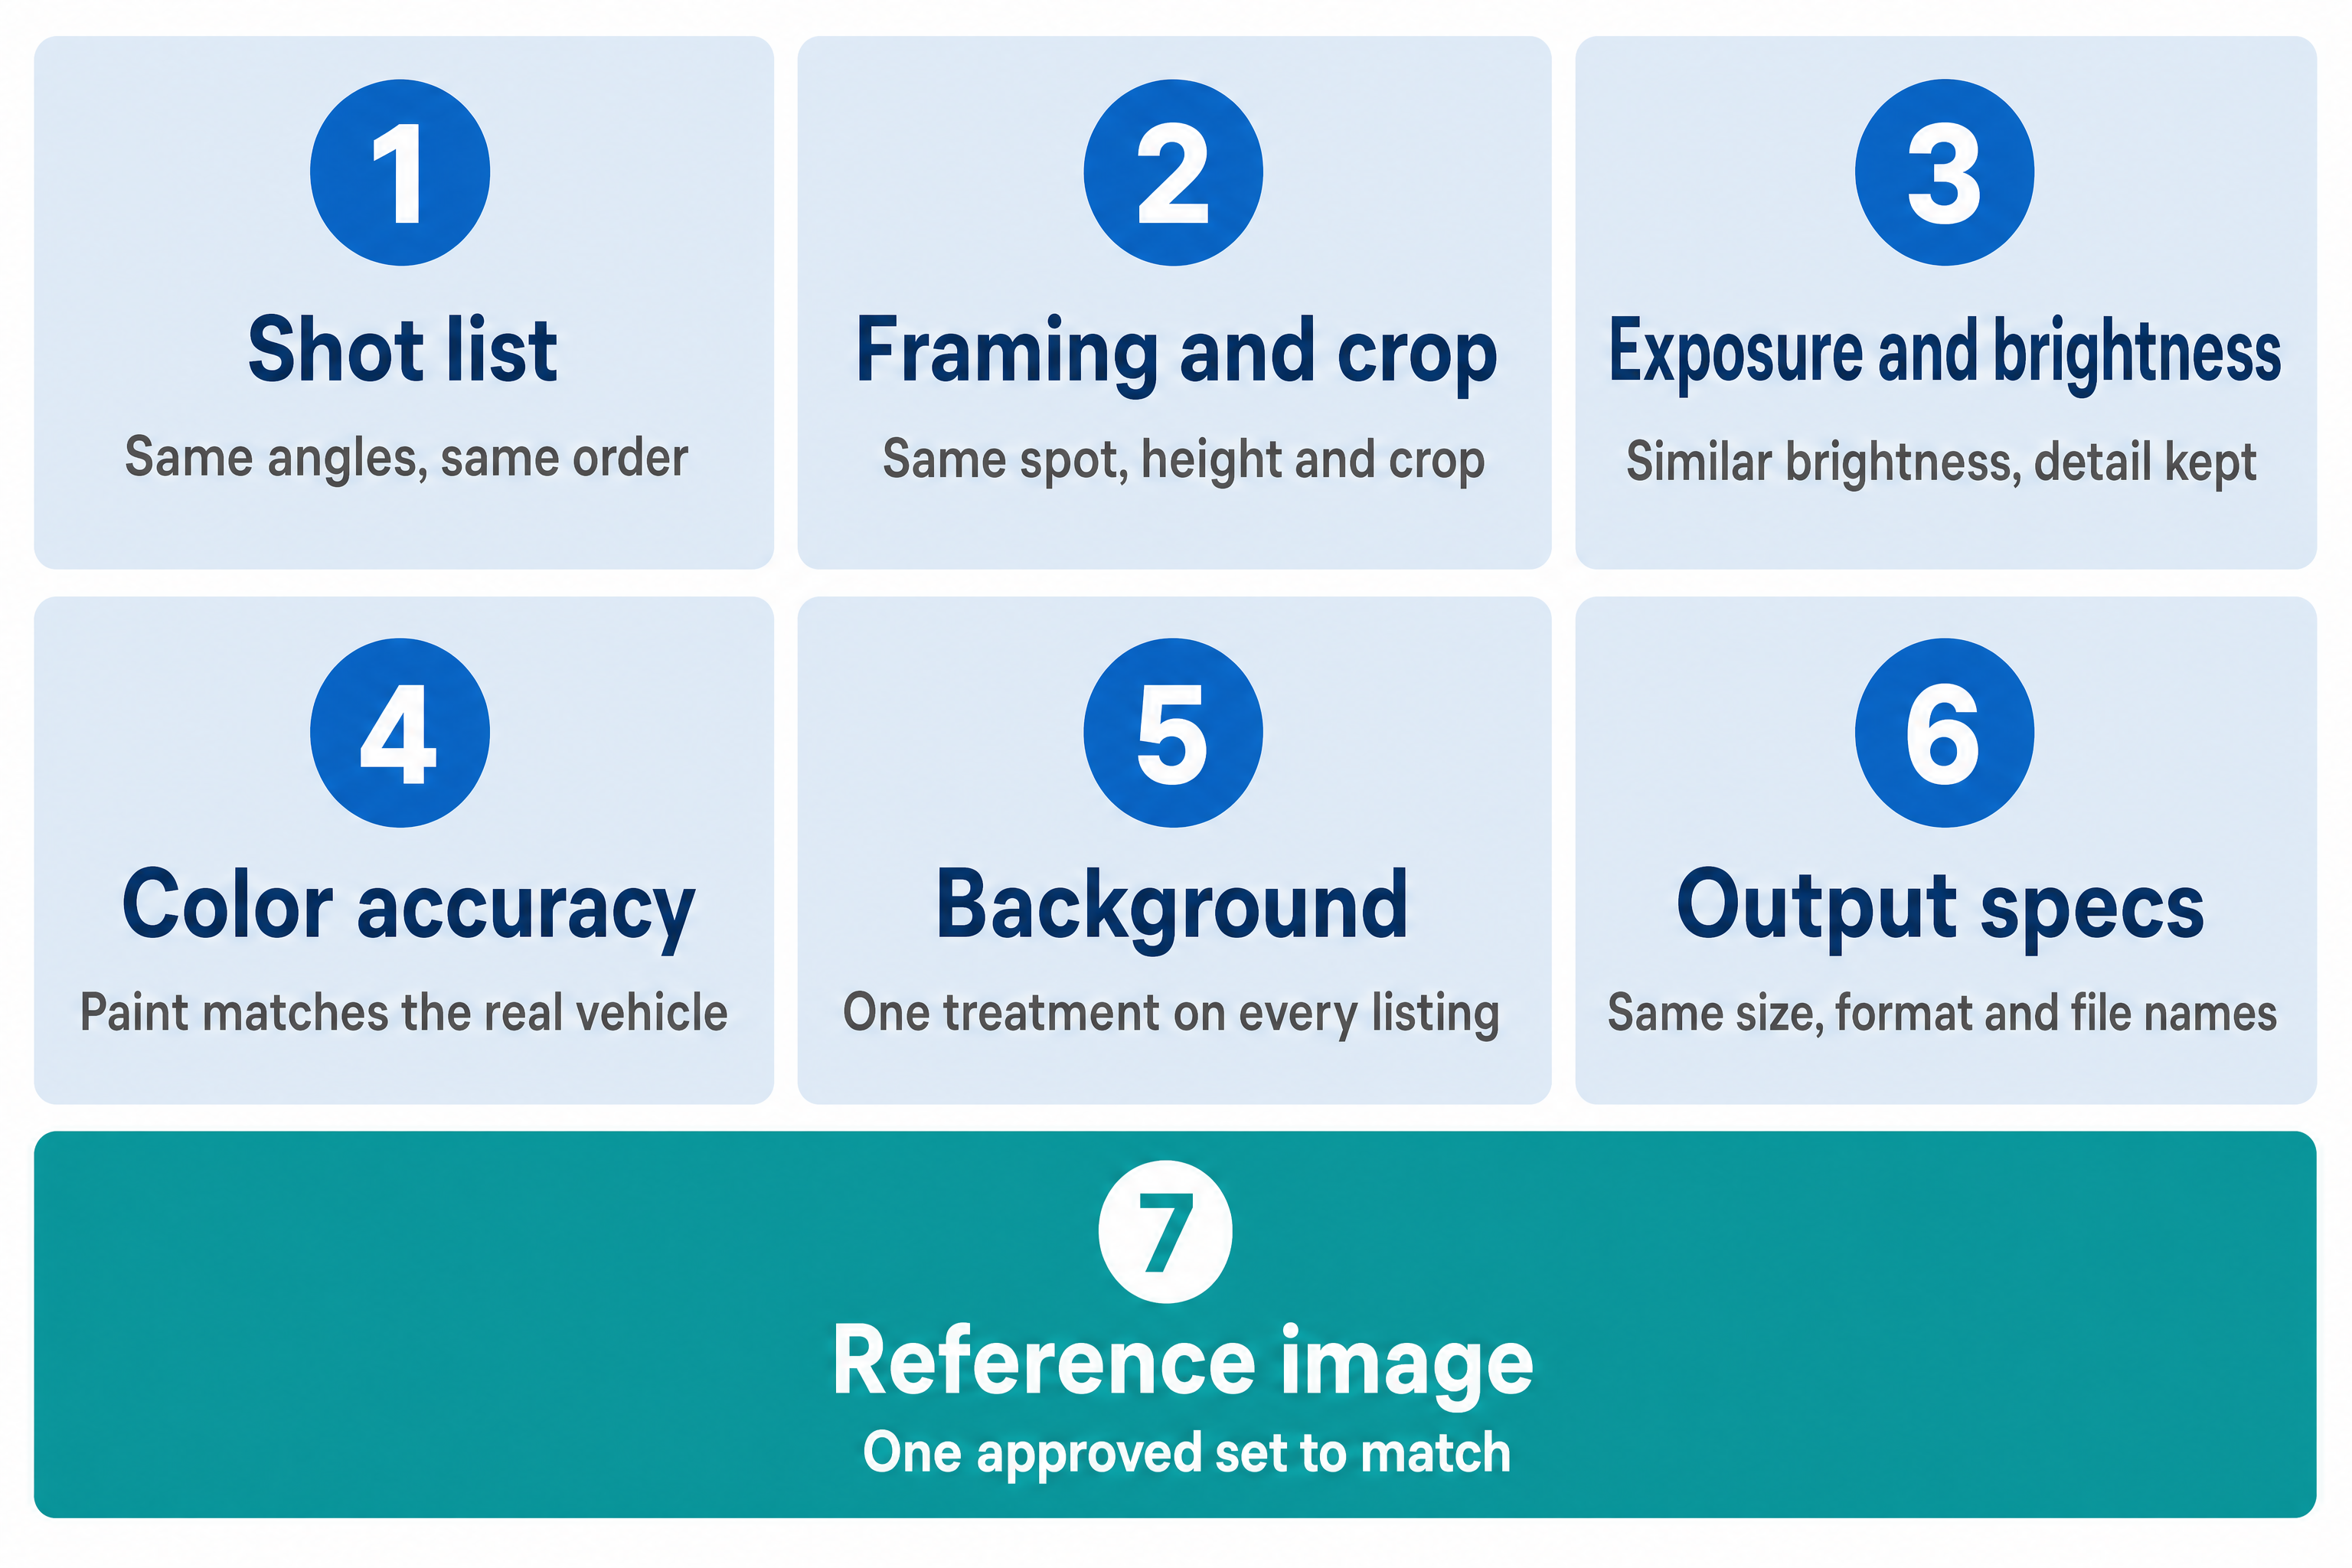
Illustrative example, AI-generated. The six-point Dealership Image Standard, plus the reference image.
1. Shot list
Shoot the same angles in the same order for every vehicle: front three-quarter (hero), driver side, rear three-quarter, rear, front, wheels, dashboard, front and rear seats, cargo area, and any feature you advertise. For used vehicles, add close-ups of any visible wear you disclose.
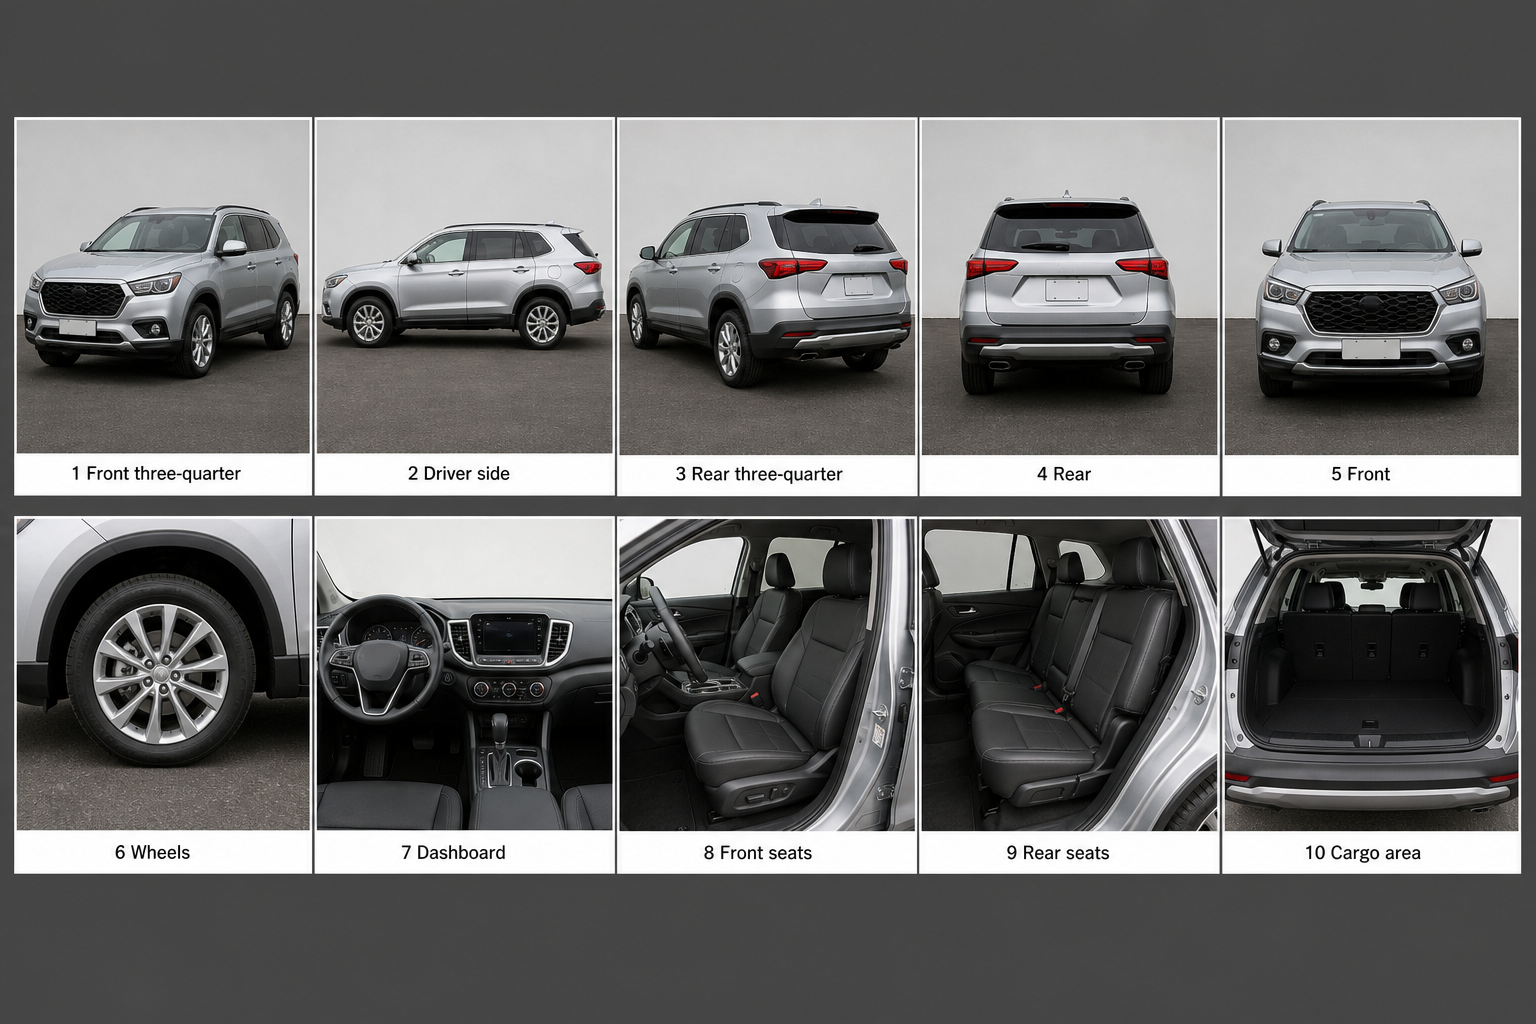
Illustrative example, AI-generated. One vehicle, every angle in the standard shot list, in the same order.
2. Framing and crop
- Same camera height and distance for exterior shots
- A marked shooting spot on the lot, so every photographer starts from the same position
- Vehicle centered, with wheels and bumpers not cut off
- Same crop ratio on every image
3. Exposure and brightness
- Shoot at similar times of day when you can, and expect to correct for the rest
- Similar brightness from vehicle to vehicle
- White vehicles keep panel detail. Black vehicles keep shape and shadow detail
- Interiors open enough to see seams, buttons and screens
4. Color accuracy
- Paint color matches what the buyer will see in person
- No orange evening cast or blue shade cast, with the same white balance approach across the set
5. Background
- One photo location on the lot, or one consistent replacement background
- No other vehicles, signs, cones, hoses or trash cans competing for attention
- The same treatment on every listing, not a mix of replaced and original backgrounds
6. Output specs
- Same pixel dimensions, aspect ratio, file format and compression
- Files named by stock number plus shot number (for example, 12345_01), so every image maps to its listing
- Sizes that meet your website and each marketplace's current requirements
What Editing Can Fix
Each fix maps back to a point in the Image Standard.
| Problem | Editing fix | Standard point |
|---|---|---|
| Dark, flat or uneven exposure, inside or out | Brighten and rebalance tones, lift shadows on wheels and footwells | Exposure |
| Orange, blue or window-light color cast | White balance and color correction | Color |
| Cluttered lot, other cars, signs, cones, loose items inside | Background removal or cleanup (a clipping path for clean edges) and object removal | Background |
| Reflections and glare on glass, paint and screens | Reflection and glare cleanup (see the limits below) | Exposure |
| Tilted shots | Straighten and level | Framing |
| Inconsistent crop and size | Standardized crop and resize | Framing, Output specs |
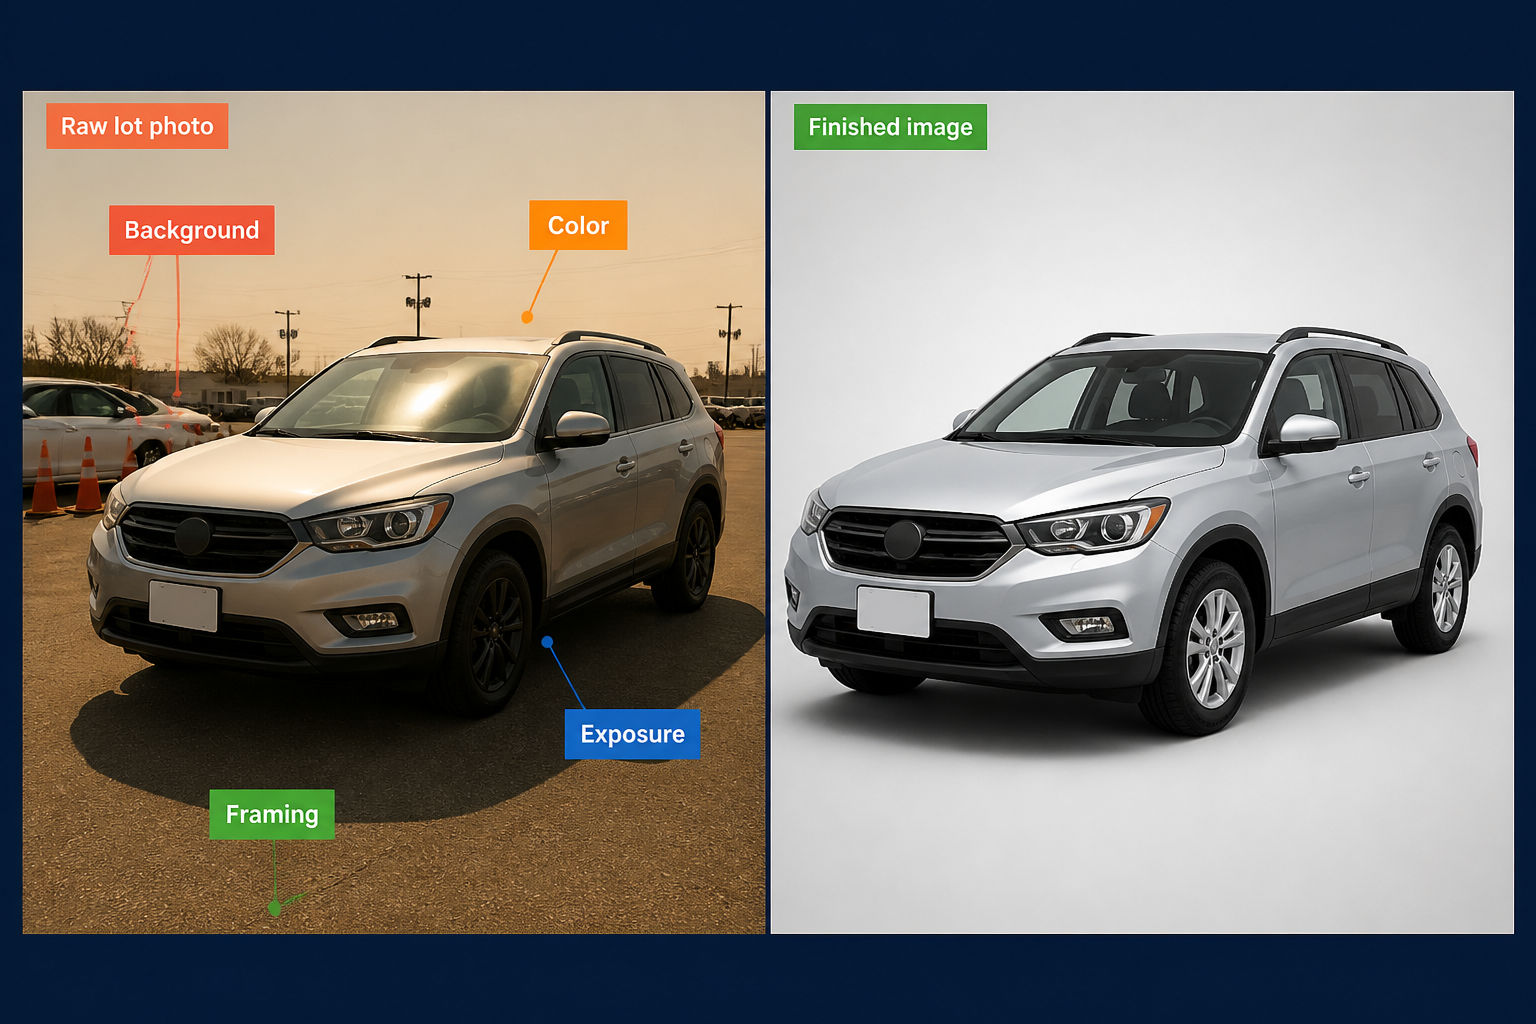
Illustrative example, AI-generated. Left: raw lot photo with the usual problems marked. Right: finished image.
What You Should Not Retouch
Editing should improve presentation. It should never misrepresent the vehicle.
Leave these alone, or disclose them clearly:
- Dents, dings, scratches and curb-rashed wheels. Buyers who see damage in person that the photos did not show may lose trust in the listing.
- Interior wear such as stained seats, cracked dashboards or worn bolsters
- Paint color. Correct a color cast, but never change the actual shade.
- Options and trim. Do not add wheels, badges or features the vehicle does not have.
- Mileage and dash readouts
This matters most for used vehicles, where condition varies from car to car and is part of what the buyer is evaluating.
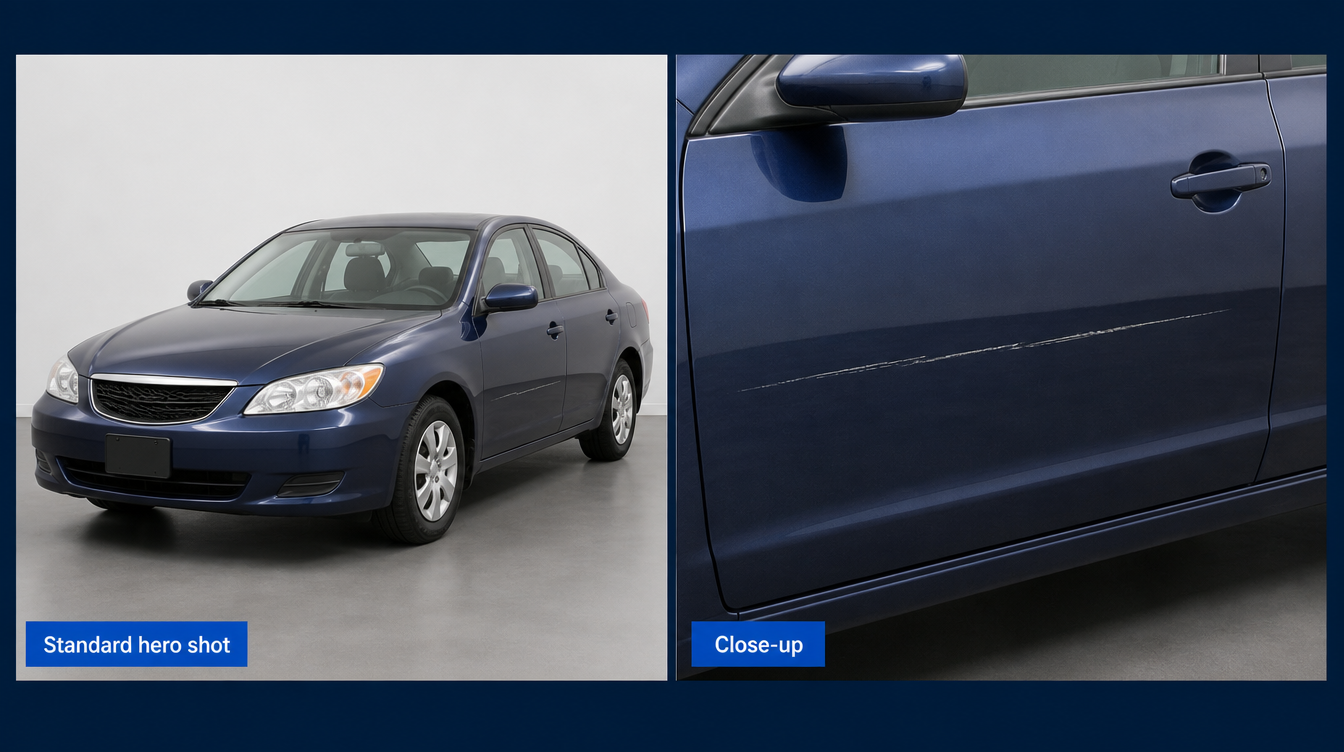
Illustrative example, AI-generated. Exposure, color and background are corrected. The visible wear stays in the photo, with a close-up beside it.
Common Editing Mistakes
- Over-brightening white cars until panel lines disappear
- Crushing black cars into flat shapes with no body lines
- Rough cutouts with halos or jagged edges around mirrors, antennas and wheels, where careful photo masking is needed
- Fake-looking shadows under the car after a background change
- Skipping QC on large batches, so one bad image reaches the live listing
Most of these are consistency failures, not skill failures. Someone edited quickly, and no one compared the finished set.
Keeping the Standard Across Large Batches
Each vehicle moves from arrival to prep, photography, upload, editing, quality control and listing. Inconsistency usually starts at two of those steps: photography (different people, different light) and editing (slow, repetitive, uneven). A workflow that holds up has three parts:
- Standardized photography. Shot list, shooting spot and camera height are fixed.
- Standardized editing. One written spec covers exposure, color, background, crop and output.
- Standardized QC. Each batch is reviewed as a grid against the reference image before it goes live.
Batch QC checklist
- Every vehicle has the full shot list
- Brightness looks similar across the grid, with detail kept on white cars and shape on black cars
- Paint color matches the real vehicle
- Backgrounds are clean and treated the same way, with clean edges around mirrors, wheels and antennas
- Damage and wear are not hidden
- Crop, size and format match the spec
- File names follow the stock-number pattern
Before and After: A 100-Vehicle Inventory (Illustrative Example)
This is an illustration, not a reported client result. Imagine a dealership with 100 vehicles, three photographers, and new arrivals photographed over three weeks as they are prepped.
| Standard point | Before | After |
|---|---|---|
| Shot list | Angles vary by photographer. A used truck's dent shows in one set and is missed in another | Same angles in the same order, plus a close-up for each disclosed condition item |
| Framing and crop | Standing height at the back of the lot, a low angle near the front row, a phone shot with different framing | One marked shooting spot, one camera height, one crop ratio |
| Exposure and brightness | Rainy-day sets look dark and flat, sunny-day sets have hard shadows, a black SUV loses its body lines | Balanced to the reference image |
| Color | Warm cast on late-day shoots | Corrected to the reference |
| Background | Cones, signs and a neighboring vehicle in some frames | One clean treatment on every listing |
| Output specs | Files named IMG_4412 or by date, in mixed sizes | Stock number plus shot number, one size and format |
Each photo before was acceptable. The grid was not. After, the inventory reads as one showroom and condition is shown the same way on every used vehicle. Editing delivers the most value when it is applied the same way to the entire inventory.
Editing Options Compared
Choose by volume, the control you need and who checks each batch. No option is right for every dealership.
| Option | Consistency and reference matching | Scalability, cost and staffing | Watch for |
|---|---|---|---|
| In-house editor or team | Direct control. An editor can learn your reference | Scales by hiring. Salary, software and backup are yours | Output can slip when volume spikes |
| Freelance editors | Depends on the editor and a shared standard | Easy to start. Capacity varies | Different freelancers, different looks |
| Automated editing tools | Consistent for rules-based edits such as crop, resize and basic exposure | Scale easily at a low cost per image | Fine edges and unusual lighting may need a human check |
| Outsourced editing service | Can match a reference if it works from one | Adds capacity without hiring. Priced per image | Confirm QC and revisions |
How ClippingPathService.com Handles Batch Editing
ClippingPathService.com is a hand-editing service for photographers, brands, retailers and production teams. Its core work is clipping paths, photo masking, retouching and color matching on large image sets. The figures below are company-wide numbers reported by ClippingPathService.com, not dealership-only numbers.
- 78,066+ projects delivered
- 450+ global brands and retailers served
- 200+ retouchers on the team
- A 3-step quality control process with human review before delivery
- 100% hand-drawn clipping paths, so cut-out edges follow the same method from the first image to the last
- Unlimited revisions if a batch misses the reference
- Layered PSD and TIFF delivery available
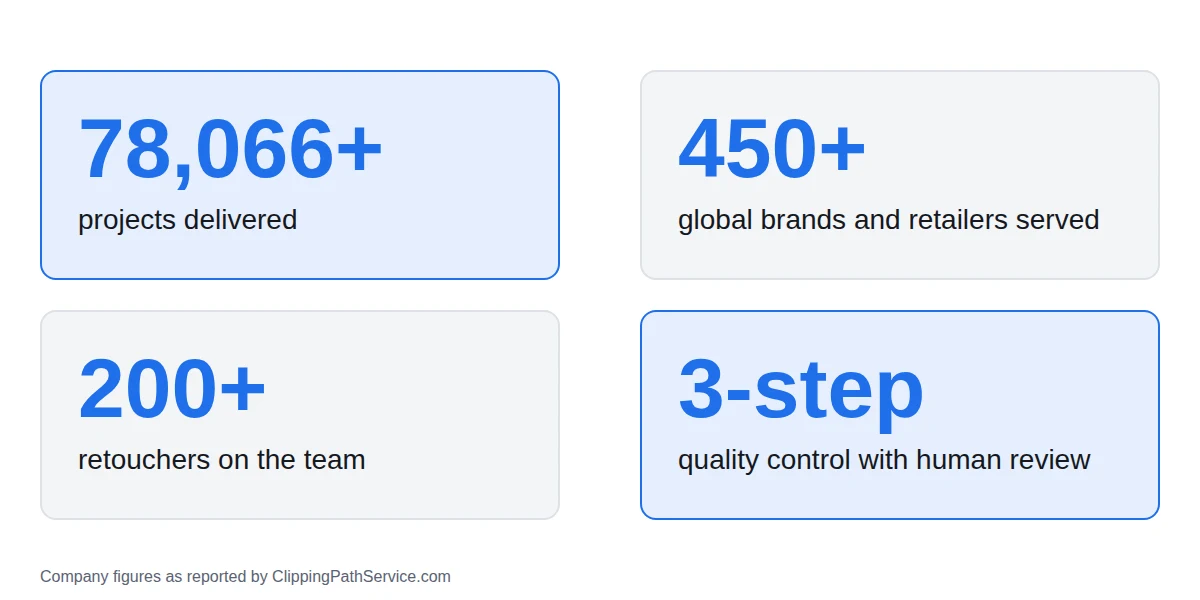
Company-wide figures as reported by ClippingPathService.com, not dealership-only numbers.
Clients who send large image sets describe the results like this:
"They remember our preferences project to project. Quality stays consistent across large image sets."
Sophie Martin, Senior Photographer, Sportswear Brand
"We needed a team that could fit into our workflow and keep pace with daily production."
Michael Torres, Production Lead, Apparel Catalog Studio
"Delivers clean files without compromising details."
Daniel Reeves, Creative Operations Manager, eCommerce Retailer
These clients work in apparel and eCommerce, not automotive. What carries over to a dealership is the workload: large batches, a reference standard and repeat orders.
| Image Standard point | How it is handled |
|---|---|
| Background | Background removal and cleanup, with hand-drawn clipping paths for clean edges |
| Exposure and color | Color correction and color matching to your reference image |
| Batch consistency | Editors work from your reference image, and 3-step QC with human review checks the batch before delivery |
| Repeat orders | Your preferences carry over, so the next batch starts from the same standard |
Turnaround and pricing: 48-hour Regular and 20-hour Overnight delivery are included. Faster options are available for urgent jobs: 10 hours, 4 hours and 1 hour, each with a surcharge. Pricing starts at $1.00 per image. Transfers are SSL-encrypted, an NDA is available on request, files are permanently deleted after project completion, and human support is available 24/7.
What to Ask Any Editing Partner
Use these questions with any provider, including us:
- Can you match an approved reference image, and is every image edited by a person?
- Who checks the batch before delivery, and what happens if it does not match?
- Can you keep the same style across weeks and months?
- Will you leave damage and condition visible?
Your Next Step
Scroll the first 20 vehicles on your inventory page and note what changes from car to car. Then write your six-point Image Standard and choose a reference image.
Test consistency with a small sample. Send 3 photos from different vehicles along with your reference image, and compare the results to your standard before committing a full batch.
Test Consistency With 3 Free Photos
Plan for a larger inventory. If you manage a full lot or several locations, request volume pricing for your inventory size.
P.S. Writing the Image Standard takes about ten minutes, and it improves every later shoot and edit, whoever does them.
Frequently Asked Questions
What photo standards should a car dealership follow? A fixed shot list, consistent framing and crop, balanced exposure, accurate color, a clean background and one output spec, written down for every photographer and editor.
How can dealerships keep vehicle photos consistent when multiple photographers shoot inventory? Give every photographer the same Image Standard and reference image, mark one shooting spot, fix the camera height, and review each batch as a grid before listing. Editing then corrects the remaining differences in exposure, color and background.
How many photos should each vehicle listing have? Enough to cover every exterior angle, the interior and any advertised feature, within your website's and each marketplace's current limits.
Should dealerships use the same background for every vehicle? Yes. Choose one treatment, either one tidy spot on the lot or one replaced background, and apply it to every listing. Mixing the two makes the inventory page look inconsistent. A replaced background is fine as long as the vehicle is shown honestly.
What should never be retouched? Dents, scratches, wheel damage, interior wear, paint color, options, trim, mileage and dash readouts.
Can editing fix dark or flat photos? Often, yes. Exposure, color and shadow detail can be corrected. Severe blur, heavy glare and missing angles are harder, and a reshoot can be the better choice.
What should a dealership include in a vehicle photo editing brief? The Image Standard, the reference image, the background choice, crop ratio and output specs, the file naming pattern, what to fix and what to leave visible, the turnaround you need, and the delivery format.
How fast can a batch of vehicle photos be edited? At ClippingPathService.com, 48-hour Regular and 20-hour Overnight delivery are included. 10-hour, 4-hour and 1-hour options are available with a surcharge.