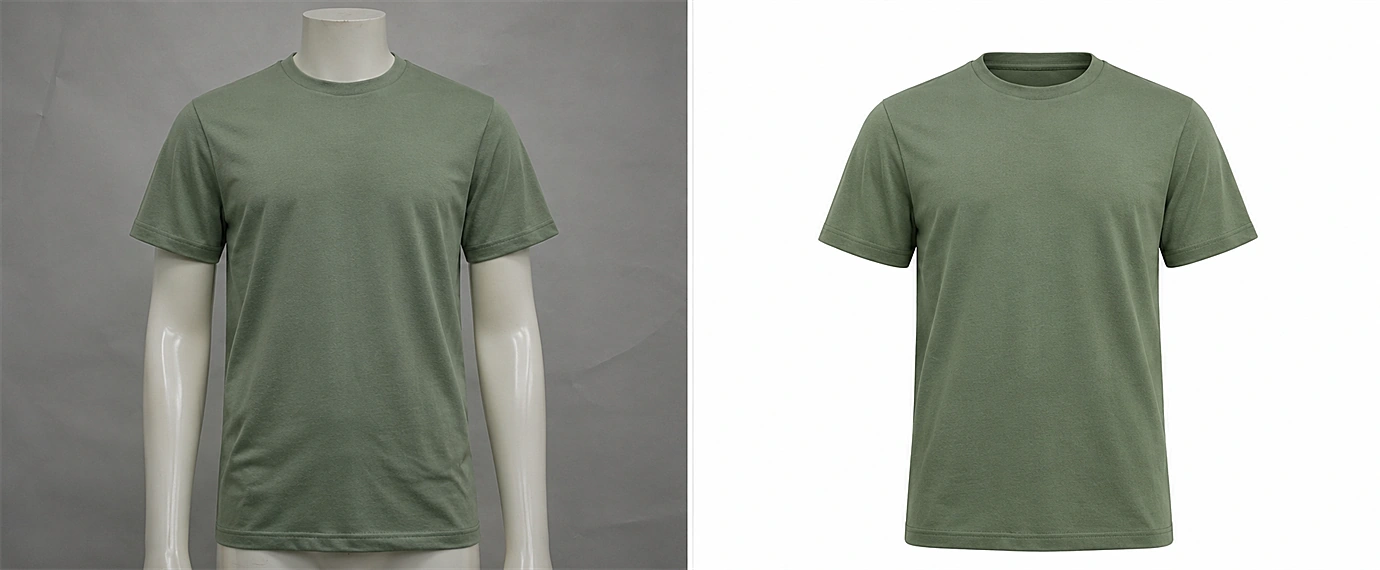
You finish the shoot. The garments look good on the mannequin. You send the files to your retoucher.
Then the message comes back: "We need a clear look inside the collar." Or: "The back view is missing."
Now you are not editing. You are rebooking a studio.
A skilled retoucher can solve a lot in Photoshop. But every detail missing from the source images is something they have to infer, and inference is where unnatural results and revision rounds come from. Better source photography reduces how much reconstruction and correction the edit needs.
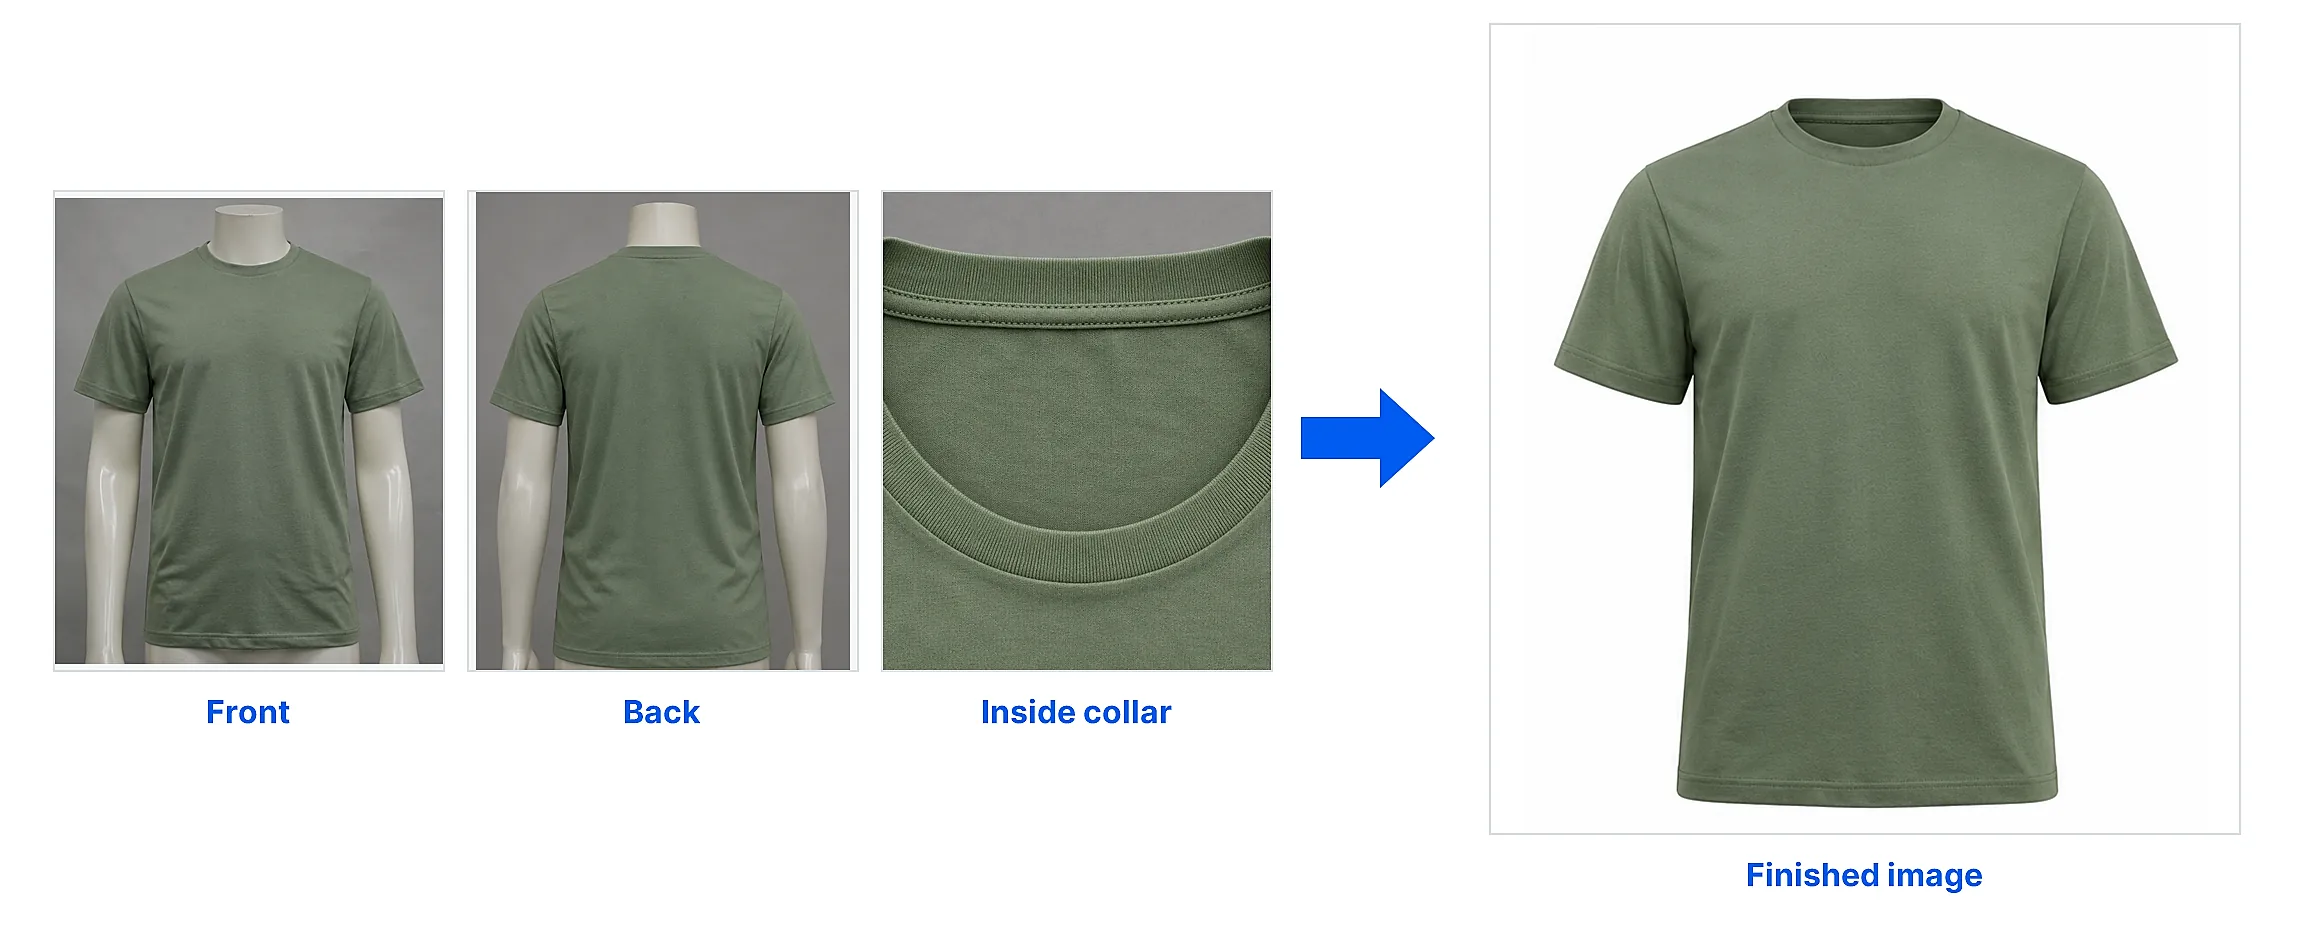
The practical way to do that is a simple, repeatable setup: three source images per garment (front, back, and an inside neck/collar reference), shot under identical conditions.
This is a strong starting workflow for many garments, not a rule for every garment. This guide covers what each shot does, how to keep the three consistent, when to add more, and a checklist to run before you upload.
Why the Shoot Shapes the Edit
A ghost mannequin image is a composite, not a single photo.
The retoucher removes the mannequin, then rebuilds the areas it was hiding: the inside of the collar, the back of the neckline, the openings at the sleeves and hem. That reconstruction looks natural when the source images show real garment information to work from.
When the source is thin, the retoucher has to recreate details from limited reference. It usually shows up as:
- A neck opening that looks flat or generic
- A collar that does not match the garment's real shape
- Mannequin remnants along the shoulders
- Folds that fabric would not actually make
Missing references → more inference → more revisions → possible reshoot
Complete, consistent references → less inference → cleaner composite → fewer revisions
The shoot and the edit are one workflow. The goal of the 3-shot setup is to reduce missing-reference problems, and with them unnecessary revisions and reshoots.
The 3-Shot Setup at a Glance
| Shot | What you capture | What the editor uses it for |
|---|---|---|
| 1. Front | The garment on the mannequin, front view, styled the way it should appear | The outer shape, fit and visible detail of the final image |
| 2. Back | The garment on the mannequin, back view | Reference for construction, neckline, seams and proportions hidden in the front shot |
| 3. Inside neck / collar | A clear view of the inside of the collar and neckline | Real reference for the hidden interior of the neck area |
Retouchers do not all use these images in exactly the same way, so confirm your retoucher's preferred source list before a large shoot.
Shot 1: The Front
This is the hero image. It sets the shape of the final result.
- Choose a mannequin close to the garment's size. Too large stretches the fabric. Too small leaves it loose and shapeless.
- Steam or smooth the garment so what remains are real folds, not creases from packaging.
- Clip or pin excess fabric at the back so the front hangs cleanly.
- Do not create unnatural tension or distortion just to make the garment look tidier. The goal is to preserve its intended shape.
- Keep the neck opening natural and leave space around the garment so nothing is cropped at the shoulders or hem.
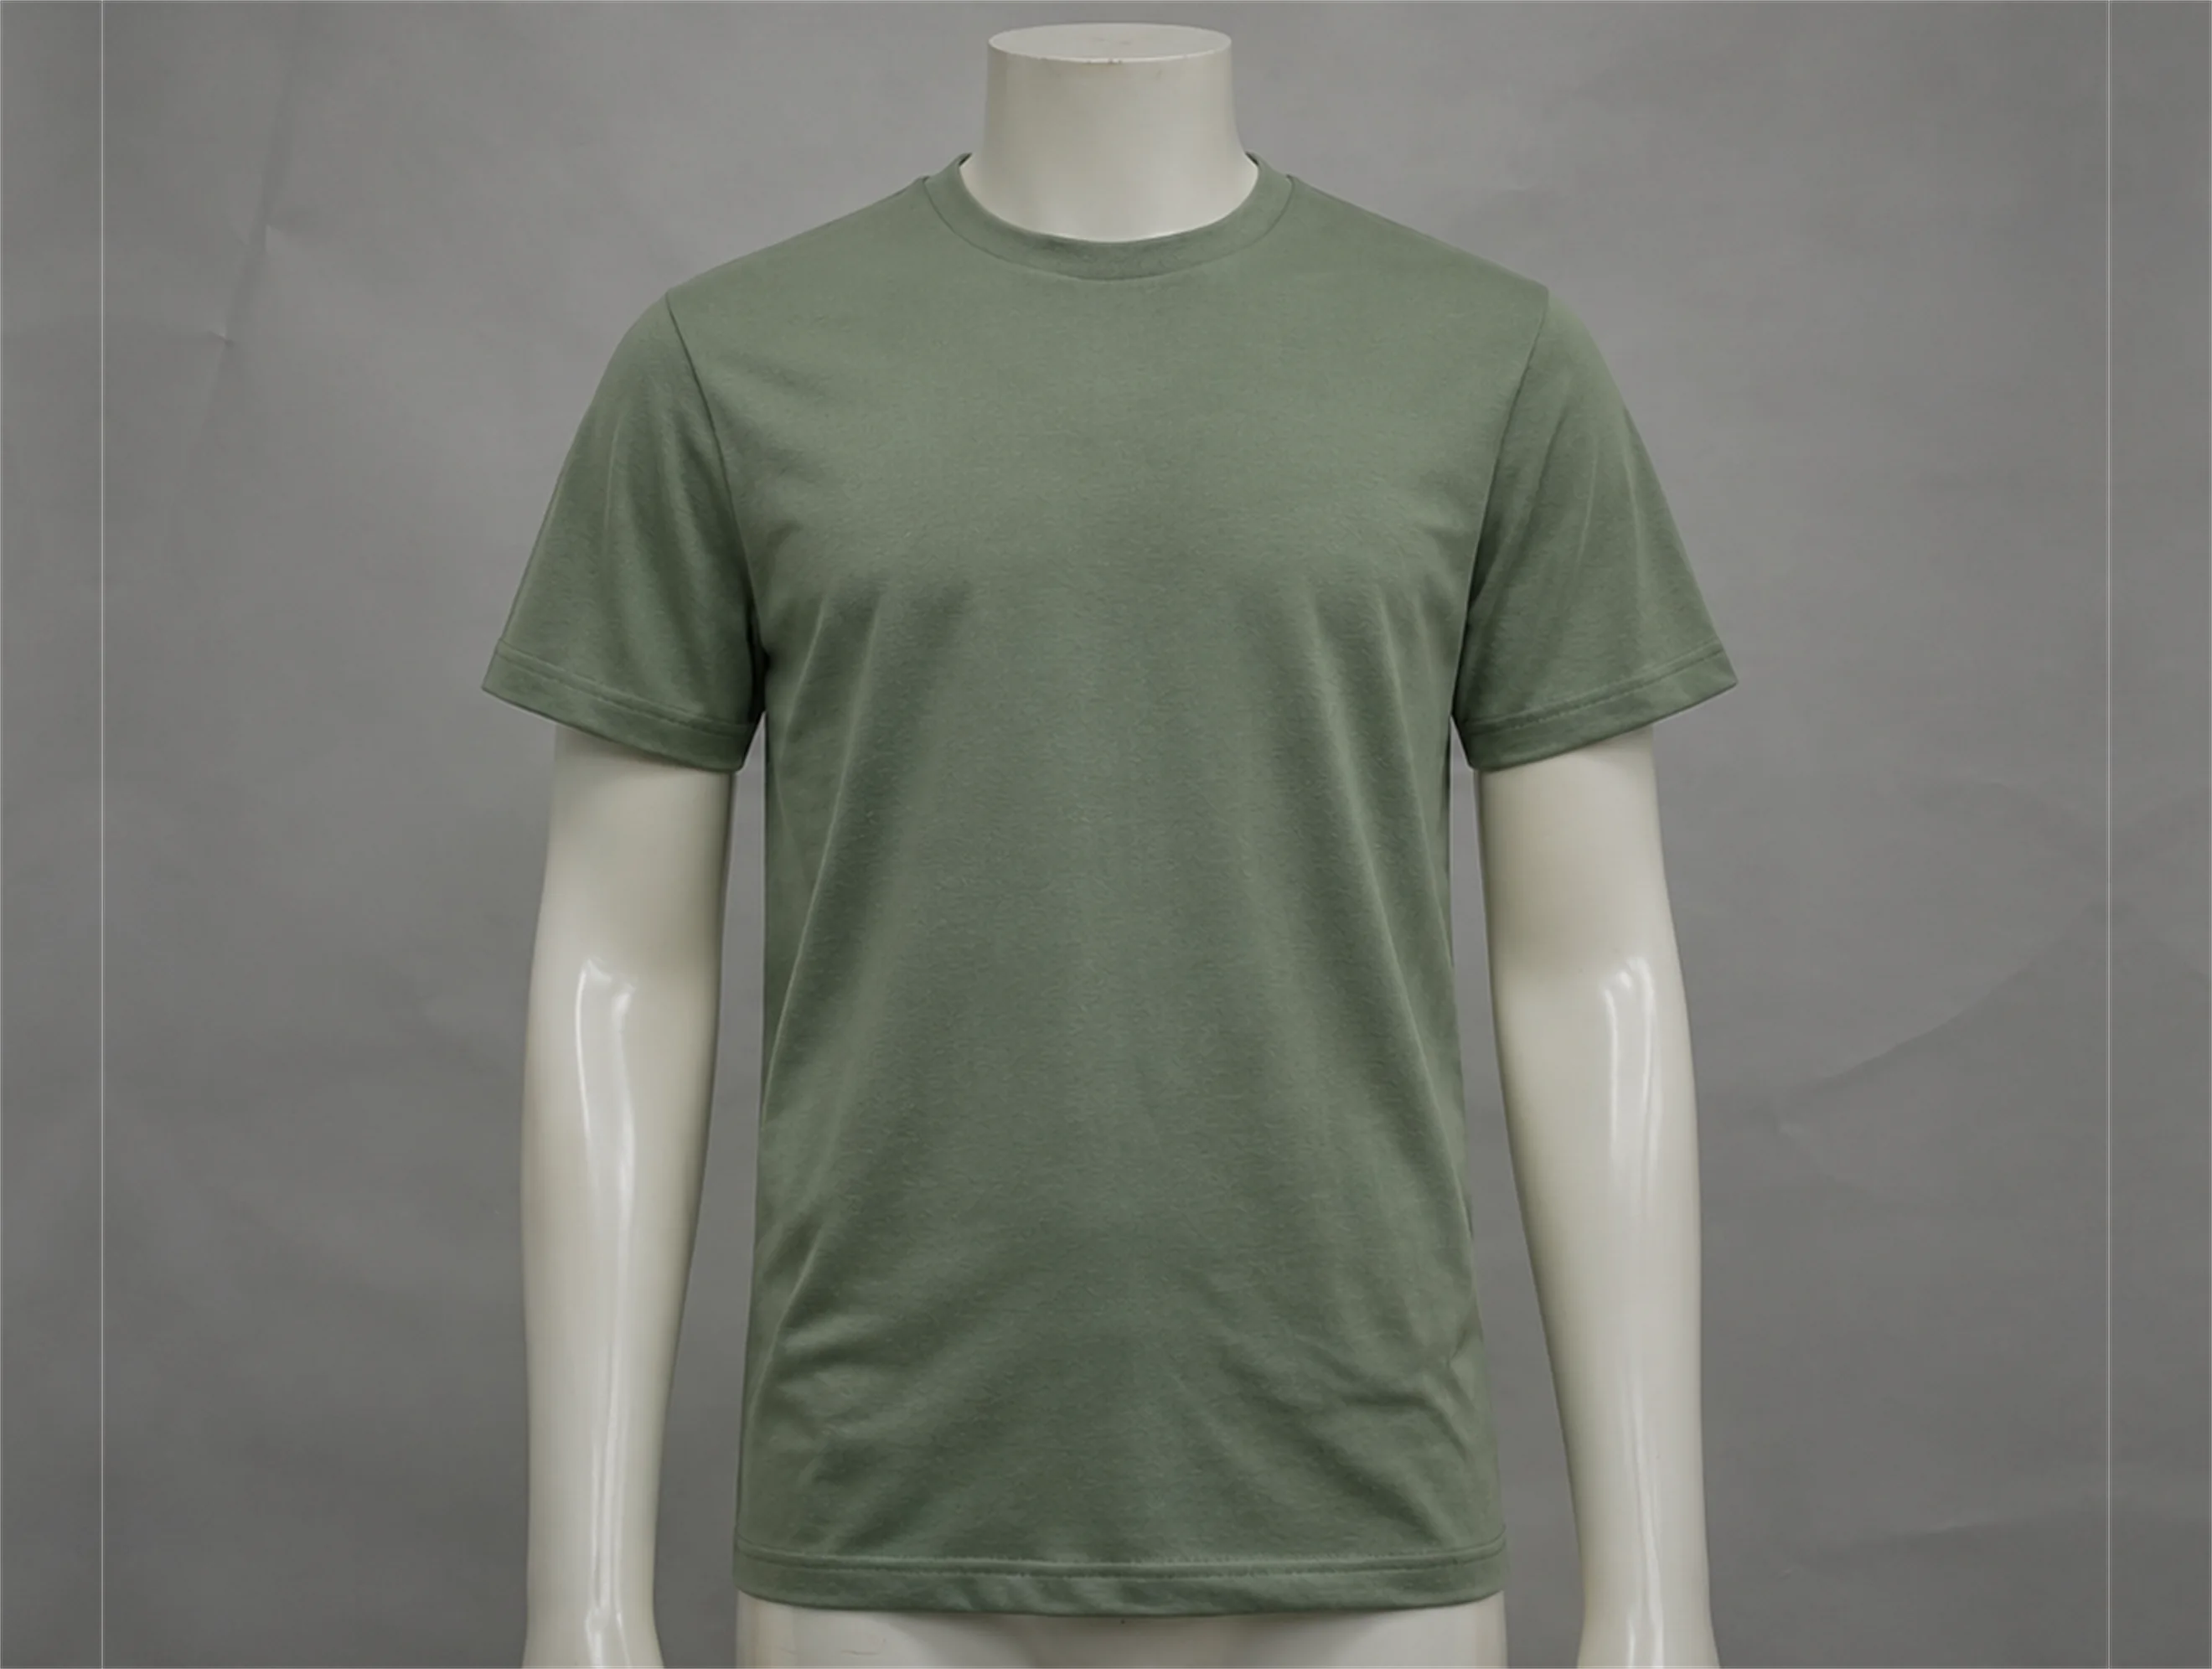
Shot 1: front view, styled to keep the garment's real shape.
Shot 2: The Back
The front view hides a lot. The back shot gives the retoucher useful reference for garment construction, neckline shape, seams, proportions and any detail that the front mannequin shot conceals.
- Rotate the garment on the mannequin. Do not move the camera.
- Keep the same distance, height and lighting as Shot 1.
- Style it with the same care as the front, since the back neckline is often part of what gets rebuilt.
How the back view is used can vary between workflows and garments. Capturing it consistently means it is there when your retoucher needs it.
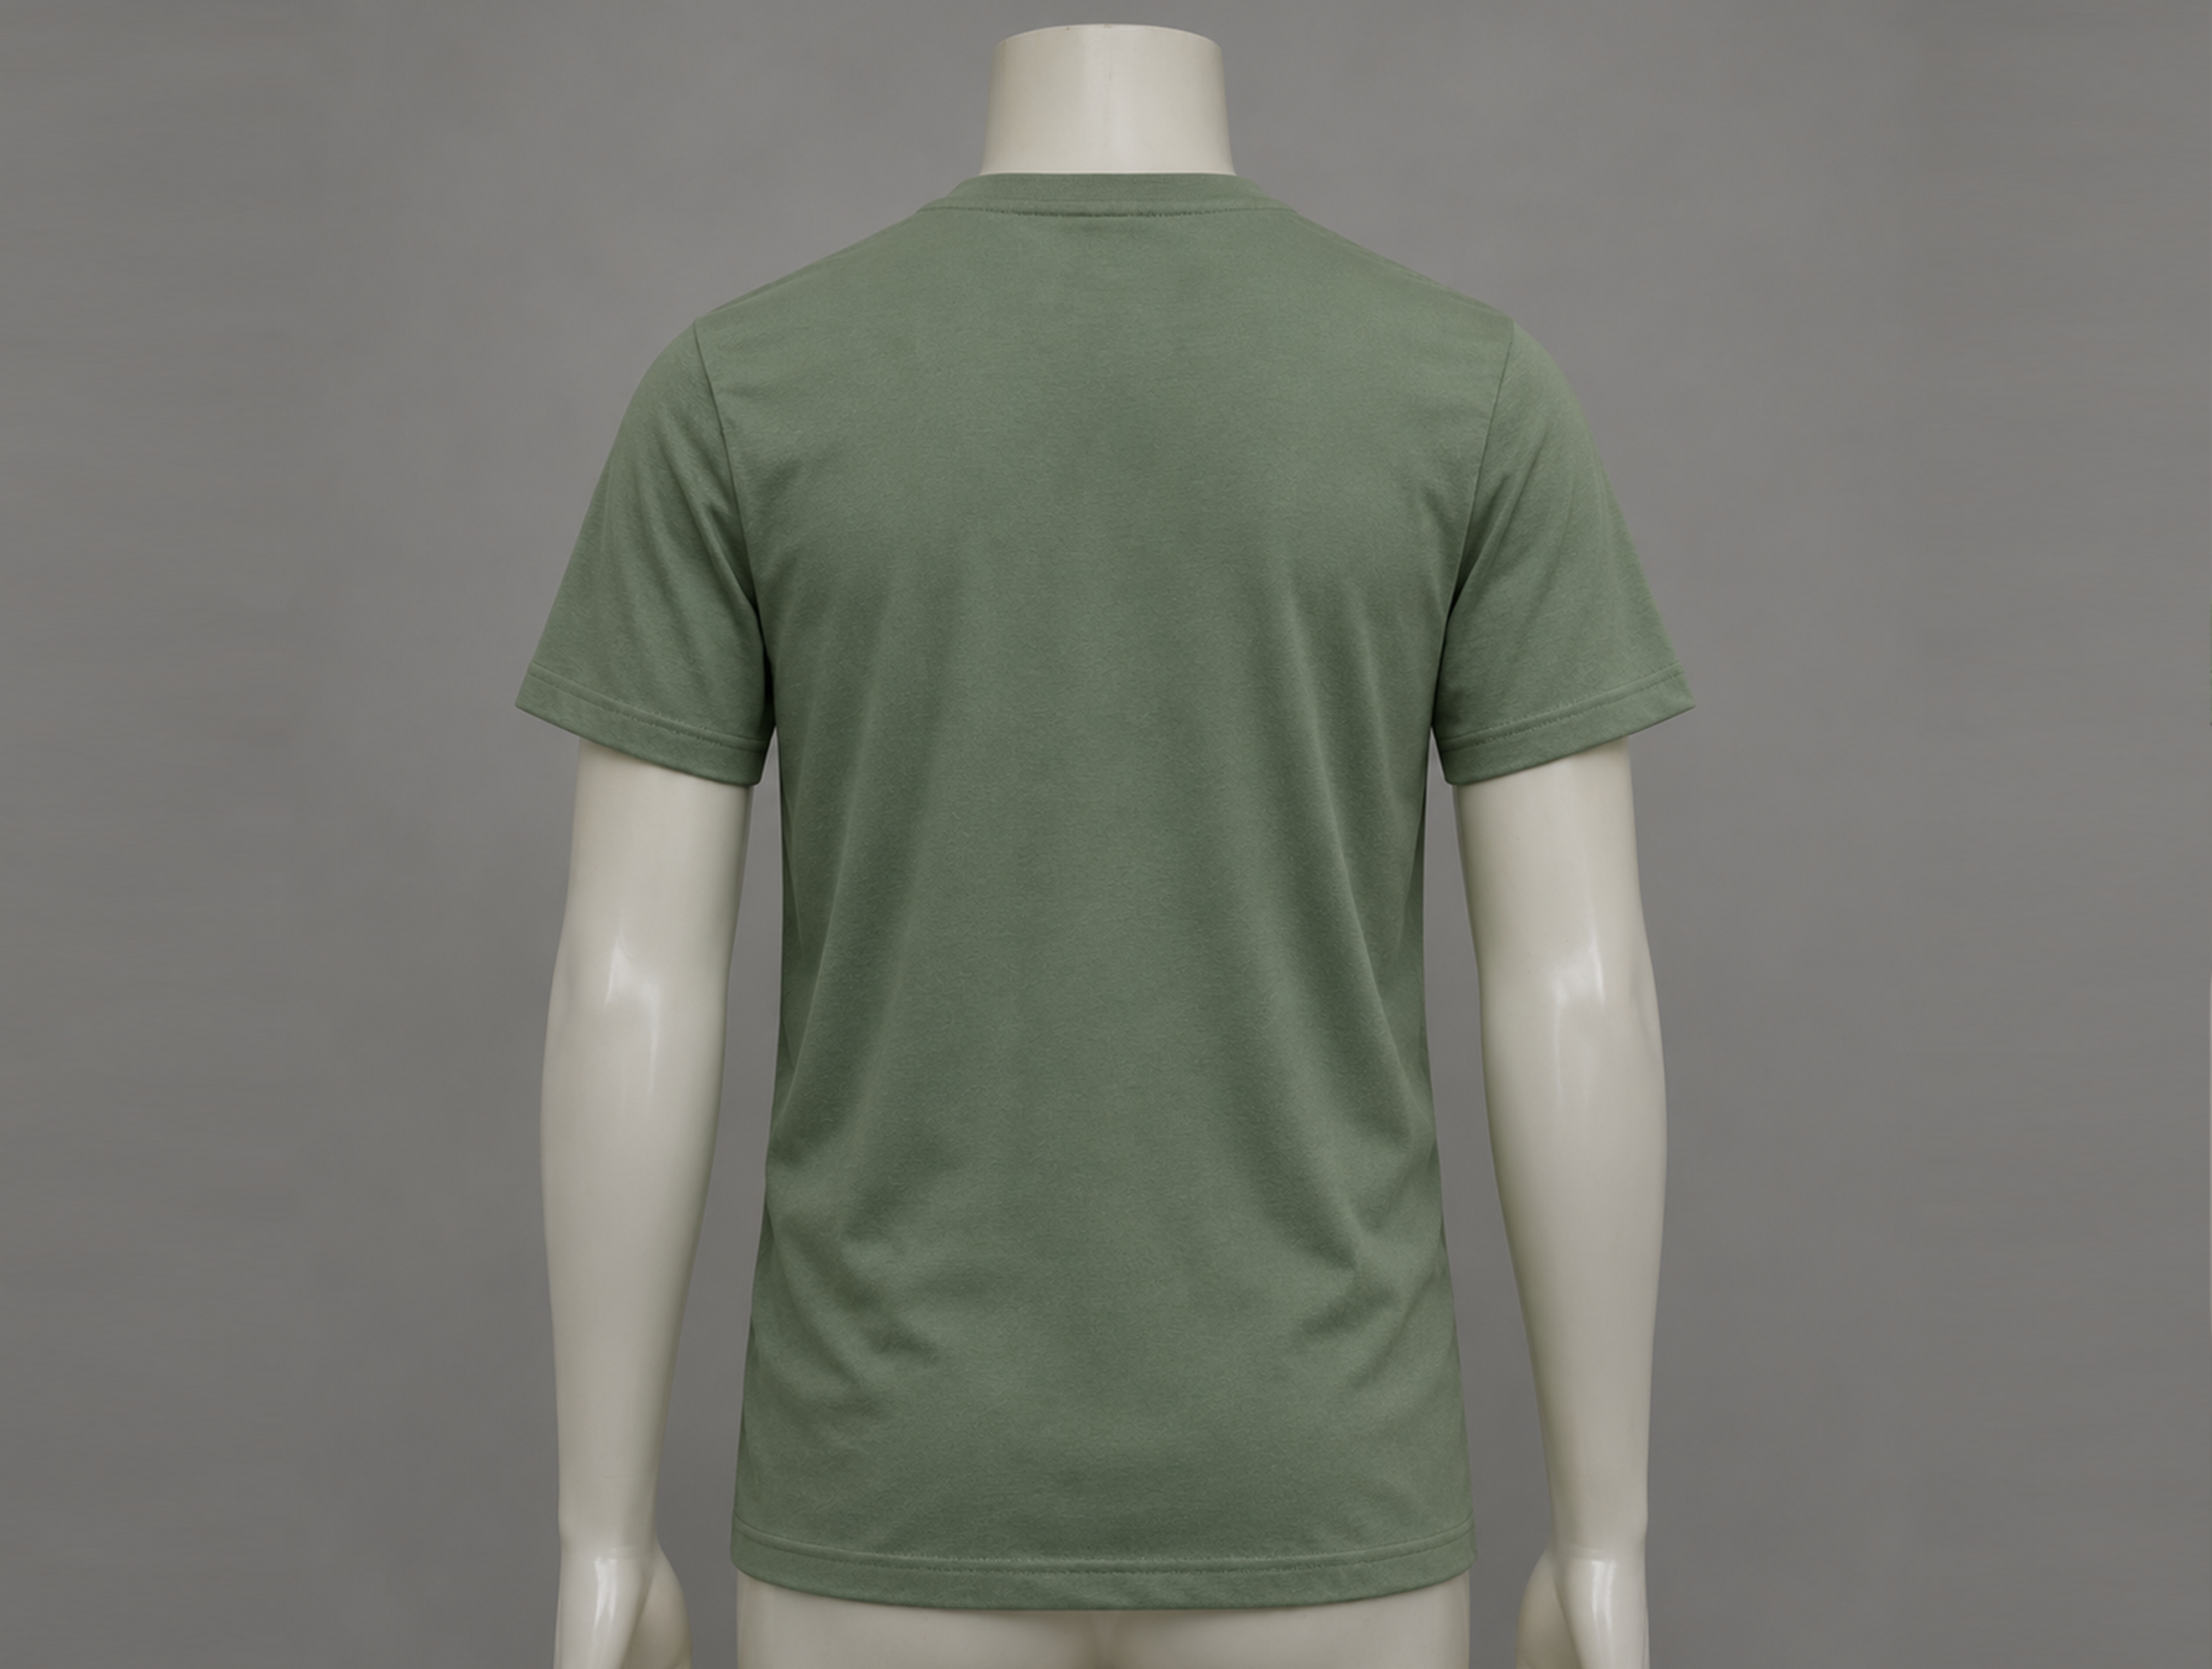
Shot 2: back view, same camera position and lighting.
Shot 3: Inside Neck / Collar Reference
This is the shot most often skipped.
In the finished image, the inside of the collar and neckline is visible through the opening. Retouchers often call this area the neck joint: the spot where the neckline and collar meet the body of the garment, and where the hidden interior has to be reconstructed. This shot shows the retoucher what that interior really looks like instead of leaving them to infer it.
- Open the garment so the inside of the collar and neckline is clearly visible.
- Show the inner back neckline and any label, lining or facing that sits there.
- Match the lighting and white balance of Shots 1 and 2.
- Keep the collar's natural shape. Do not press it flat.
The inside reference supplies real information for the hidden areas. Realism in the final image still depends on all three shots, consistent lighting, and the retoucher's work.
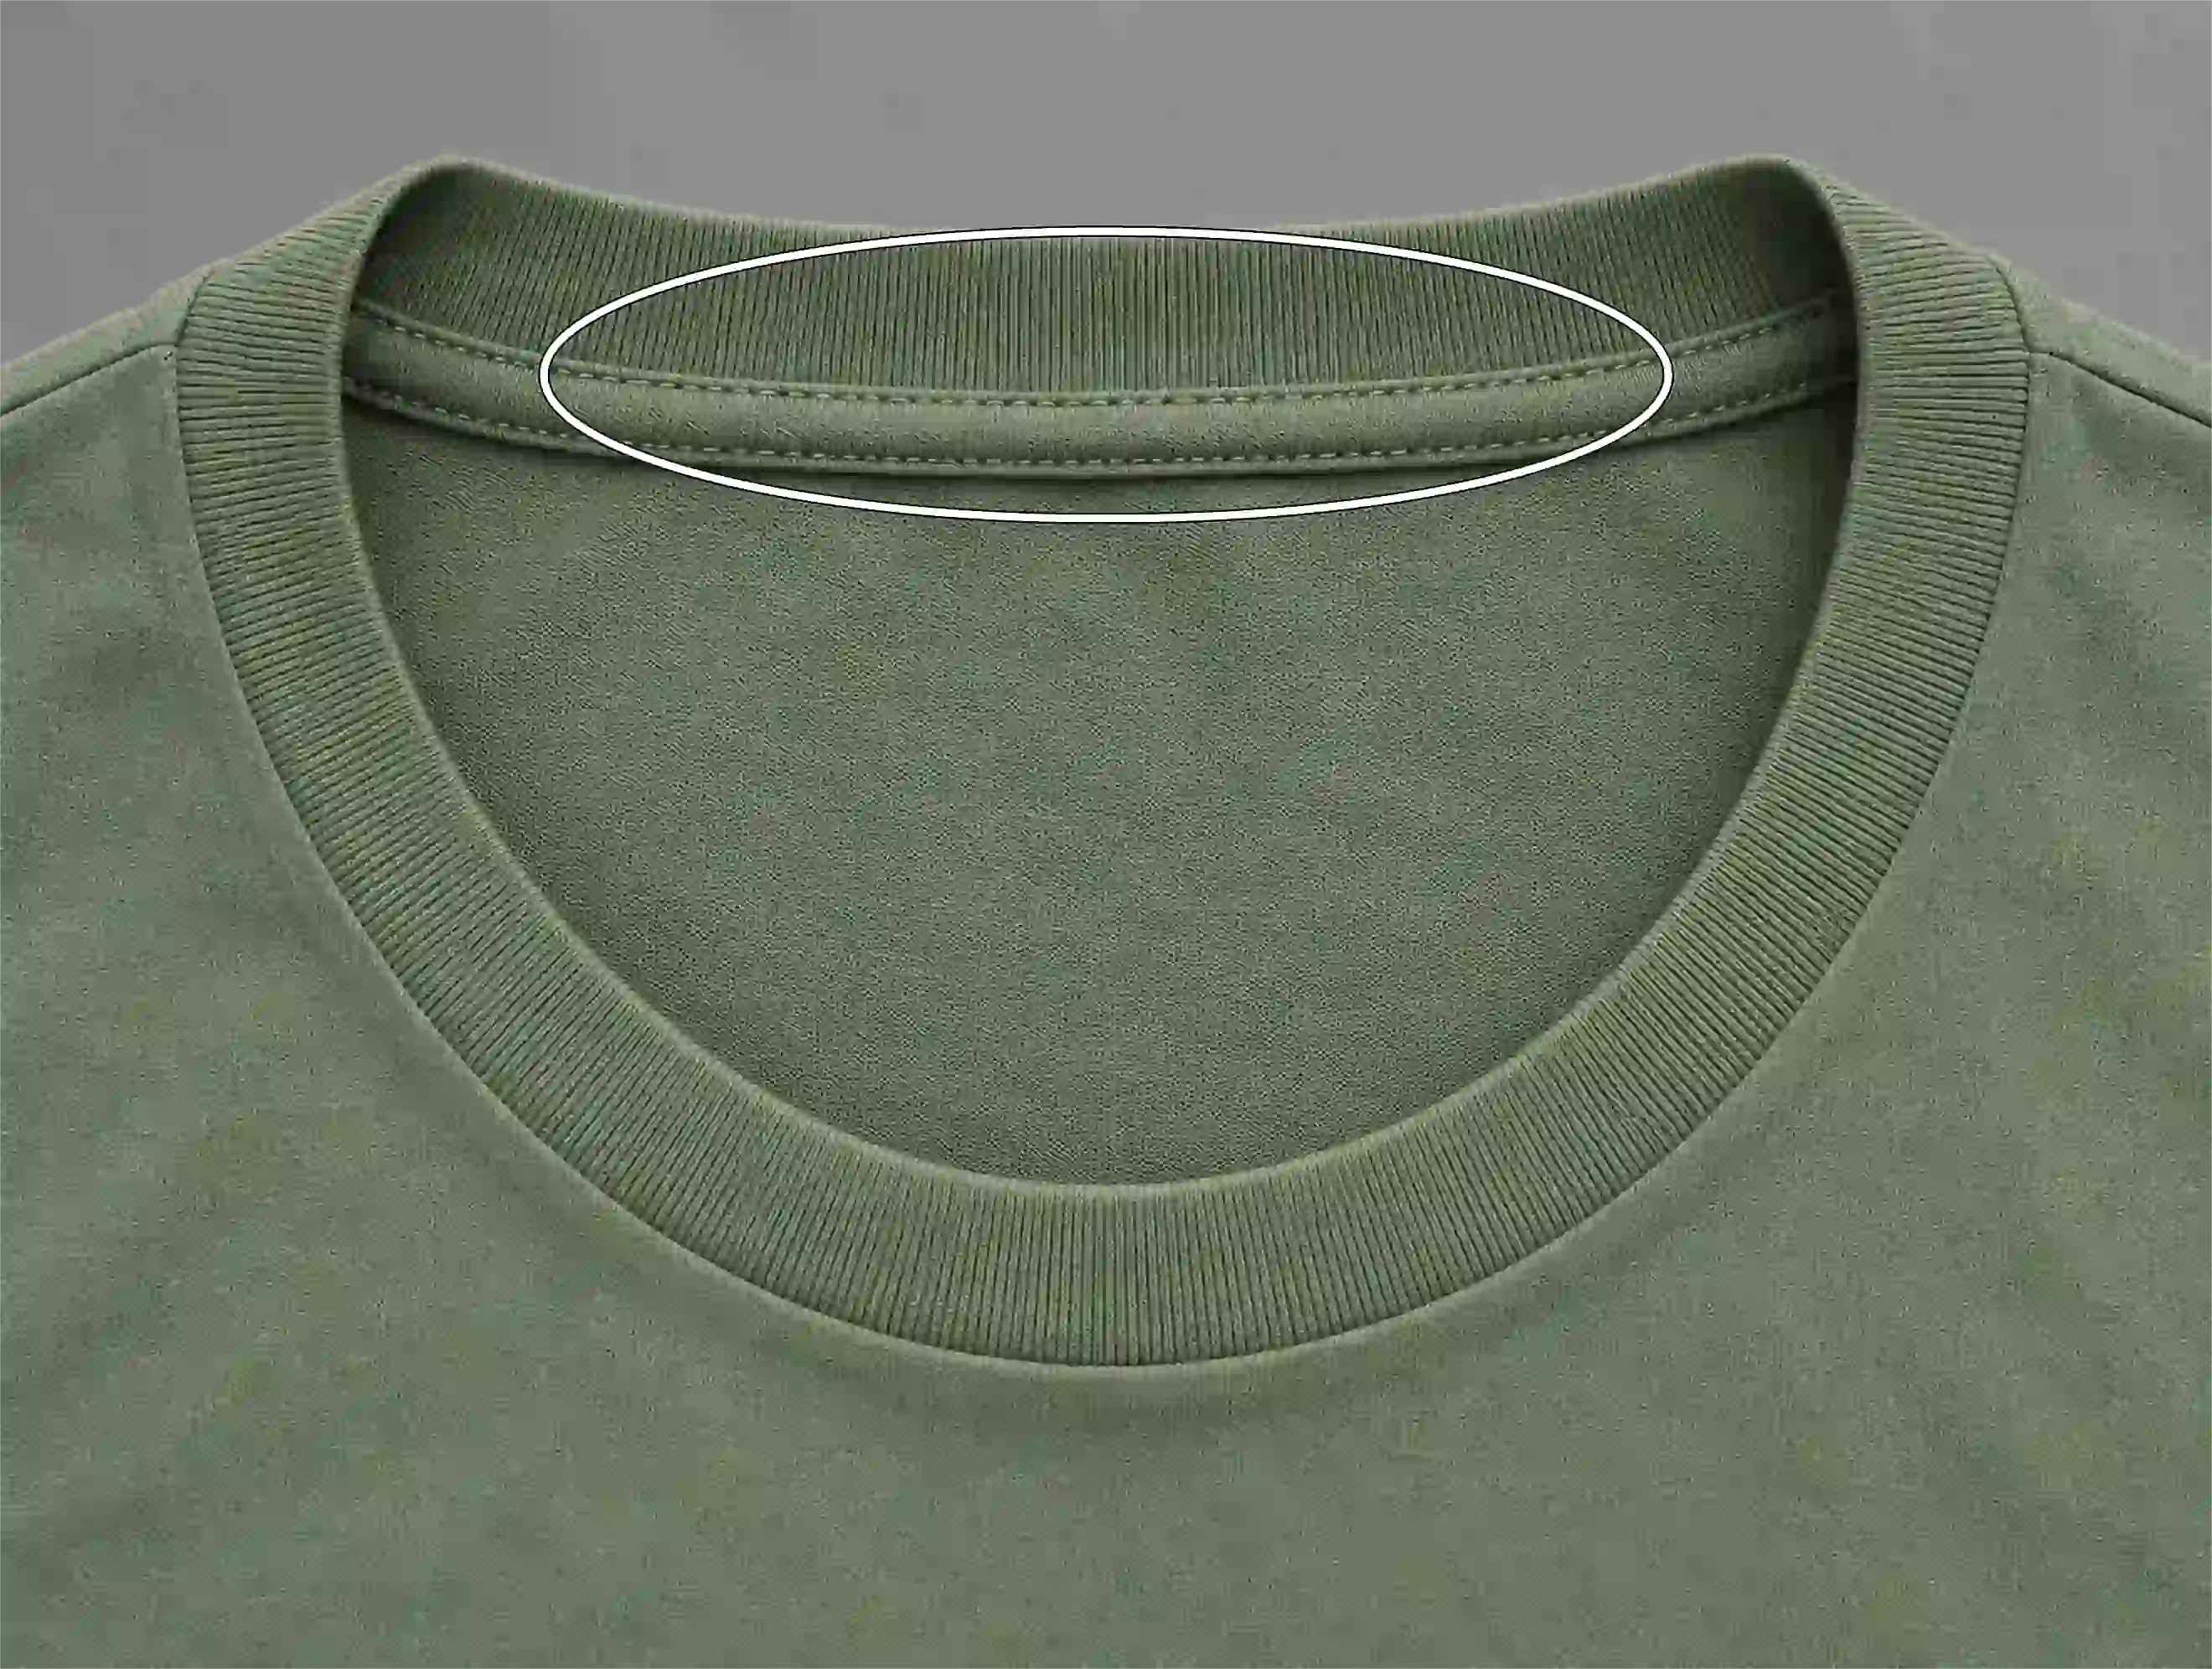
Shot 3: inside neck and collar reference.
Keep All Three Shots Consistent
Three good photos that do not match are still a problem, because the retoucher has to align and correct them. Consistency between source images makes compositing easier and reduces correction work.
Lock these before you shoot the first garment:
- Camera on a tripod, same height and distance for every shot.
- Same focal length across all three shots and all garments.
- Locked exposure. Use manual exposure so brightness does not drift between shots.
- Locked white balance. Set a custom or fixed value, not auto.
- Floor marks for the mannequin position so it never drifts.
- Fixed lighting, with the same lights, power and angles.
- Consistent framing and background for every garment in the collection.
Repeat the setup for every SKU. That is what keeps a collection looking like one brand instead of many different shoots.
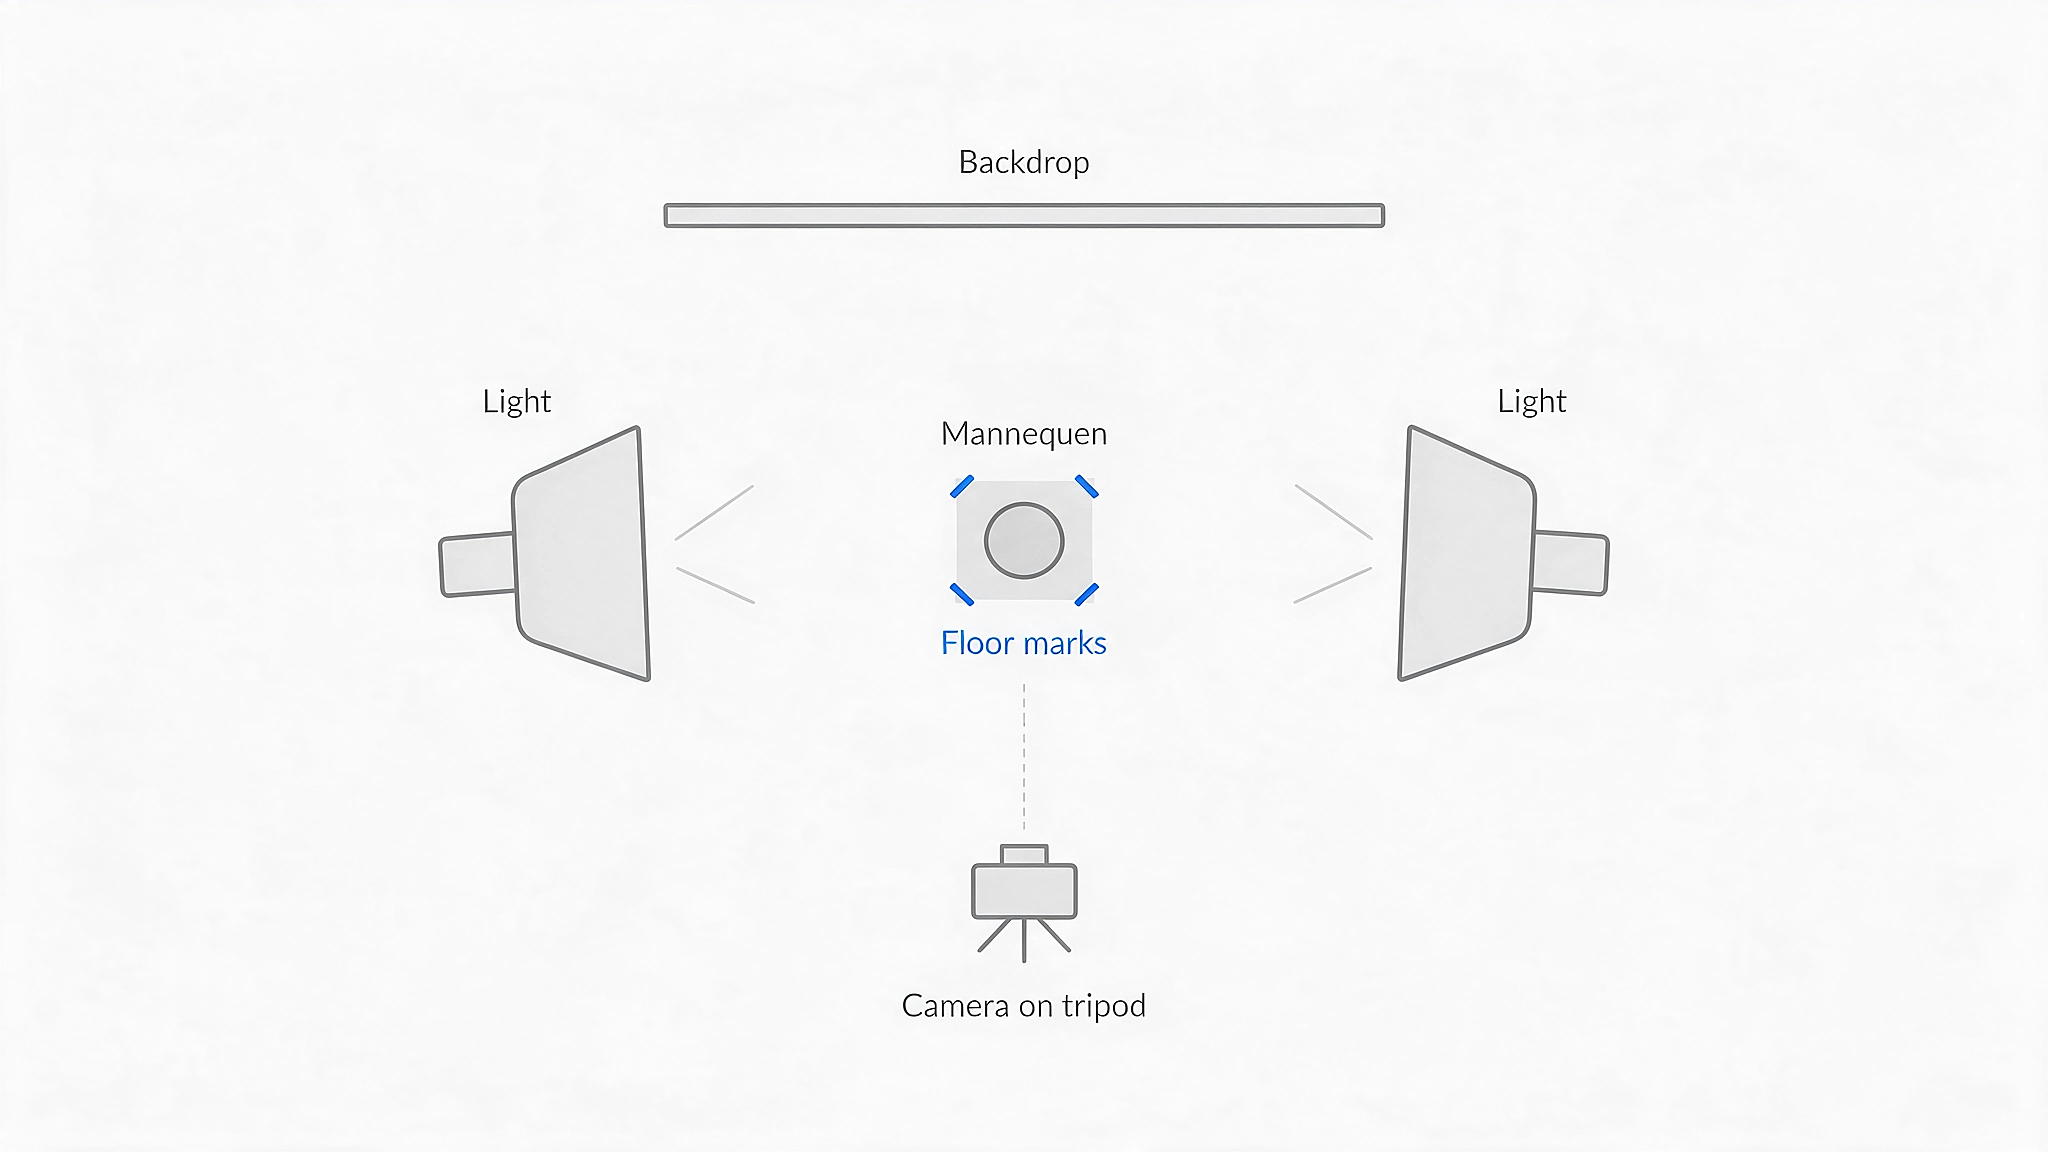
When Three Shots Aren't Enough
Front, back and inside neck reference is a solid baseline. Some garments need more.
Extra reference shots or angles are often worth capturing for:
- Structured jackets and blazers
- Layered garments
- Complex dresses
- Garments with hoods
- Lace or transparent fabrics
- Unusual or asymmetric construction
- Complicated waist details or garment openings
For these, confirm the required source-image list with your retoucher before a large shoot. A five-minute check up front is cheaper than a second shoot day.
Pre-Send Checklist
Run this before you upload. It takes a couple of minutes per garment.
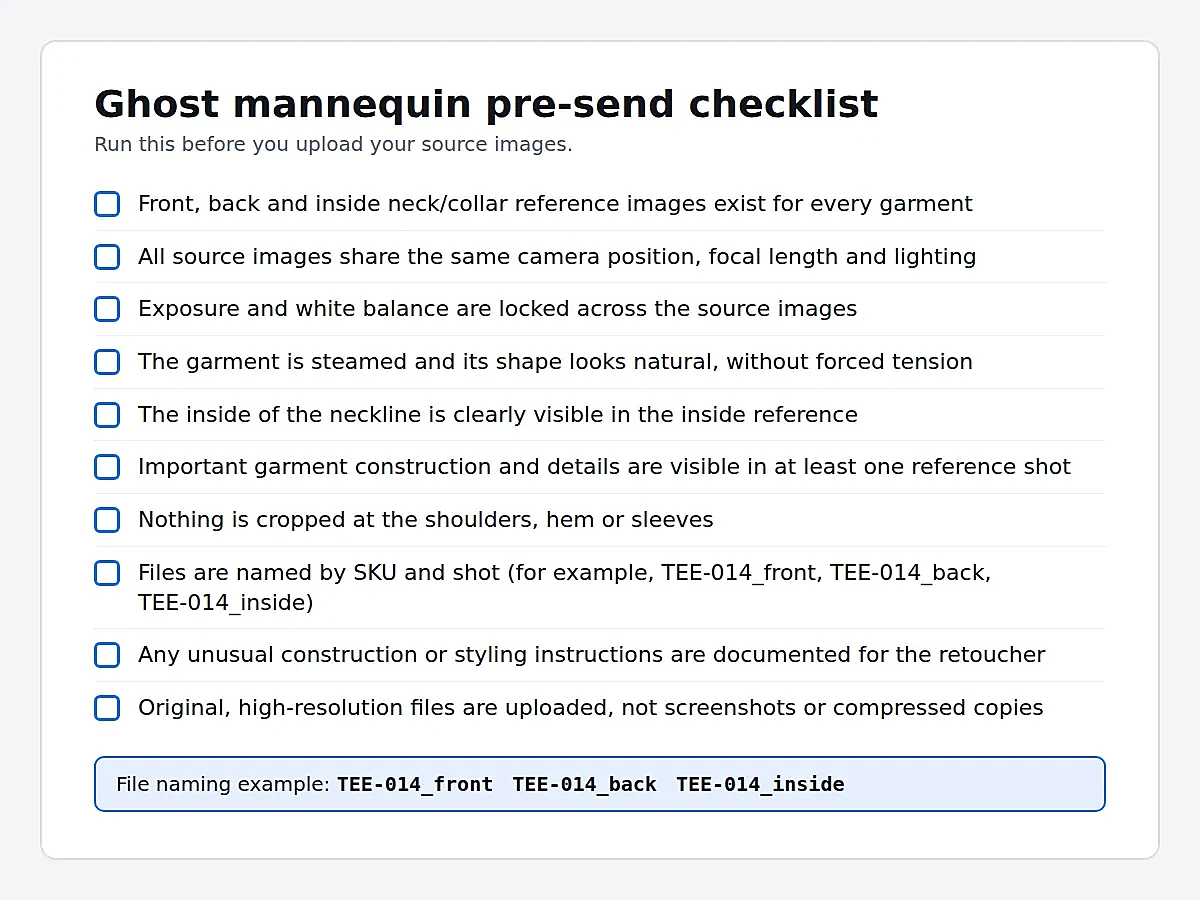
- Front, back and inside neck/collar reference images exist for every garment
- All source images share the same camera position, focal length and lighting
- Exposure and white balance are locked across the source images
- The garment is steamed and its shape looks natural, without forced tension
- The inside of the neckline is clearly visible in the inside reference
- Important garment construction and details are visible in at least one reference shot
- Nothing is cropped at the shoulders, hem or sleeves
- Files are named by SKU and shot (for example,
TEE-014_front,TEE-014_back,TEE-014_inside) - Any unusual construction or styling instructions are documented for the retoucher
- Original, high-resolution files are uploaded, not screenshots or compressed copies
Where ClippingPathService.com Fits
ClippingPathService.com works with photographers, apparel studios, eCommerce brands and agencies. Its Invisible Mannequin service removes the mannequin while preserving garment structure, combining front, back and inner sections into clean apparel images for eCommerce and catalog use.
What matters most for this workflow:
- Human editing. Images are edited by people, which matters most on the parts automation handles badly: the neckline, the inner collar and the fall of the fabric. The company reports 78,066+ hand-edited projects delivered and 200+ retouchers.
- Batch consistency. Apparel clients describe it in their own words. Sophie Martin, Senior Photographer at a sportswear brand: "They remember our preferences project to project. Quality stays consistent across large image sets."
- Turnaround options. Delivery ranges from 1-hour Express to 48-hour Regular, with 20-hour Overnight included. Faster tiers carry a surcharge. [VERIFY BEFORE PUBLISHING: confirm these apply to Invisible Mannequin orders]
- Layered files. Layered PSD and TIFF delivery for teams that adjust results in-house. [VERIFY BEFORE PUBLISHING: confirm layered delivery for Invisible Mannequin]
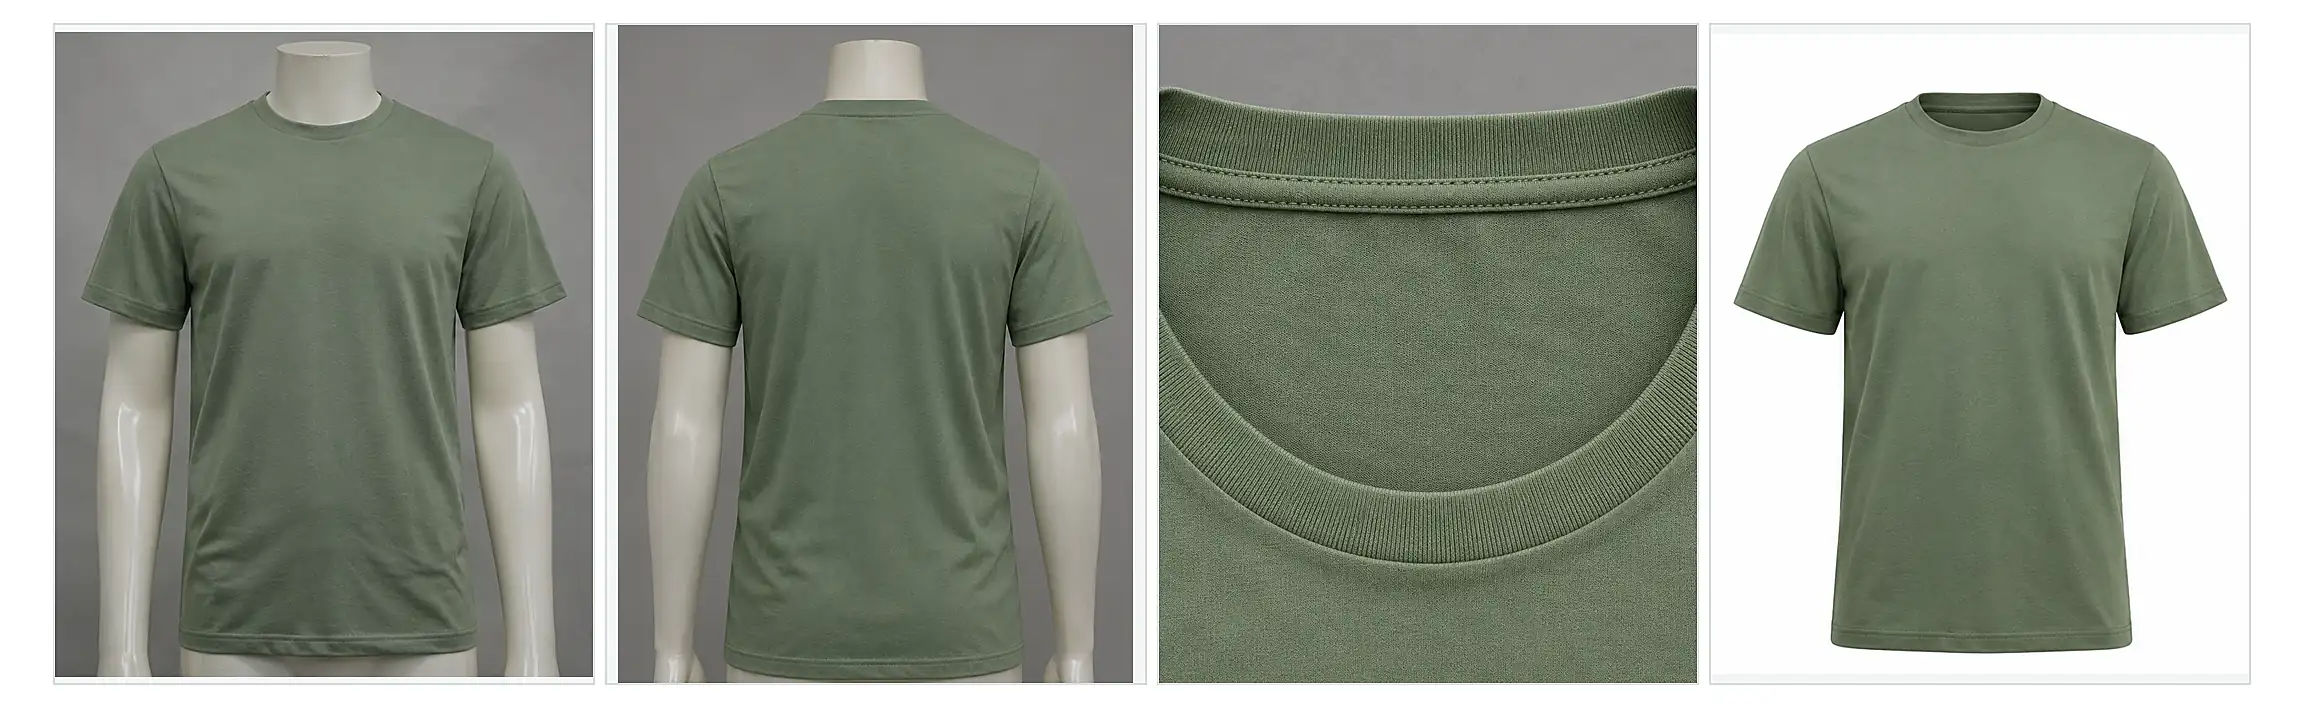
DEMO REFERENCE FOR THE TEAM, NOT A REAL JOB: replace this image and caption with the real source shots and finished image from an approved client job before publishing, or delete this block.
What to Ask Any Ghost Mannequin Provider
Before you commit a full collection to any vendor, ask:
- Which source images do they need from you?
- Will they run a sample first?
- How do they handle the neck and collar area?
- How do they preserve the garment's real shape?
- How do they keep results consistent across a large batch?
- What is their revision process?
- Do they deliver layered files?
Clear answers to these questions help you understand whether a provider's workflow fits your production process.
Frequently Asked Questions
How many photos do I need for a ghost mannequin image? Three (front, back and inside neck/collar reference) is a practical starting point for many garments. Complex garments may need additional angles, so confirm the list with your retoucher.
Can I shoot ghost mannequin photos with a phone? You can if the files are sharp, high resolution and consistent. A tripod helps keep framing identical between shots, but the camera still has to produce files sharp enough to composite cleanly.
What if I only shot the front? The retoucher will have less reference for the hidden areas, and the neckline is where it usually shows. If a reshoot is possible, capture the missing shots. If not, upload what you have with a note and ask for a sample first.
Does every garment need the same three shots? No. T-shirts, hoodies, jackets, dresses and trousers can each call for different handling. Treat the 3-shot setup as a baseline, not a universal rule.
How should I name and send the files?
Upload the original high-resolution files, named clearly by SKU and shot, such as TEE-014_front.
Try It on Your Own Garments
The best test is your own product.
Shoot one garment using the setup above, then see how it turns out before you send the rest of the collection.
Test us on 3 images. Pay nothing. No credit card required. [VERIFY BEFORE PUBLISHING: confirm the current offer wording, including "no credit card required"]
Test Your Garments Free [VERIFY BEFORE PUBLISHING: confirm this is the correct current URL]