How to Disguise a Face onto a Gnarly Tree Bark using Photoshop
This tutorial is about how to disguise a face onto a gnarly tree bark using adobe Photoshop CS6. I hope it will help you both the beginner and advanced level of students in a great deal.
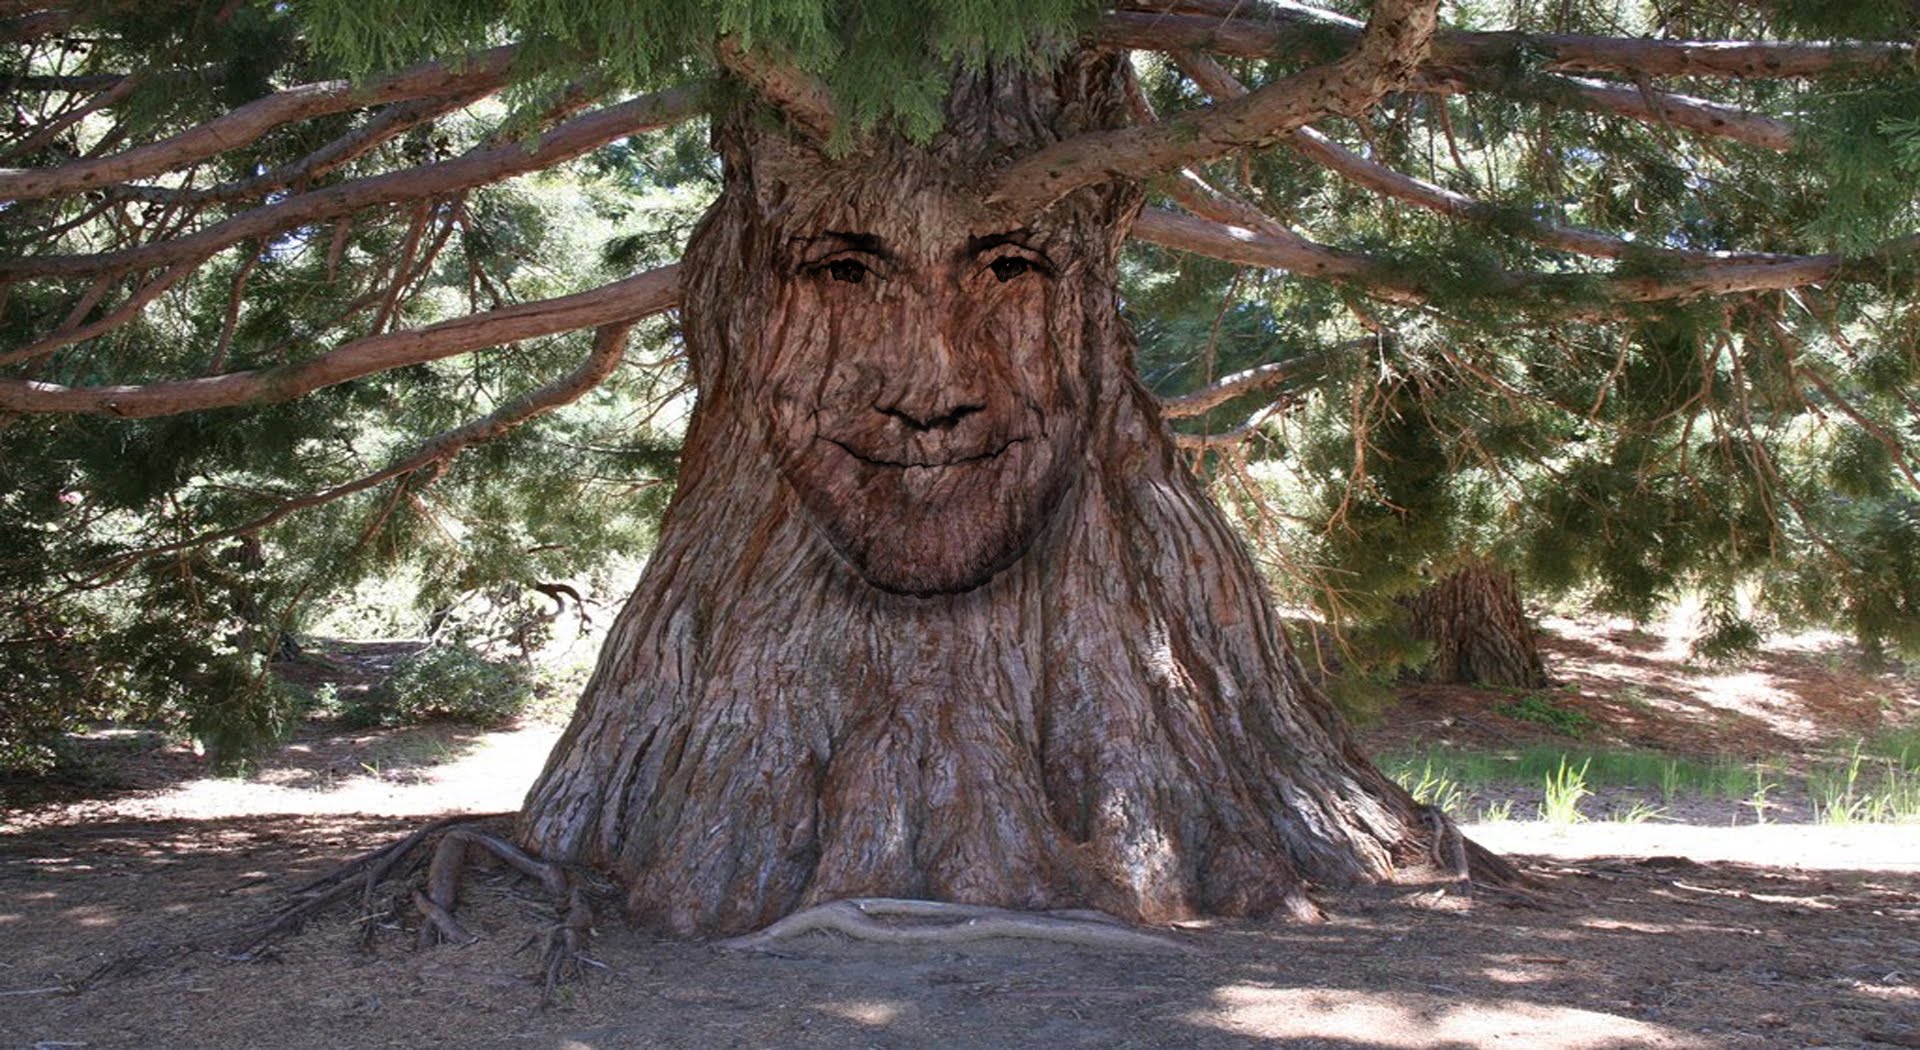
You will need an image of a tree to start with. Open a photo of a face that you would like to place on the tree. If the photo is in color, press Ctrl + Shift + U to saturated to from your PC. To move it into the tree document that you saved earlier, open your move tool by clicking ‘v’ and drag it onto the tab of the tree. Open your transform tool by clicking Ctrl + T and re-size it and place it onto the tree. In order to make the darkest tones black and lightest tone white, press Ctrl + Alt + L for all levels. Open your brush tool now and make sure the size is 25 px, hardness is 0 and opacity is 100 percent. Do not forget to make sure that the foreground and background color is black and white respectively. Open the quick mask tool and drive around the face to make a quick mask. Press Q to make it into a selection and inverted by clicking Ctrl + Shift + I. Press Ctrl + J to cut and copy it onto its own layer. Click the eyeballs of the both layers. It will wrap the texture of the park around the face with the displacement shelter. Make a copy of the tree trunk and go to Filter> Blur> Gaussian Blur and make sure the radius is selected by 2 pixels and click OK. Go to layers panel above to do this and click duplicate layer. Rename the document as new and type in displacement and click OK. Close the displacement file and save it as PSD file on your PC. AS we do not need this, make the top layer visible.
Now, go to Filter> Distort> Displace the horizontal and vertical scale to 10 pixels. Click the displacement PSD file and make a copy of the displaced photo by clicking Ctrl + J and change the blending mode to multiply. Double click on the layer to open its layer and make some adjustment on overlay with changing the blending mode to color dodge. Make the layer below active, change the blending mode to overlay and opacity to 100 percent. Make some adjustment of the image if its is required. make it a bit darker.
That will sum up the whole process. In this way, you can disguise a face onto a gnarly tree bark with photo edit using adobe Photoshop. Hope that helps! I hope that it will help you and from now on, hopefully you will follow this procedure more often in Photoshop and be an expert in this field in the future.

Many photographers are faced with the similar problem of an over-exposed sky and under-exposed foreground. It is because the detail of the foreground is often more important than the sky itself. Fortunately, this can be remedied with … Continue reading How to Edit Skies in Adobe Lightroom
Read More
Today you will learn how to create a fashion poster in Photoshop. The techniques that will cover here include creating a collage of photos and applying simple layer adjustment. You will need an image of … Continue reading How to Create a Fashion Poster in Photoshop
Read More